Deliver the WordPress Application with Cloud RDS
This tutorial will demonstrate how to deploy a WordPress application with Kusion, which relies on both Kubernetes and IaaS resources provided by cloud vendors. We can learn how to declare the Relational Database Service (RDS) to provide a cloud-based database solution for our application from this article.
Prerequisites
- Install Kusion
- Deploy Kubernetes or Kind or Minikube
- Install Terraform
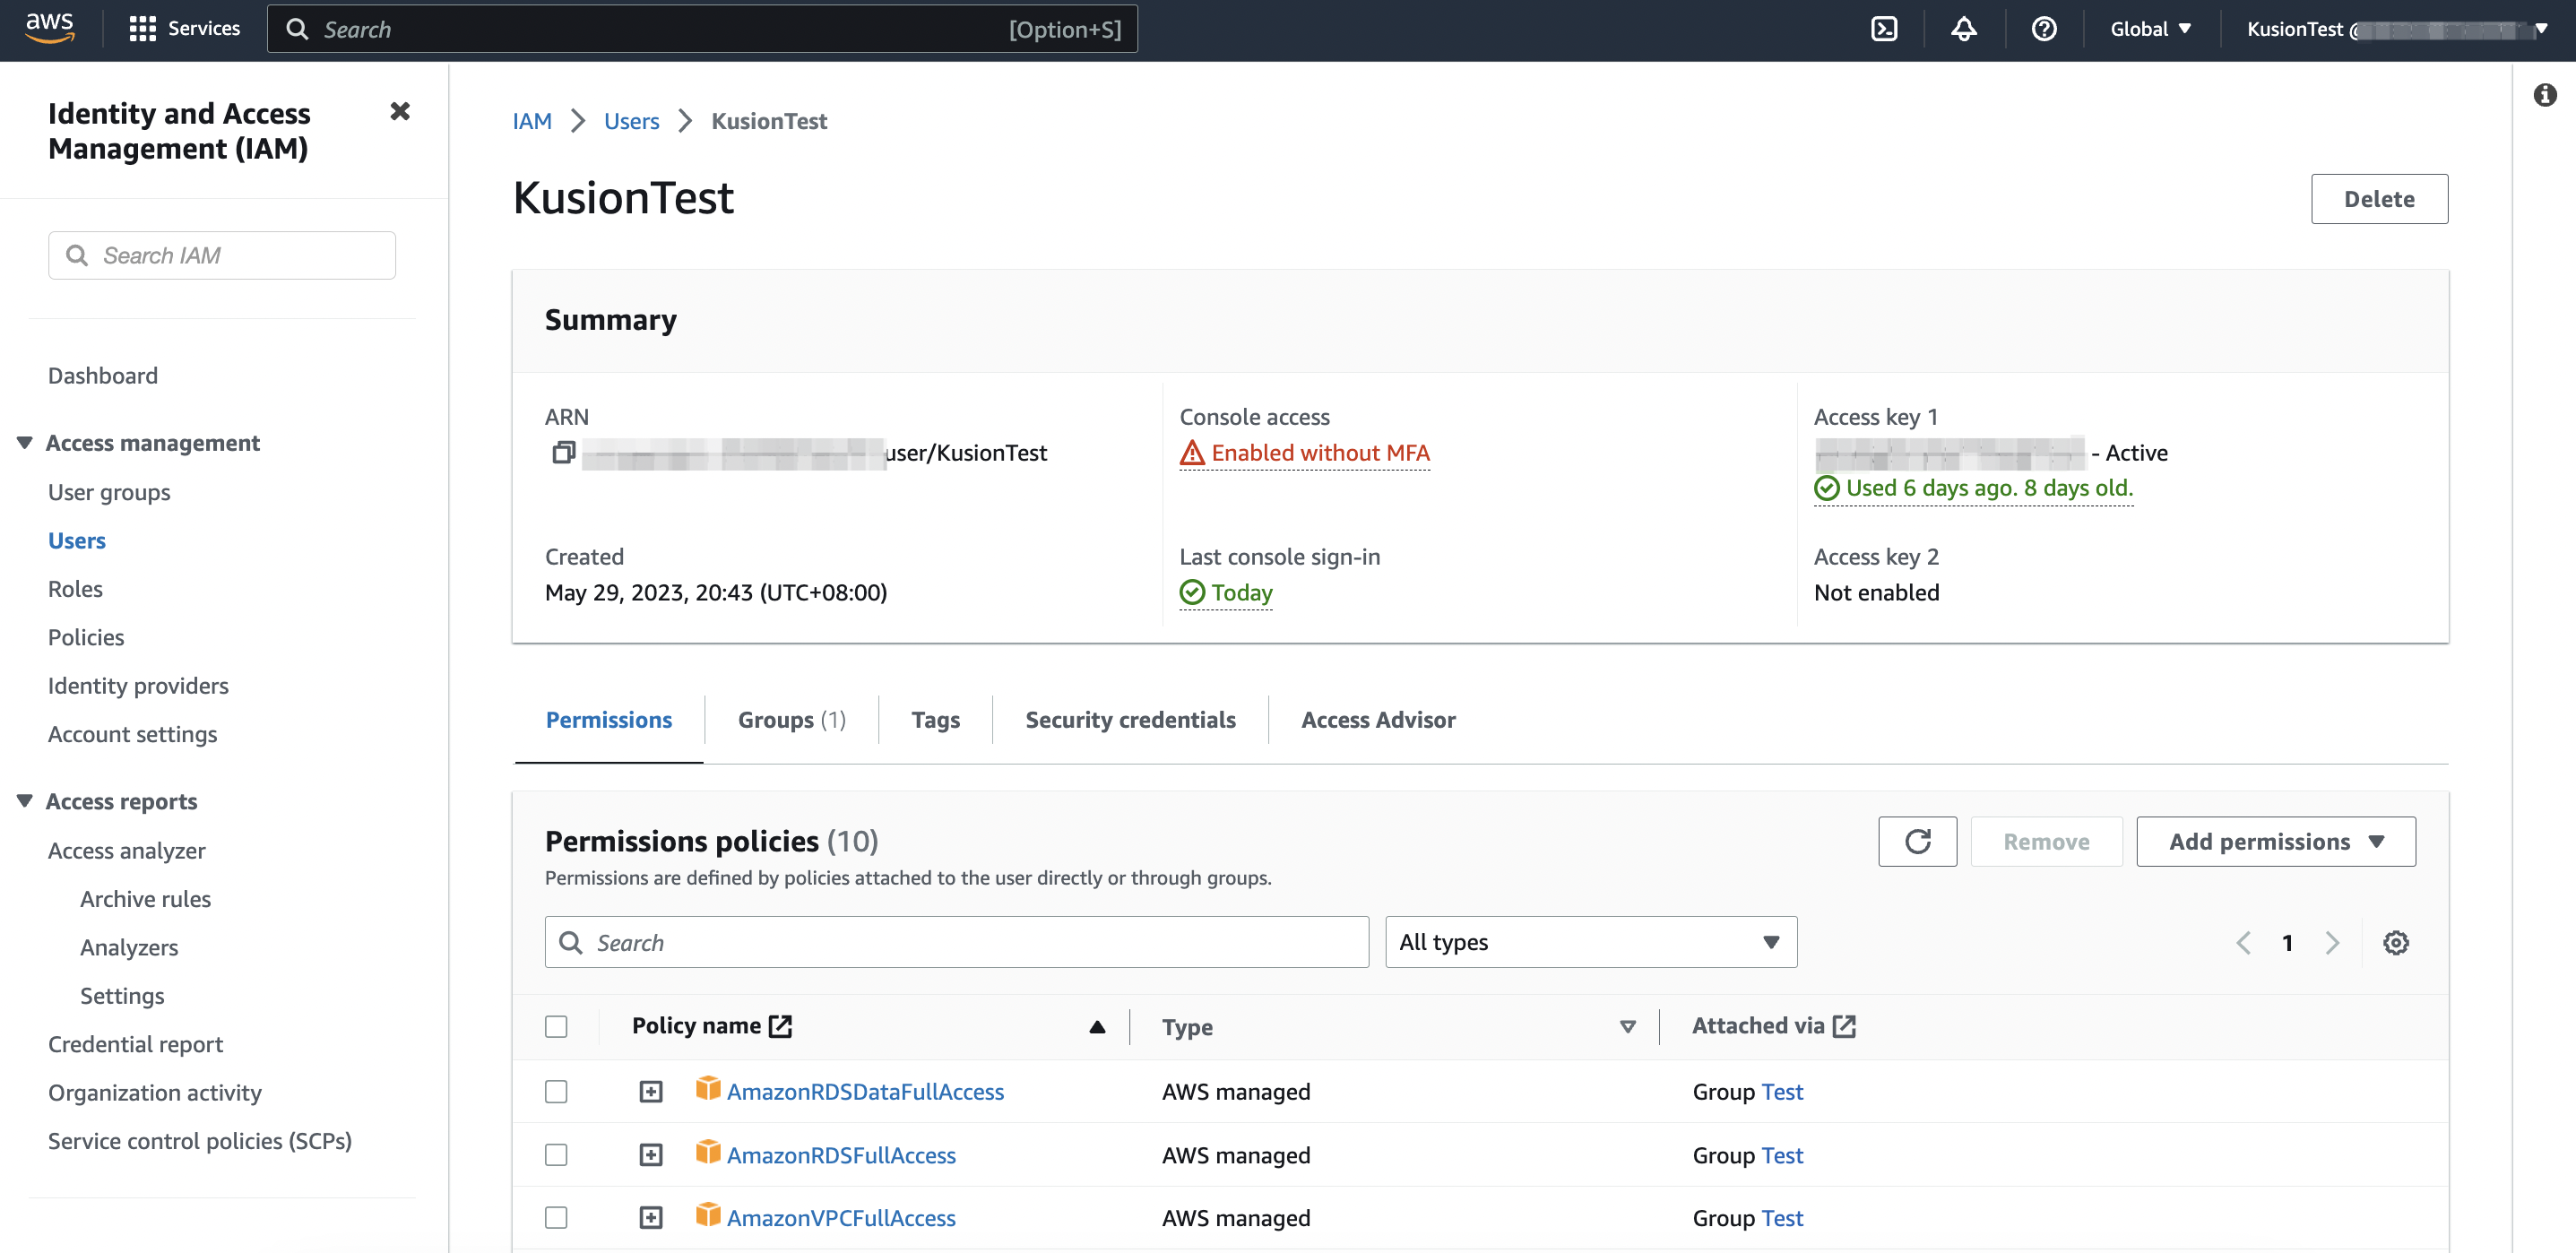
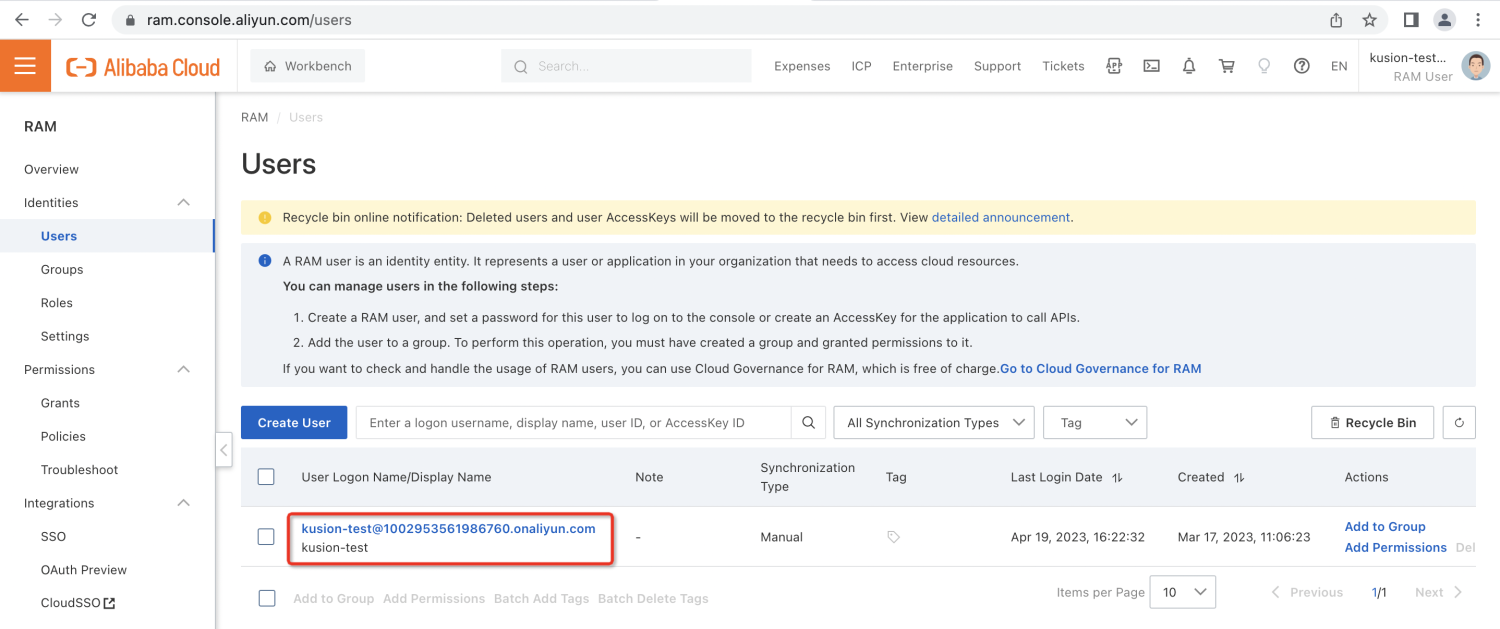
- Prepare a cloud service account and create a user with
VPCFullAccessandRDSFullAccesspermissions to use the Relational Database Service (RDS). This kind of user can be created and managed in the Identity and Access Management (IAM) console - The environment that executes
kusionneed to have connectivity to terraform registry to download the terraform providers
Additionally, we also need to configure the obtained AccessKey and SecretKey as environment variables for specific cloud provider:
- AWS
- Alicloud
export AWS_ACCESS_KEY_ID="AKIAQZDxxxx" # replace it with your AccessKey
export AWS_SECRET_ACCESS_KEY="oE/xxxx" # replace it with your SecretKey
export ALICLOUD_ACCESS_KEY="LTAI5txxx" # replace it with your AccessKey
export ALICLOUD_SECRET_KEY="nxuowIxxx" # replace it with your SecretKey
Init Workspace
To deploy the WordPress application with cloud rds, we first need to initiate a Workspace for the targeted stack (here we are using dev). Please copy the following example YAML file to your local workspace.yaml.
- AWS
- Alicloud
workspace.yaml
runtimes:
  kubernetes:
    kubeConfig: /etc/kubeconfig.yaml # Please replace with your own kubeconfig file path
  terraform:
    random:
      version: 3.5.1
      source: hashicorp/random
    aws:
      version: 5.0.1
      source: hashicorp/aws
      region: us-east-1

# MySQL configurations for AWS RDS
modules:
  mysql:
    default:
      cloud: aws
      size: 20
      instanceType: db.t3.micro
      privateRouting: false
      suffix: "-mysql"
workspace.yaml
runtimes:
  kubernetes:
    kubeConfig: /etc/kubeconfig.yaml # Replace with your own kubeconfig file path
  terraform:
    random:
      version: 3.5.1
      source: hashicorp/random
    alicloud:
      version: 1.209.1
      source: aliyun/alicloud
      region: cn-beijing

# MySQL configurations for Alicloud RDS
modules:
  mysql:
    default:
      cloud: alicloud
      size: 20
      instanceType: mysql.n2.serverless.1c
      category: serverless_basic
      privateRouting: false
      subnetID: [your-subnet-id]
      suffix: "-mysql"
You can replace the runtimes.kubernetes.kubeConfig field with your own kubeconfig file path in workspace.yaml, and if you would like to try creating the Alicloud RDS instance, you should also replace the [your-subnet-id] of modules.mysql.default.subnetID field with the Alicloud vSwitchID to provision the database in. After that, you can execute the following command line to initiate the workspace configuration for dev stack.
kusion workspace create dev -f workspace.yaml
If you already create the workspace configuration for dev stack, you can append the Terraform runtime configs and MySQL module configs to your workspace YAML file and use the following command line to update the workspace configuration.
kusion workspace update dev -f workspace.yaml
You can use the following command lines to list and show the workspace configurations for dev stack.
kusion workspace list

kusion workspace show dev
The workspace.yaml is a sample configuration file for workspace management, including Kubernetes and Terraform runtime configs and MySQL module config. Workspace configurations are usually declared by Platform Engineers and will take effect through the corresponding stack.
More details about the configuration of Workspace can be found in Workspace Management.
Init Project
We can start by initializing this tutorial project with online templates:
kusion init --online
All init templates are listed as follows:
➜  kusion_playground kusion init --online
? Please choose a template: wordpress-cloud-rds        A sample wordpress project with cloud rds
This command will walk you through creating a new kusion project.

Enter a value or leave blank to accept the (default), and press <ENTER>.
Press ^C at any time to quit.

Project Config:
? ProjectName: wordpress-cloud-rds
? AppName: wordpress
Stack Config: dev
? Image: wordpress:6.3
Created project 'wordpress-cloud-rds'
Select wordpress-cloud-rds and press Enter. After that, we will see hints below and use the default values to config this project and stack.

The directory structure looks like the following:
cd wordpress-cloud-rds/dev && tree
➜  kusion_playground cd wordpress-cloud-rds/dev && tree
.
├── kcl.mod
├── main.k
└── stack.yaml

1 directory, 3 files
Review Configuration Files
Now let's take a look at the configuration files located in dev/main.k.
import catalog.models.schema.v1 as ac
import catalog.models.schema.v1.workload as wl
import catalog.models.schema.v1.workload.container as c
import catalog.models.schema.v1.workload.network as n
import catalog.models.schema.v1.accessories.mysql

# main.k declares customized configurations for dev stacks.
wordpress: ac.AppConfiguration {
    workload: wl.Service {
        containers: {
            wordpress: c.Container {
                image: "wordpress:6.3"
                env: {
                    "WORDPRESS_DB_HOST": "$(KUSION_DB_HOST_WORDPRESS_MYSQL)"
                    "WORDPRESS_DB_USER": "$(KUSION_DB_USERNAME_WORDPRESS_MYSQL)"
                    "WORDPRESS_DB_PASSWORD": "$(KUSION_DB_PASSWORD_WORDPRESS_MYSQL)"
                    "WORDPRESS_DB_NAME": "mysql"
                }
                resources: {
                    "cpu": "500m"
                    "memory": "512Mi"
                }
            }
        }
        replicas: 1
        ports: [
            n.Port {
                port: 80
            }
        ]
    }
    database: {
        wordpress: mysql.MySQL {
            type: "cloud"
            version: "8.0"
        }
    }
}
The configuration file main.k, usually written by the App Developers, declares customized configurations for dev stack, which includes an AppConfiguration with the name of wordpress. And the wordpress application includes a workload of type workload.Service, which runs on 1 replica and exposes 80 port to be accessed. Besides, it declares a cloud mysql.MySQL as the database accessory with the engine version of 8.0 for the application.
The necessary Terraform resources for deploying and using the cloud rds (relational database service) will be generated, and users can get the host, username and password of the database through the mysql credentials and connectivity of Kusion in application containers.
More details about Catalog models can be found in Catalog
The collaboration paradigm between App Developers and Platform Engineers with Kusion can be found in Collaboration Paradigm
Application Delivery
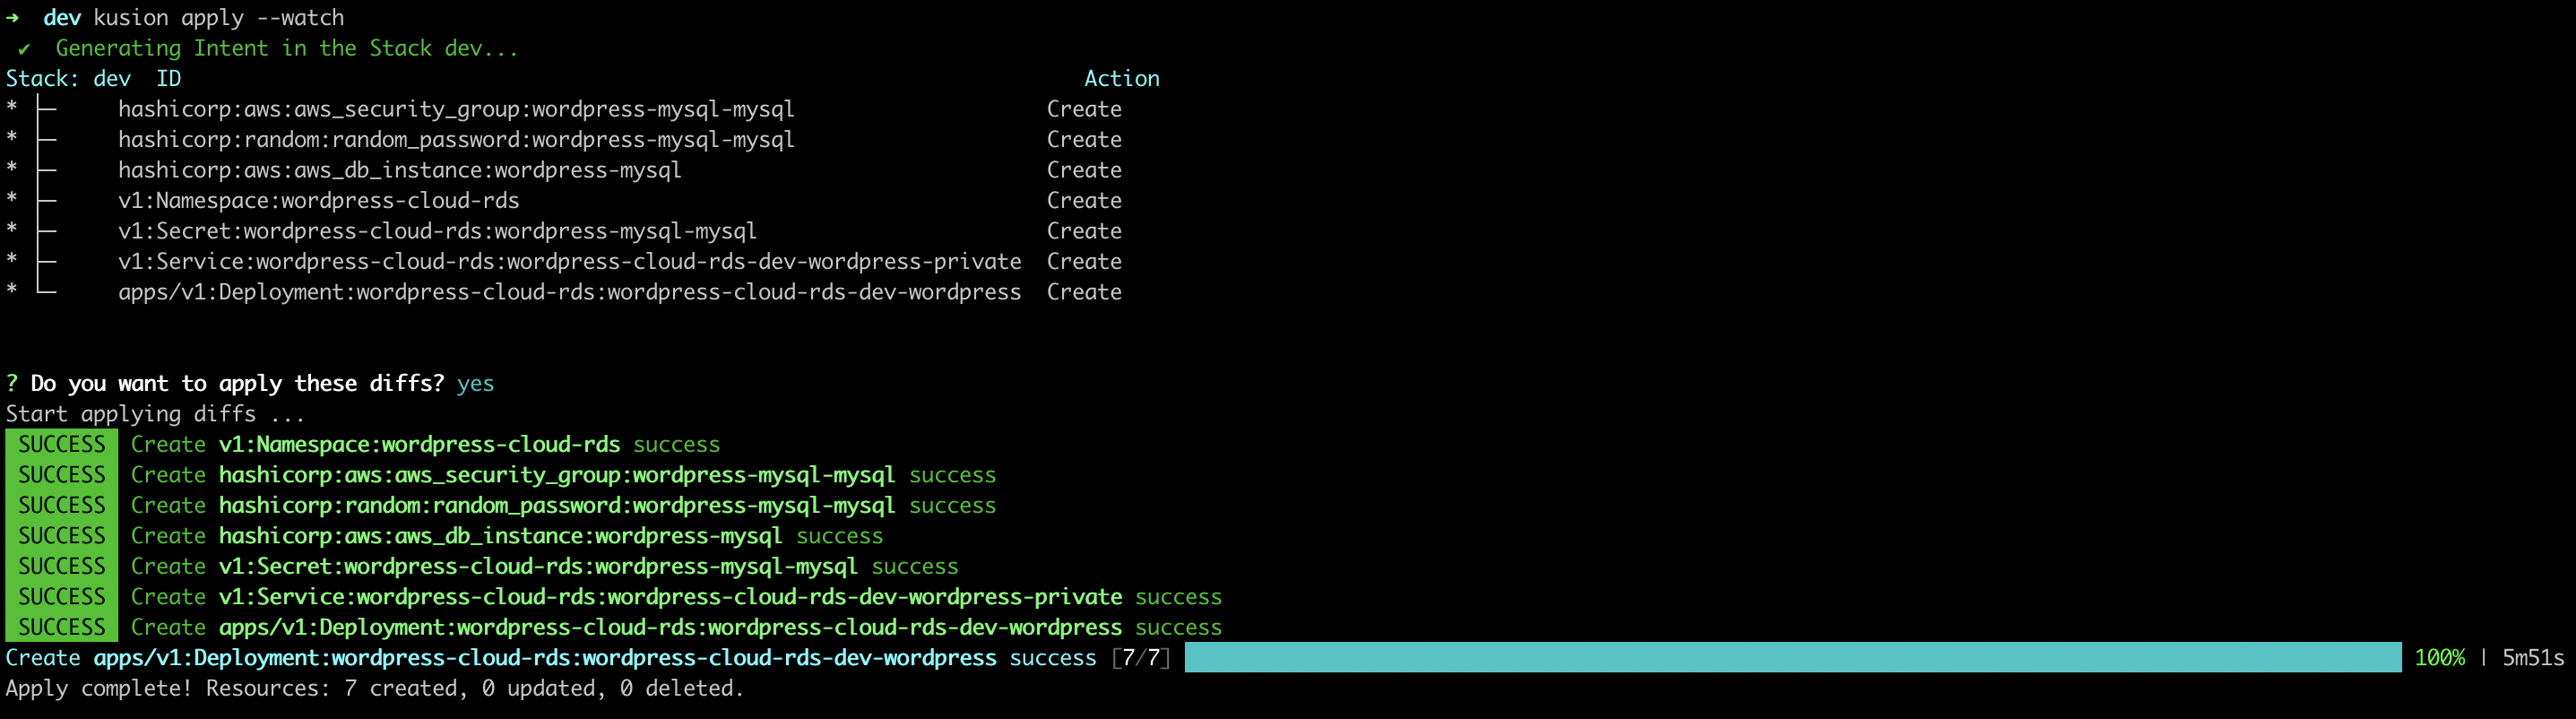
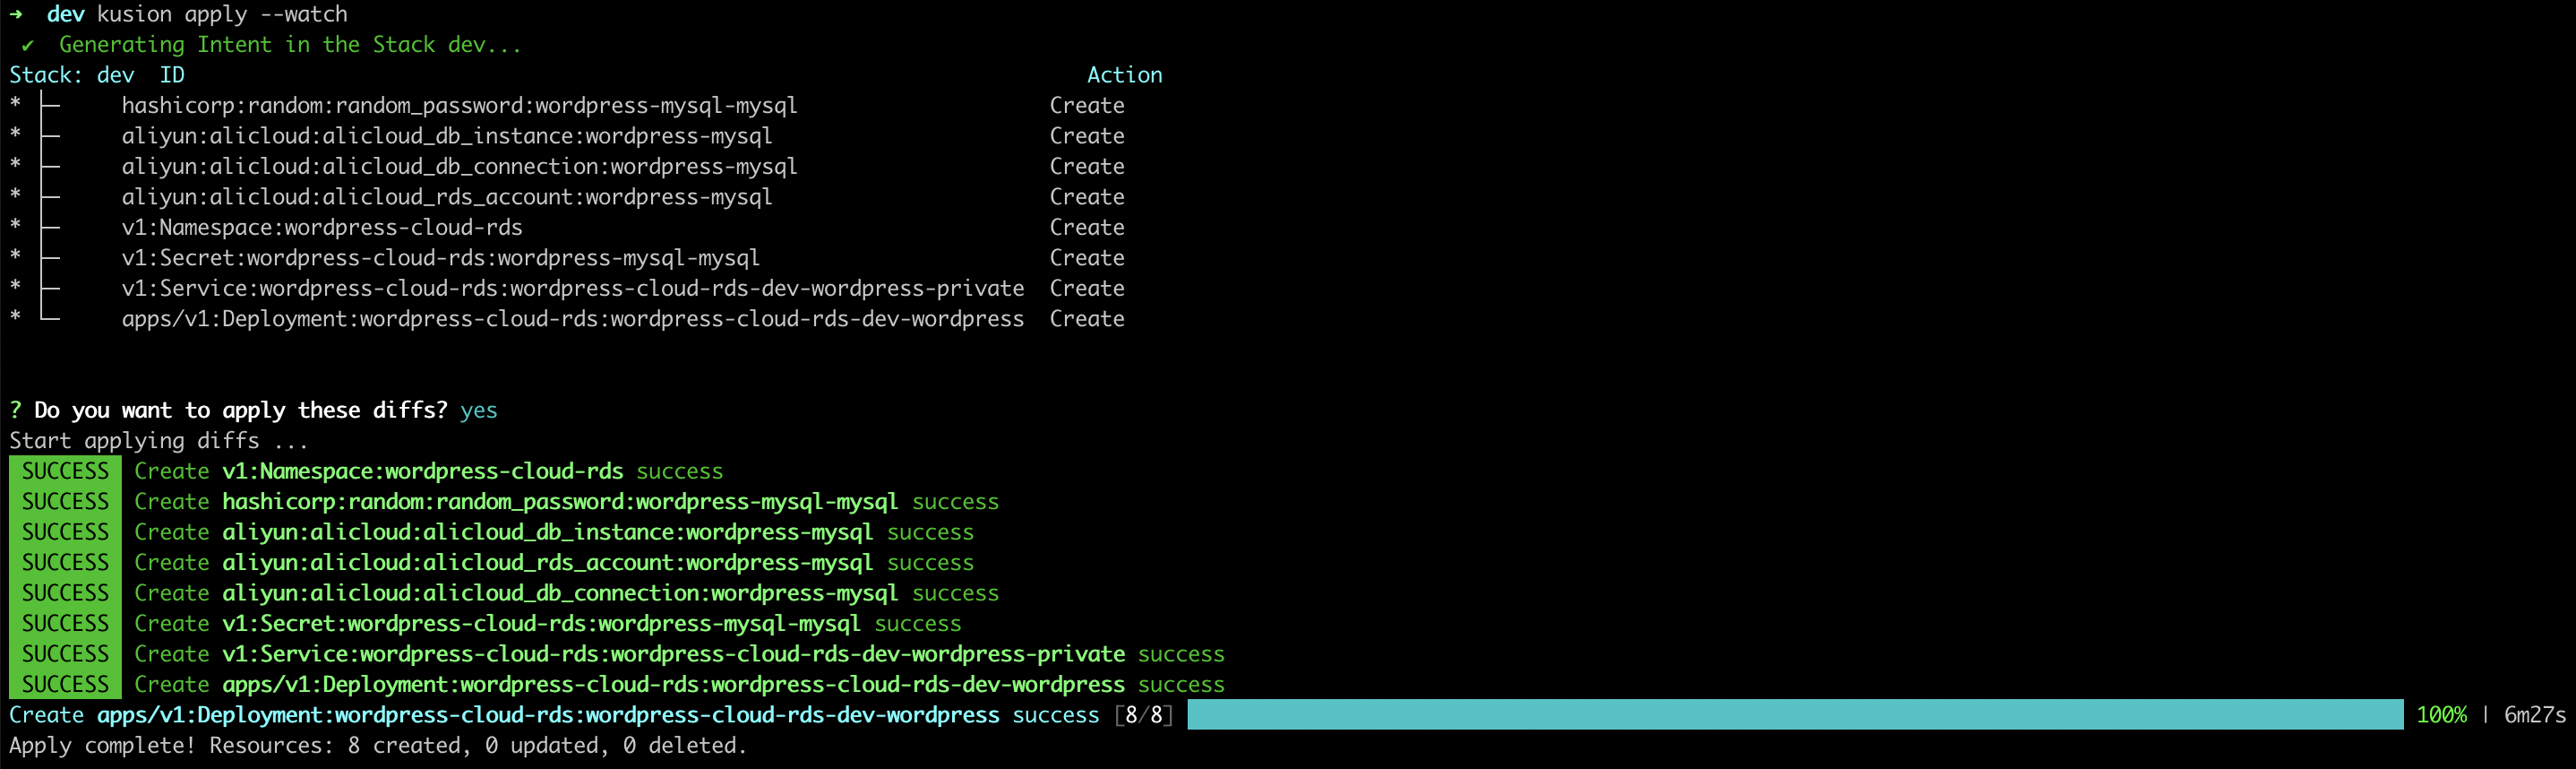
You can complete the delivery of the WordPress application in the folder of wordpress-cloud-rds/dev using the following command line:
kusion apply --watch
- AWS
- Alicloud
After all the resources reconciled, we can port-forward our local port (e.g. 12345) to the WordPress frontend service port (80) in the cluster:
kubectl port-forward -n wordpress-cloud-rds svc/wordpress-cloud-rds-dev-wordpress-private 12345:80

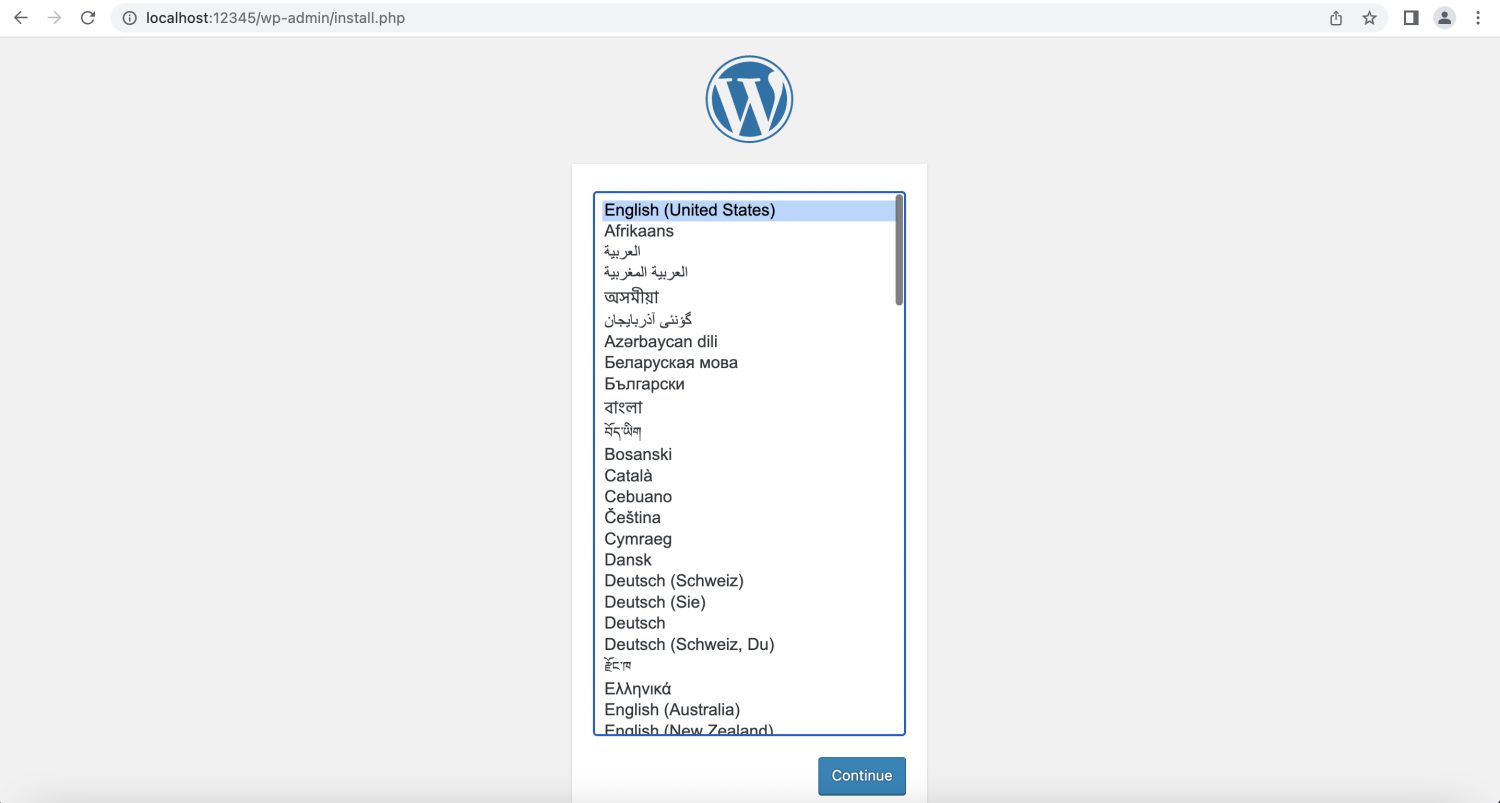
Verify WordPress Application
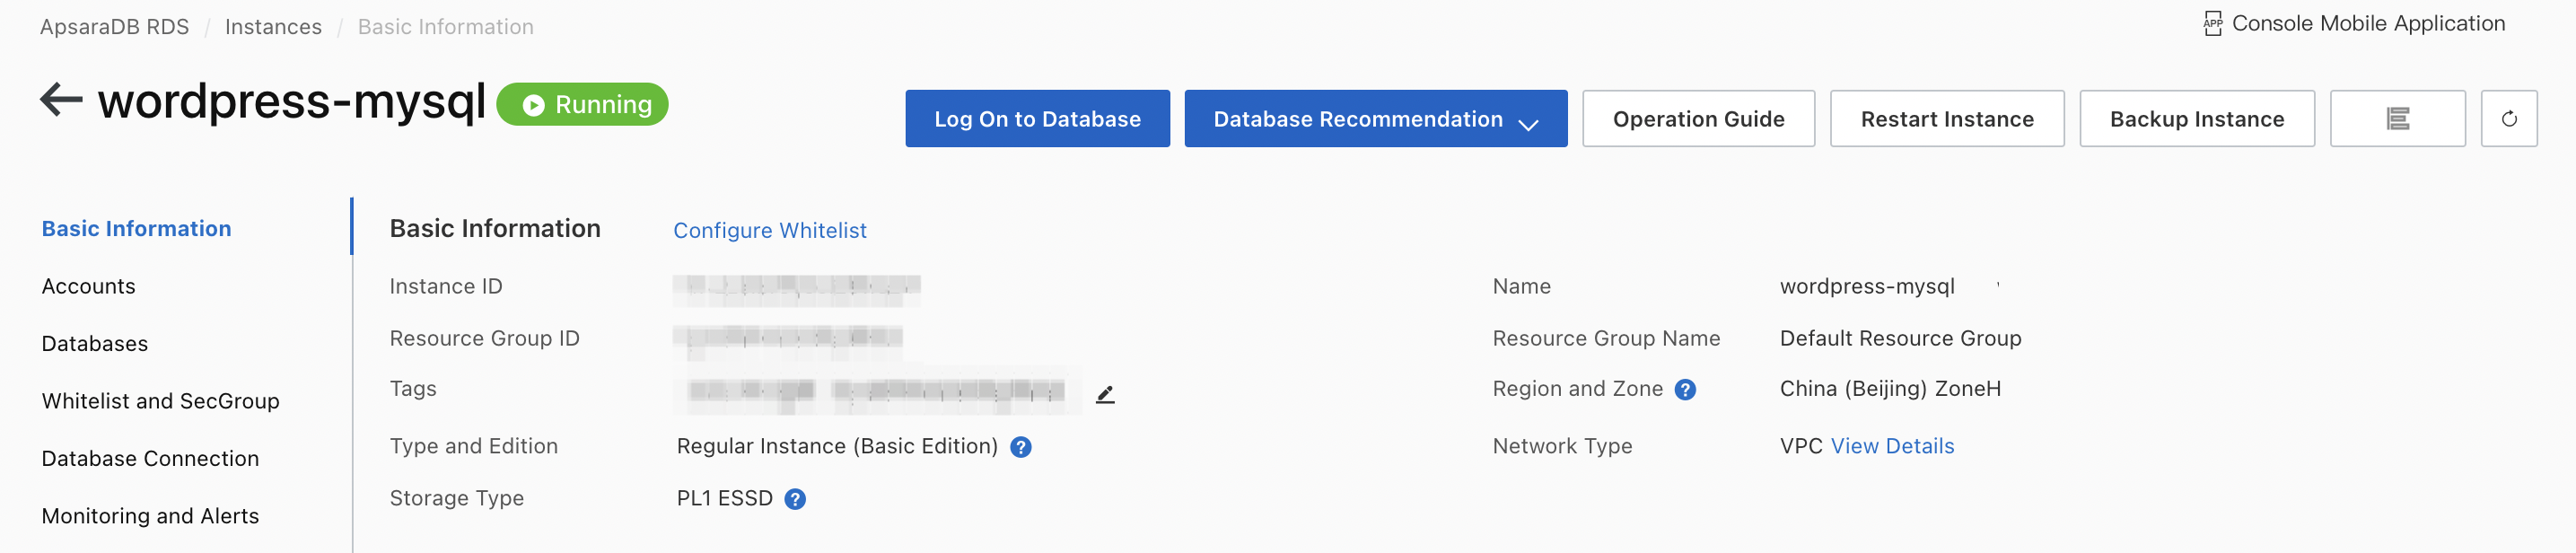
Next, we will verify the WordPress site service we just delivered, along with the creation of the RDS instance it depends on. We can start using the WordPress site by accessing the link of local-forwarded port (http://localhost:12345) we just configured in the browser.
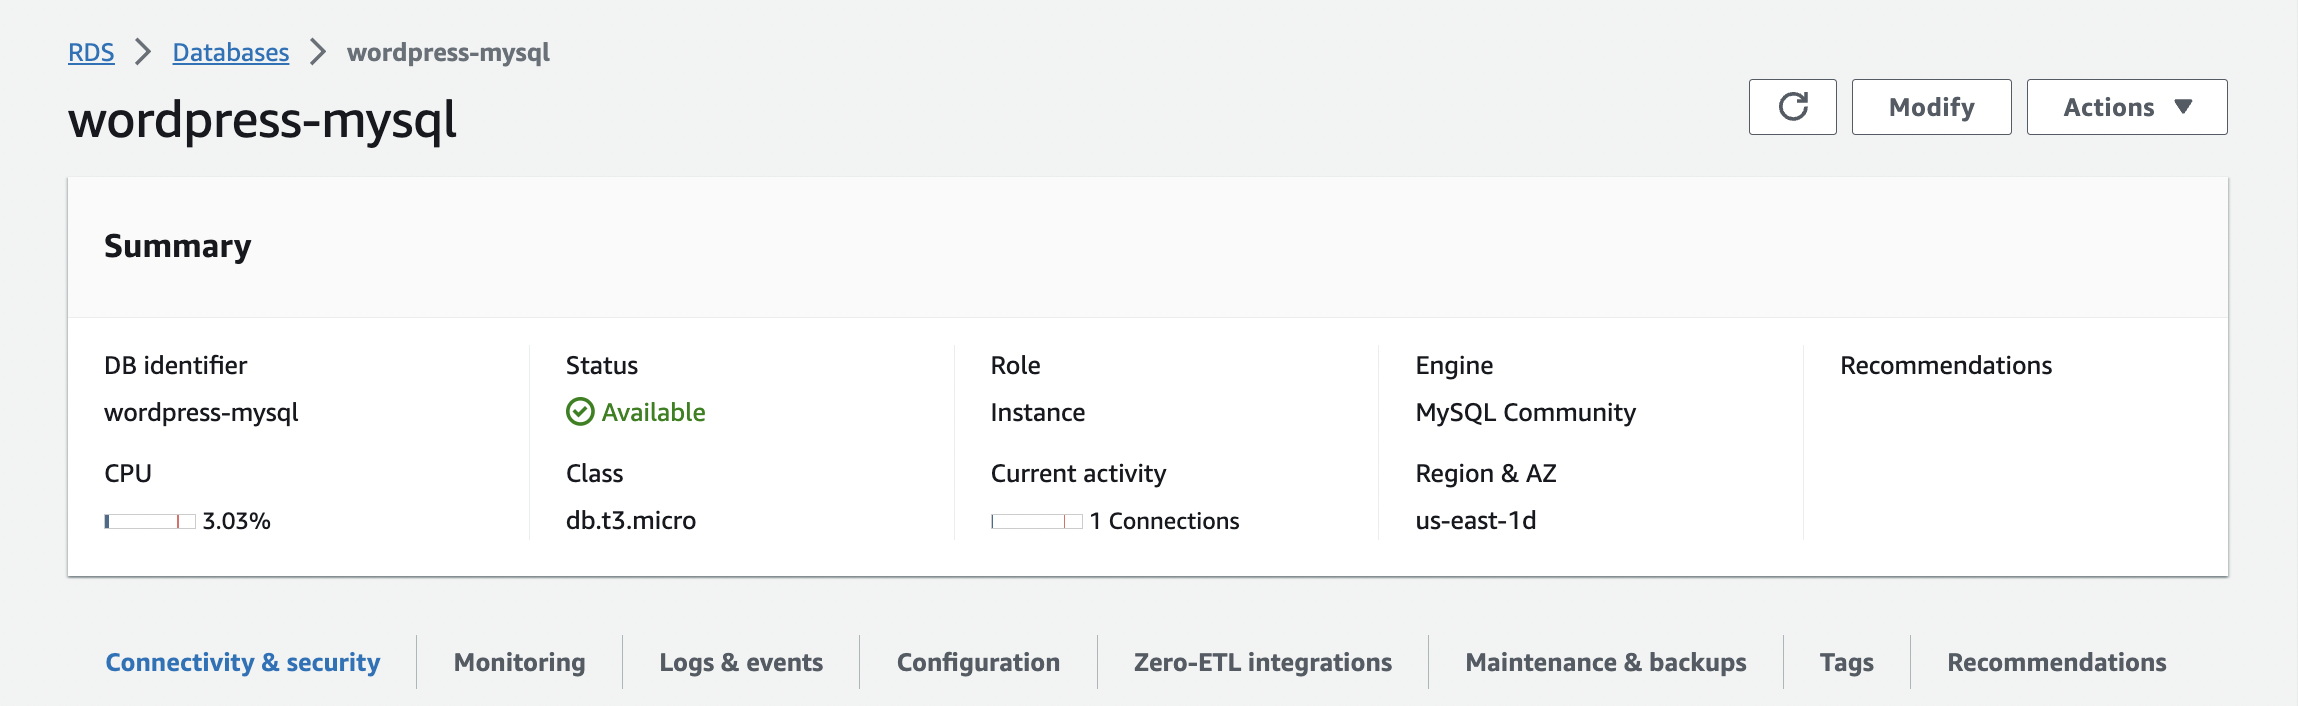
In addition, we can also log in to the cloud service console page to view the RDS instance we just created.
- AWS
- Alicloud
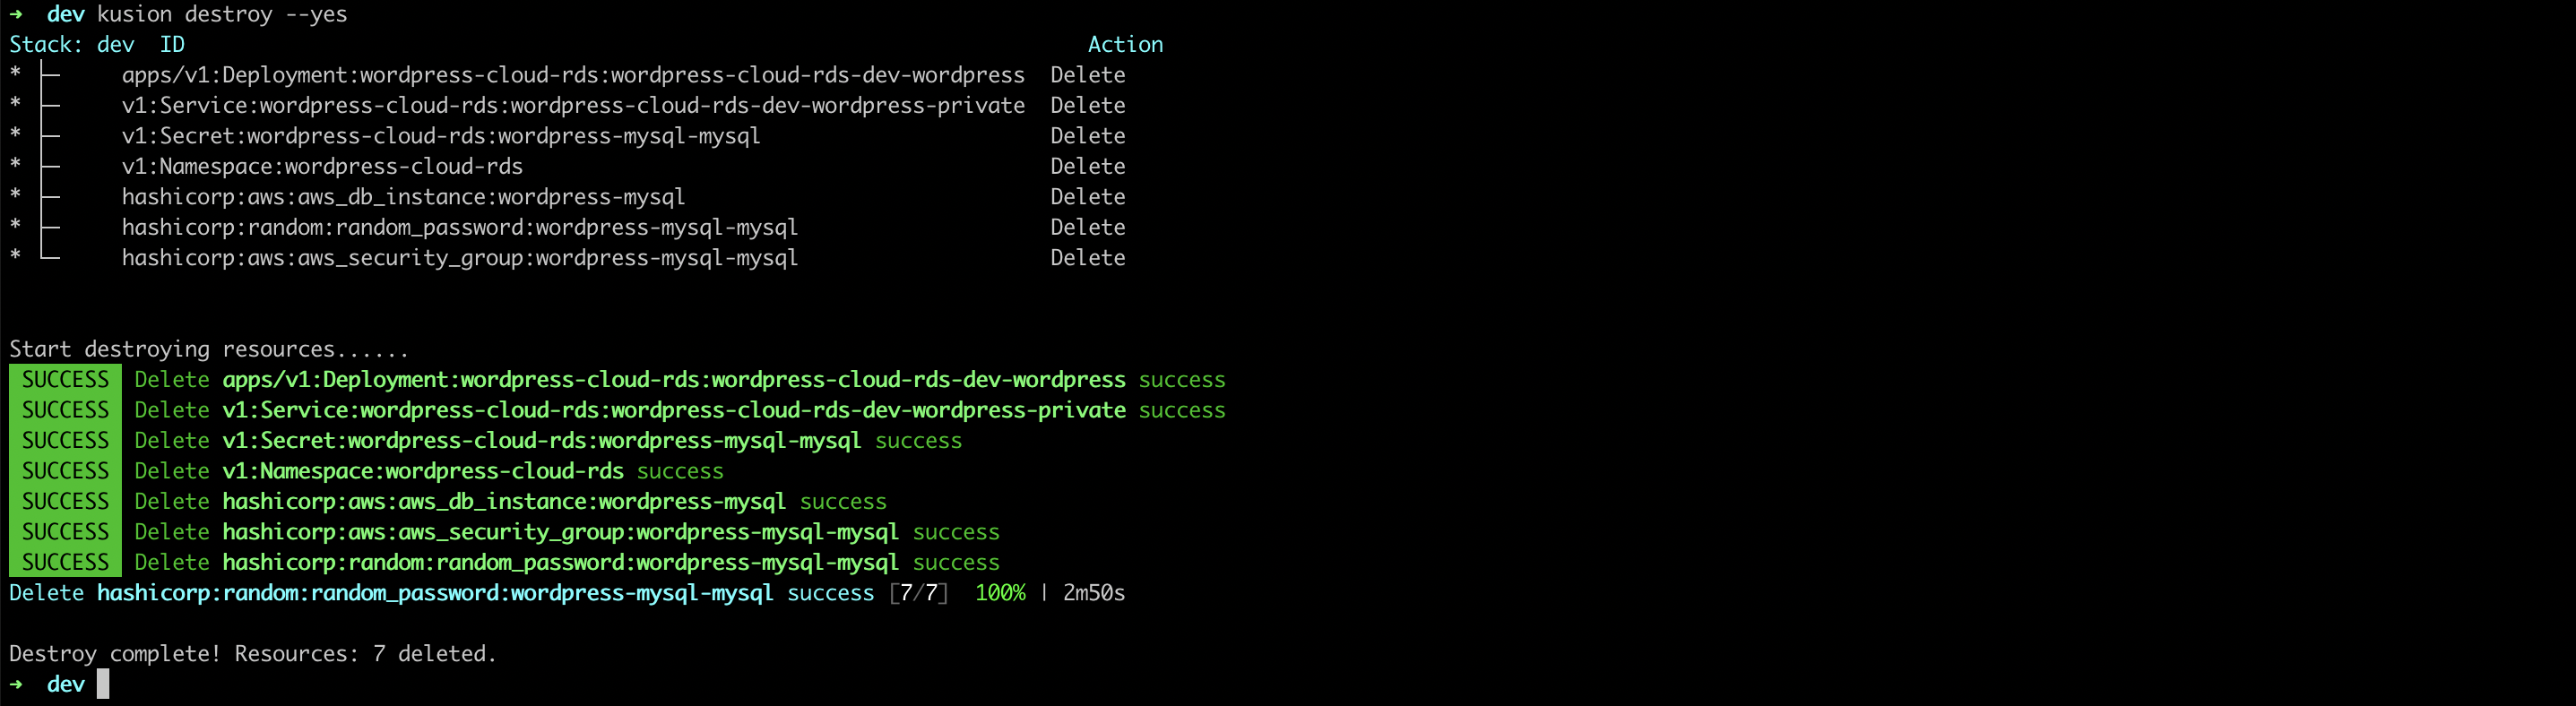
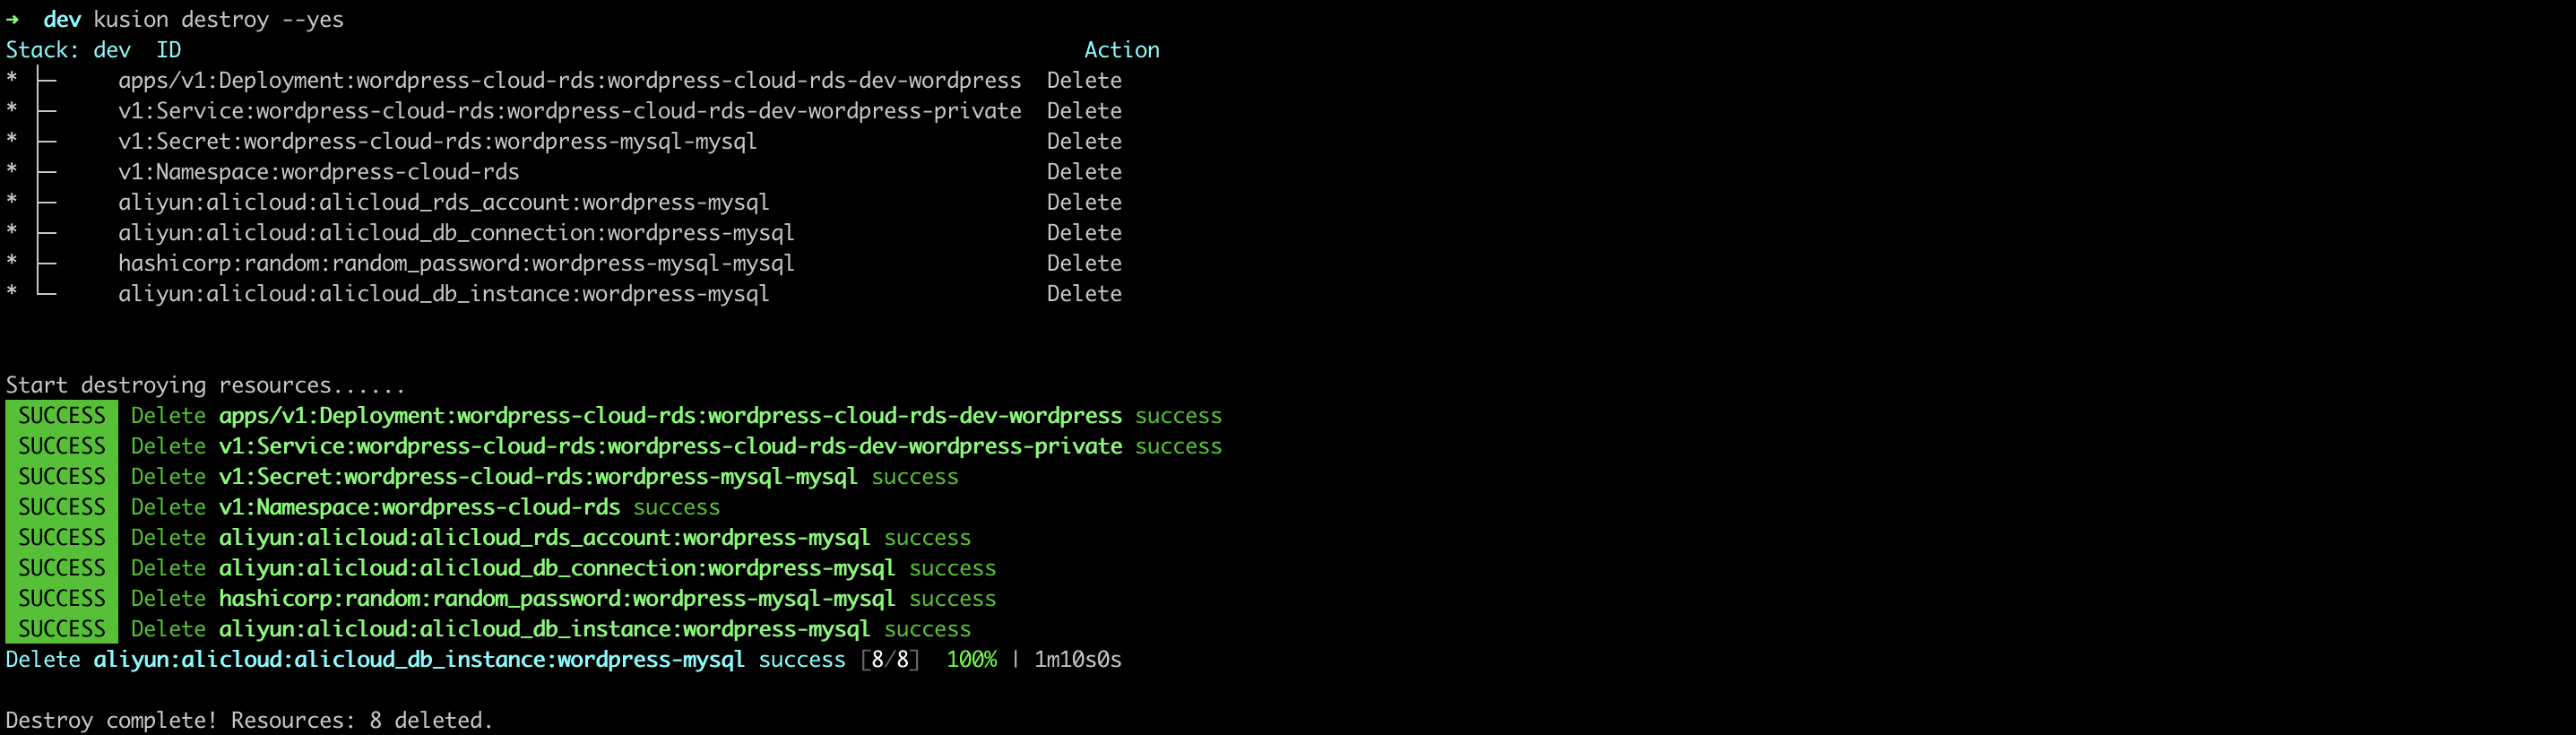
Delete WordPress Application
You can delete the WordPress application and related RDS resources using the following command line.
kusion destroy --yes
- AWS
- Alicloud