Run Your Own App with MySQL on Kubernetes with Kusion Server
In this tutorial, we will learn how to create and manage our own application with MySQL database on Kubernetes with Kusion. The locally deployed MySQL database is declared as an accessory in the config codes and will be automatically created and managed by Kusion.
Prerequisites
Before we start to play with this example, we need to have the Kusion Server installed and run an accessible Kubernetes cluster. Besides, we need to have a GitHub account to initiate our own config code repository as Source in Kusion.
- Install Kusion Server.
- Run a Kubernetes cluster. Some light and convenient options for Kubernetes local deployment include k3s, k3d, and MiniKube.
Please walk through this documentation before proceeding with the upcoming instructions.
Initialize Source
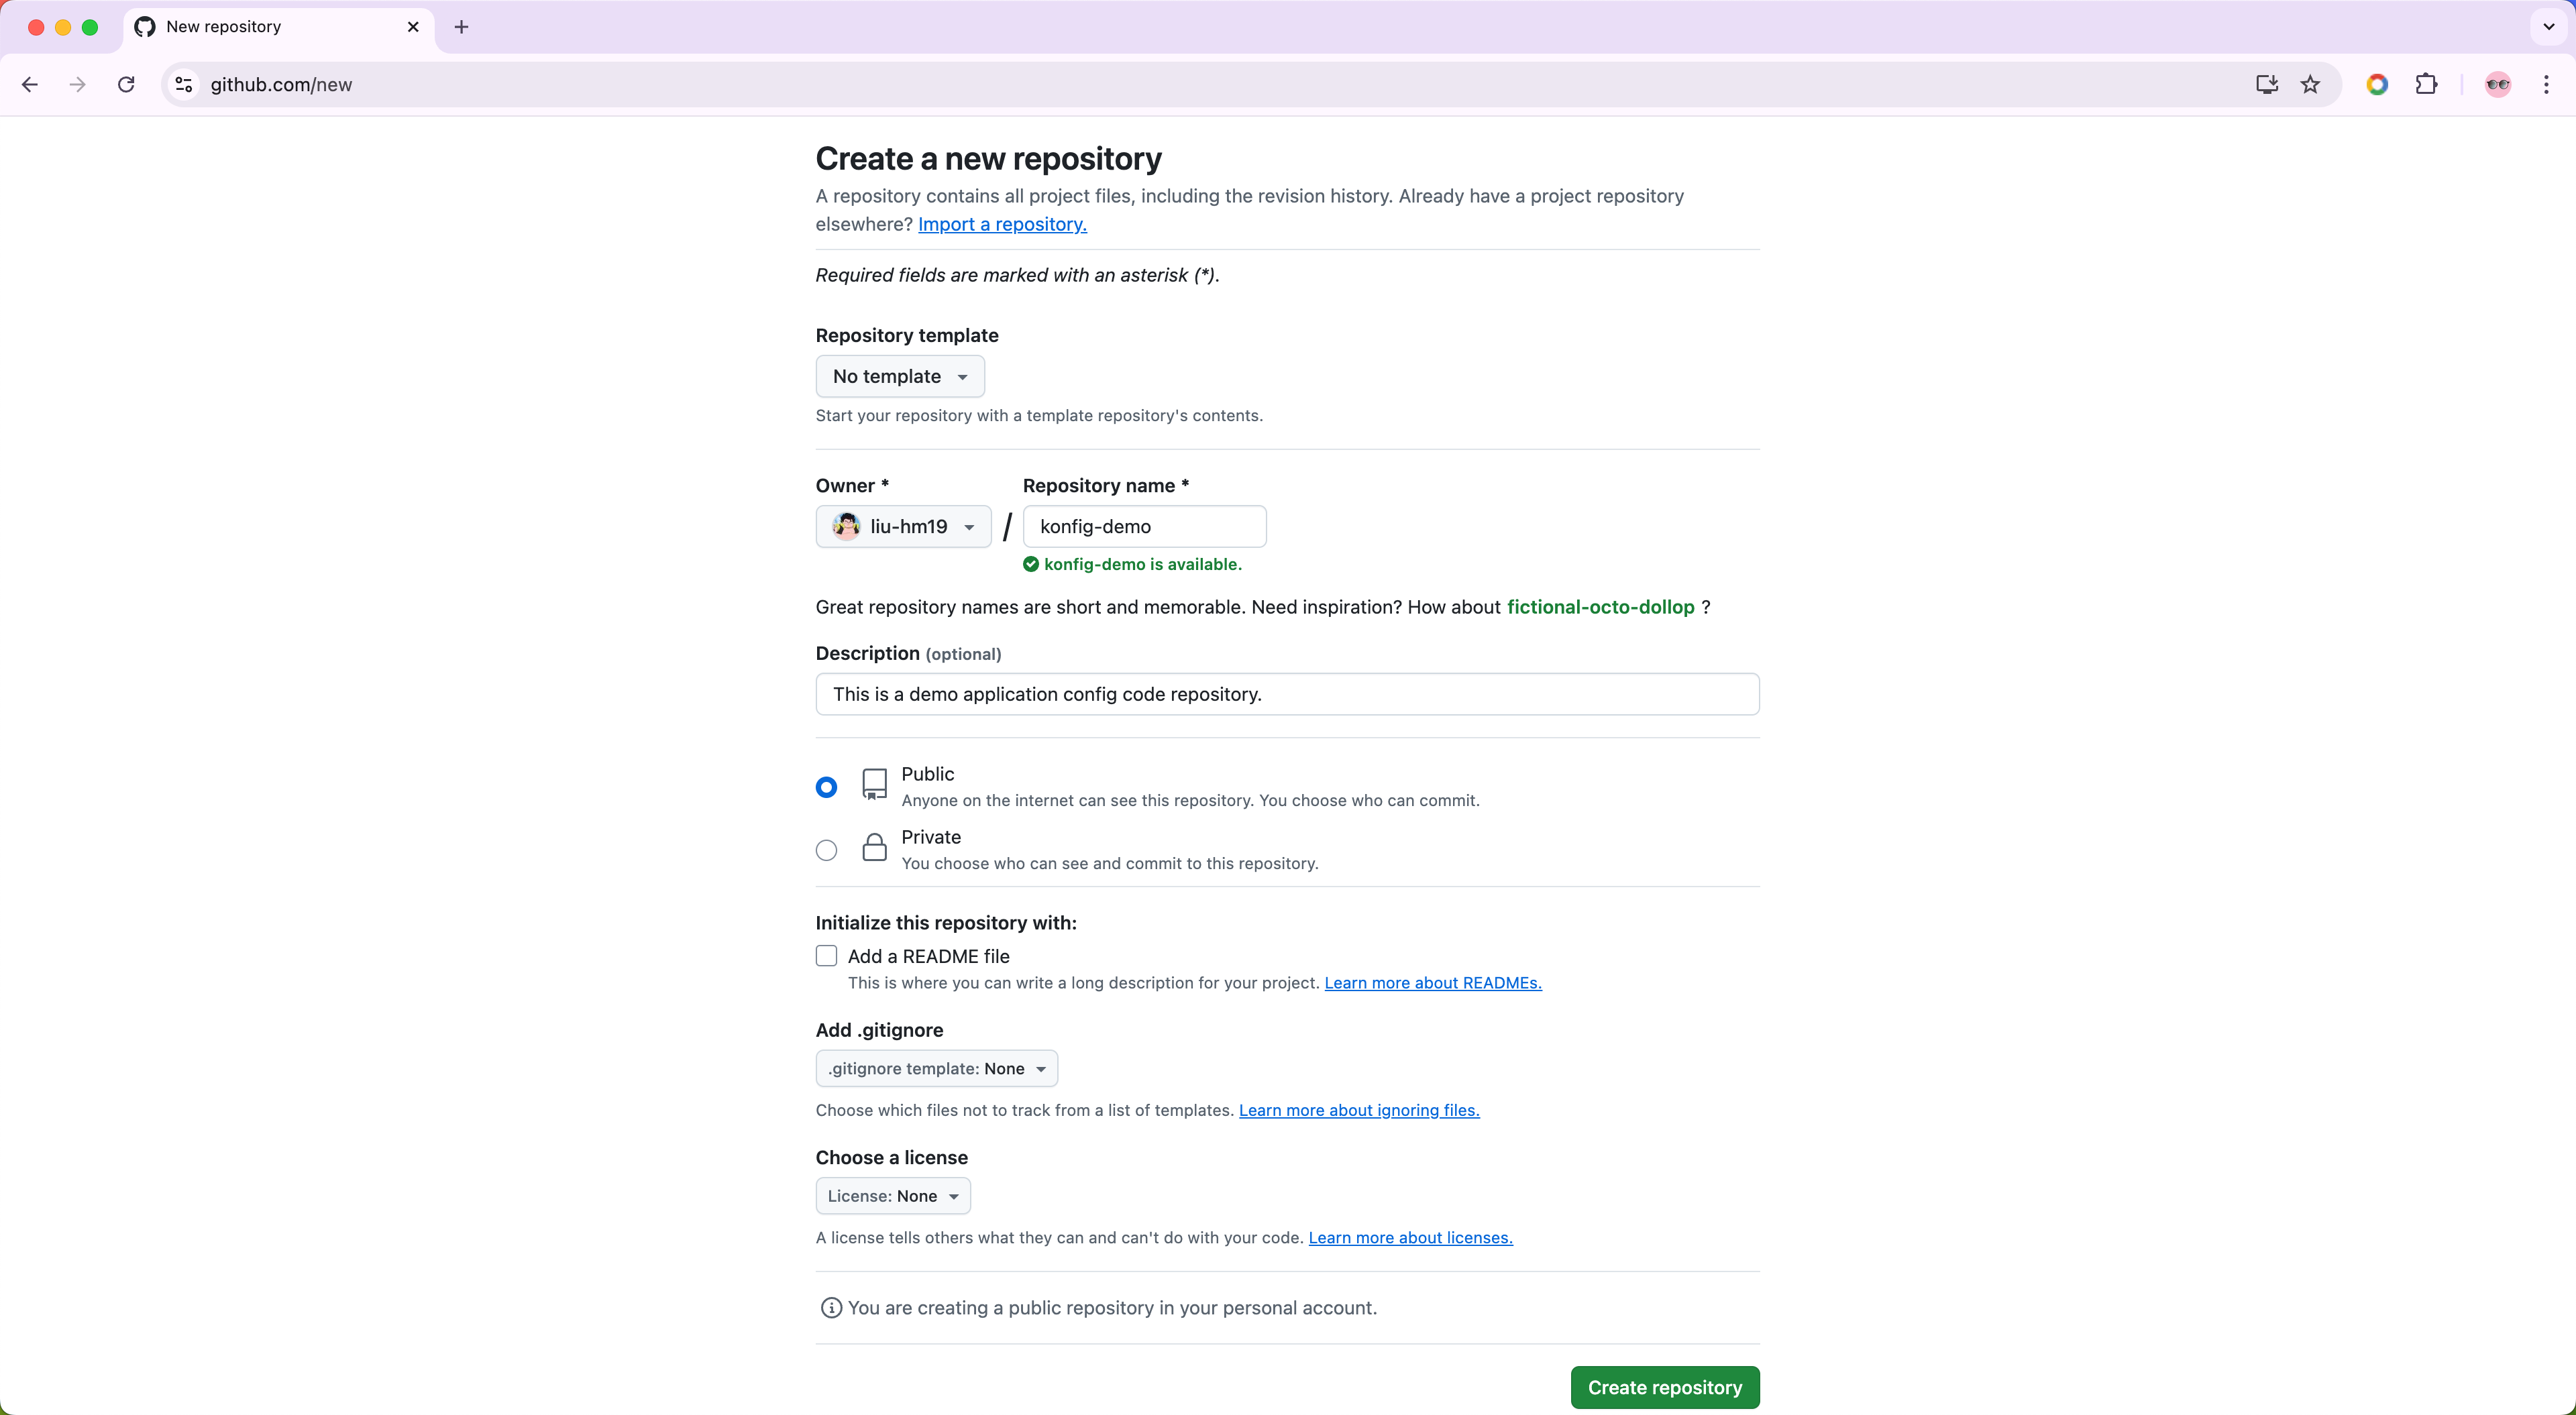
First, we need to create our own application configuration code repository as Source in Kusion.
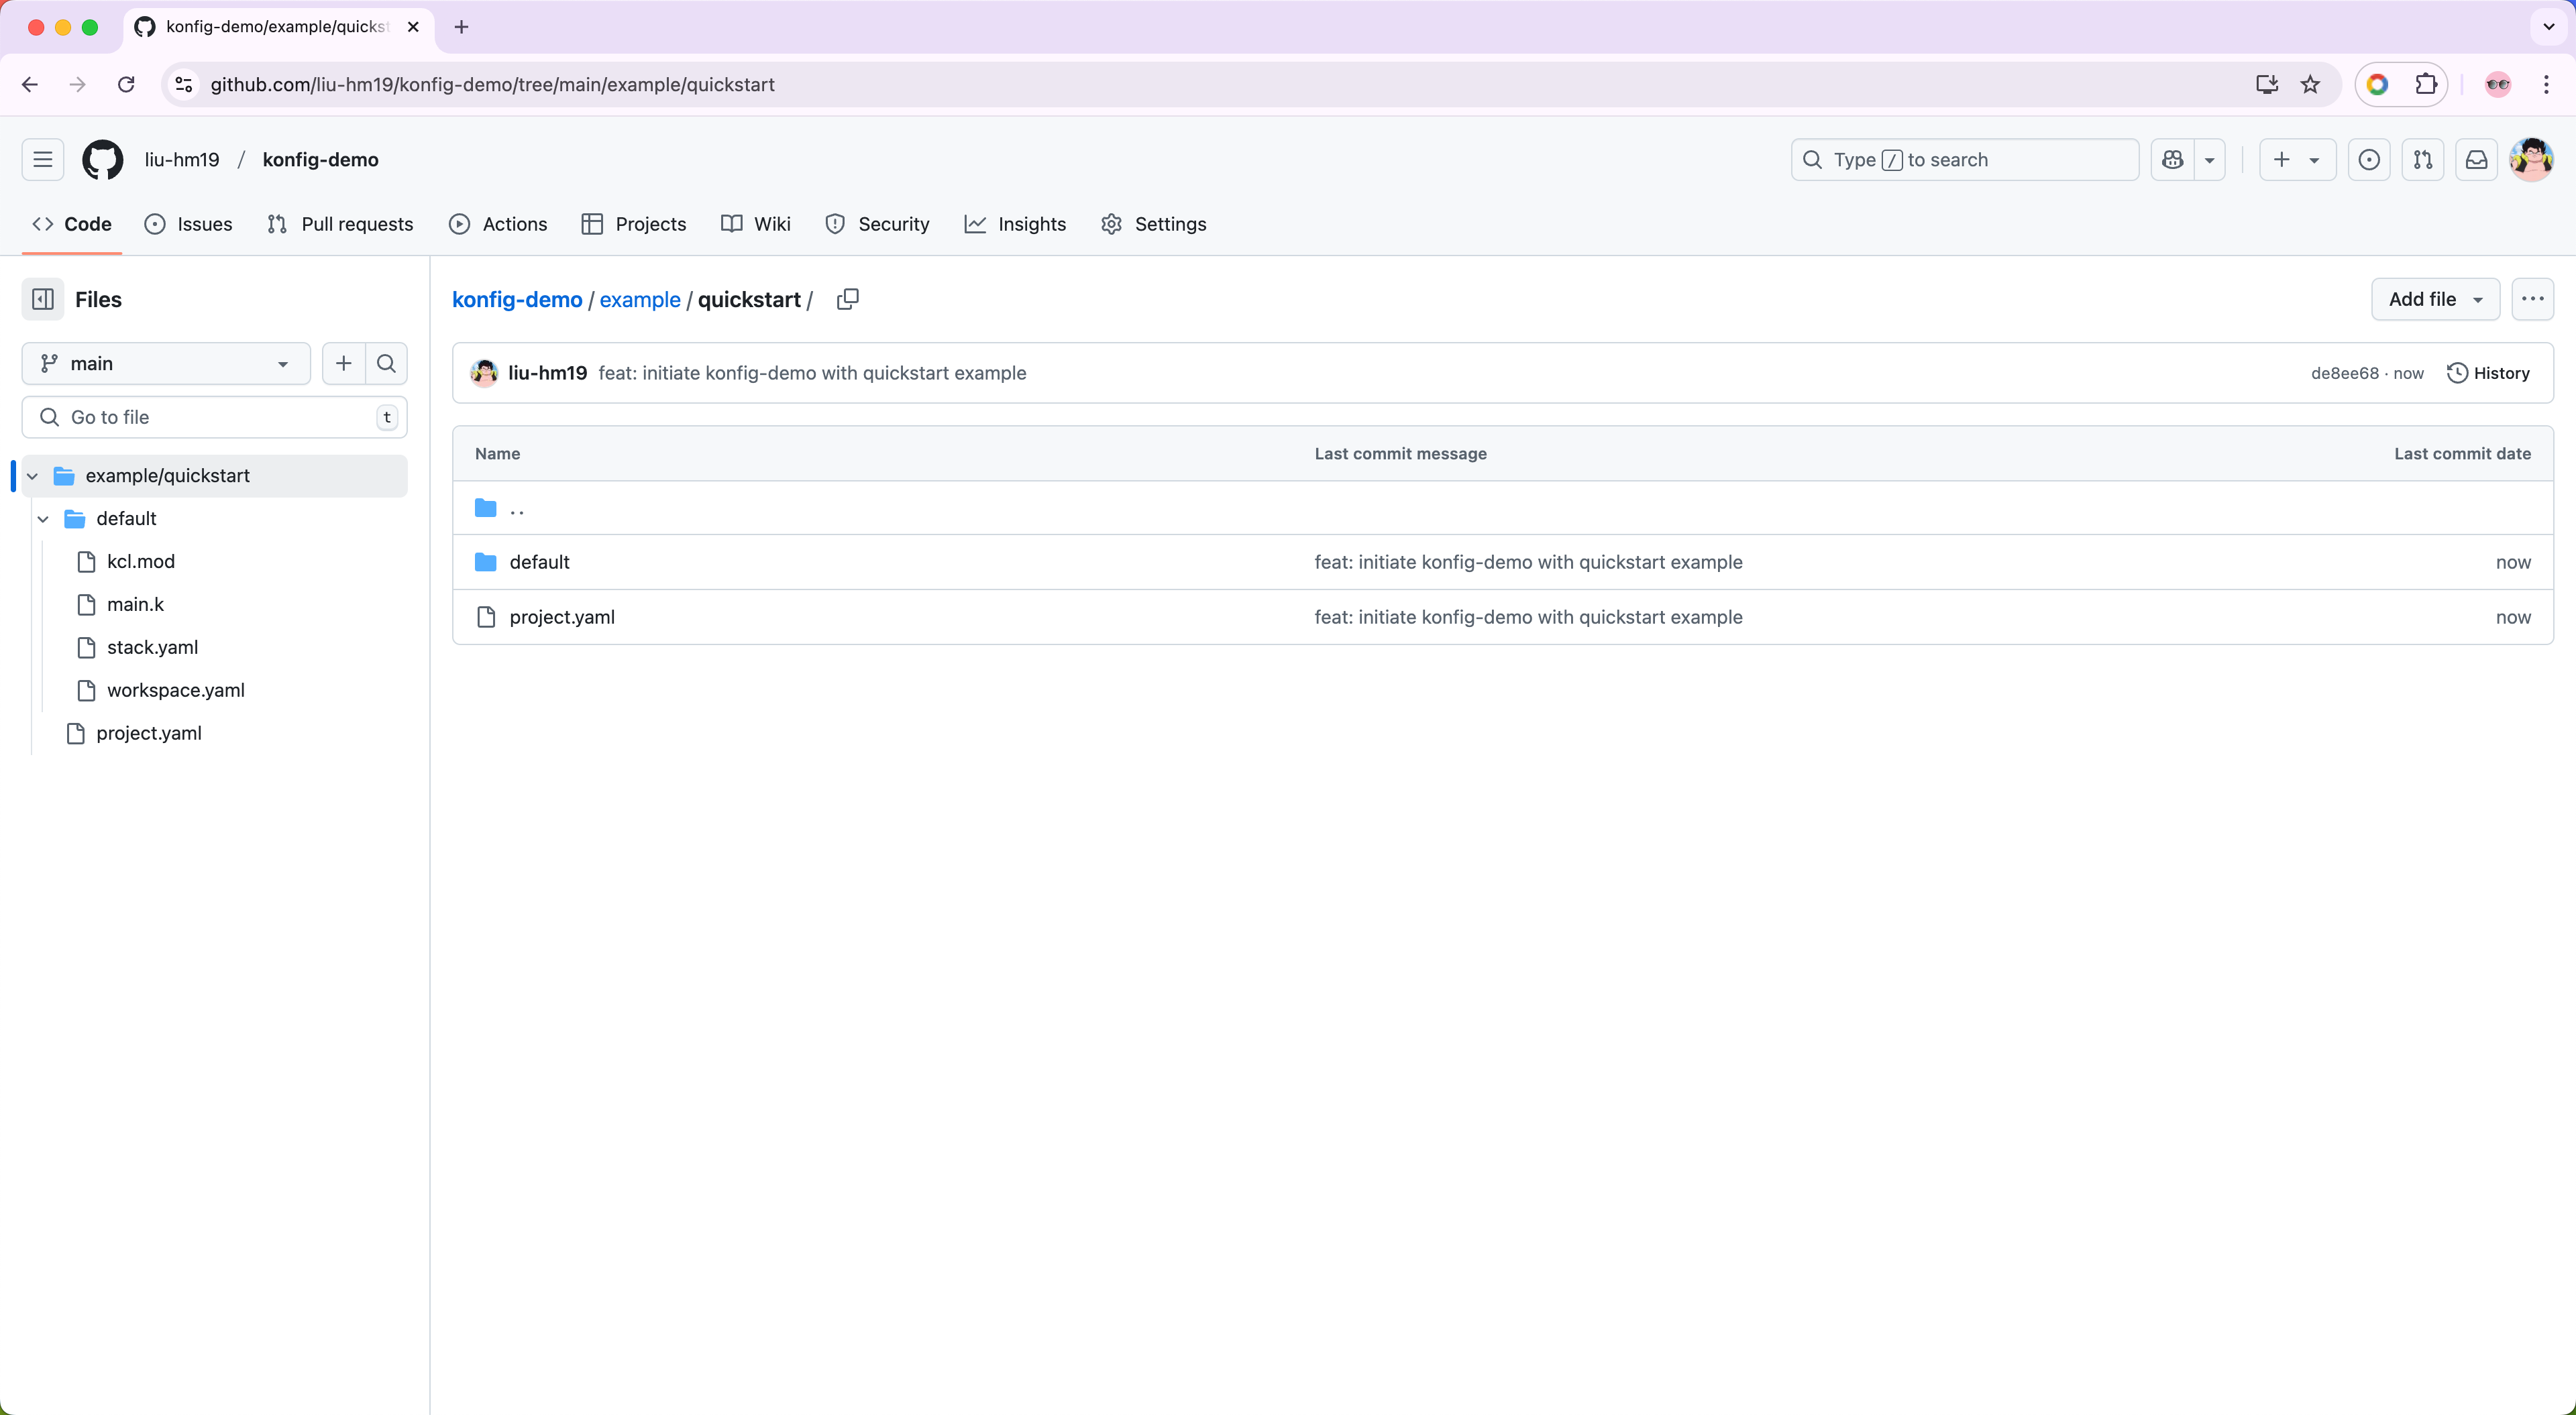
We can simply copy the quickstart example in KusionStack/konfig into our new repo.
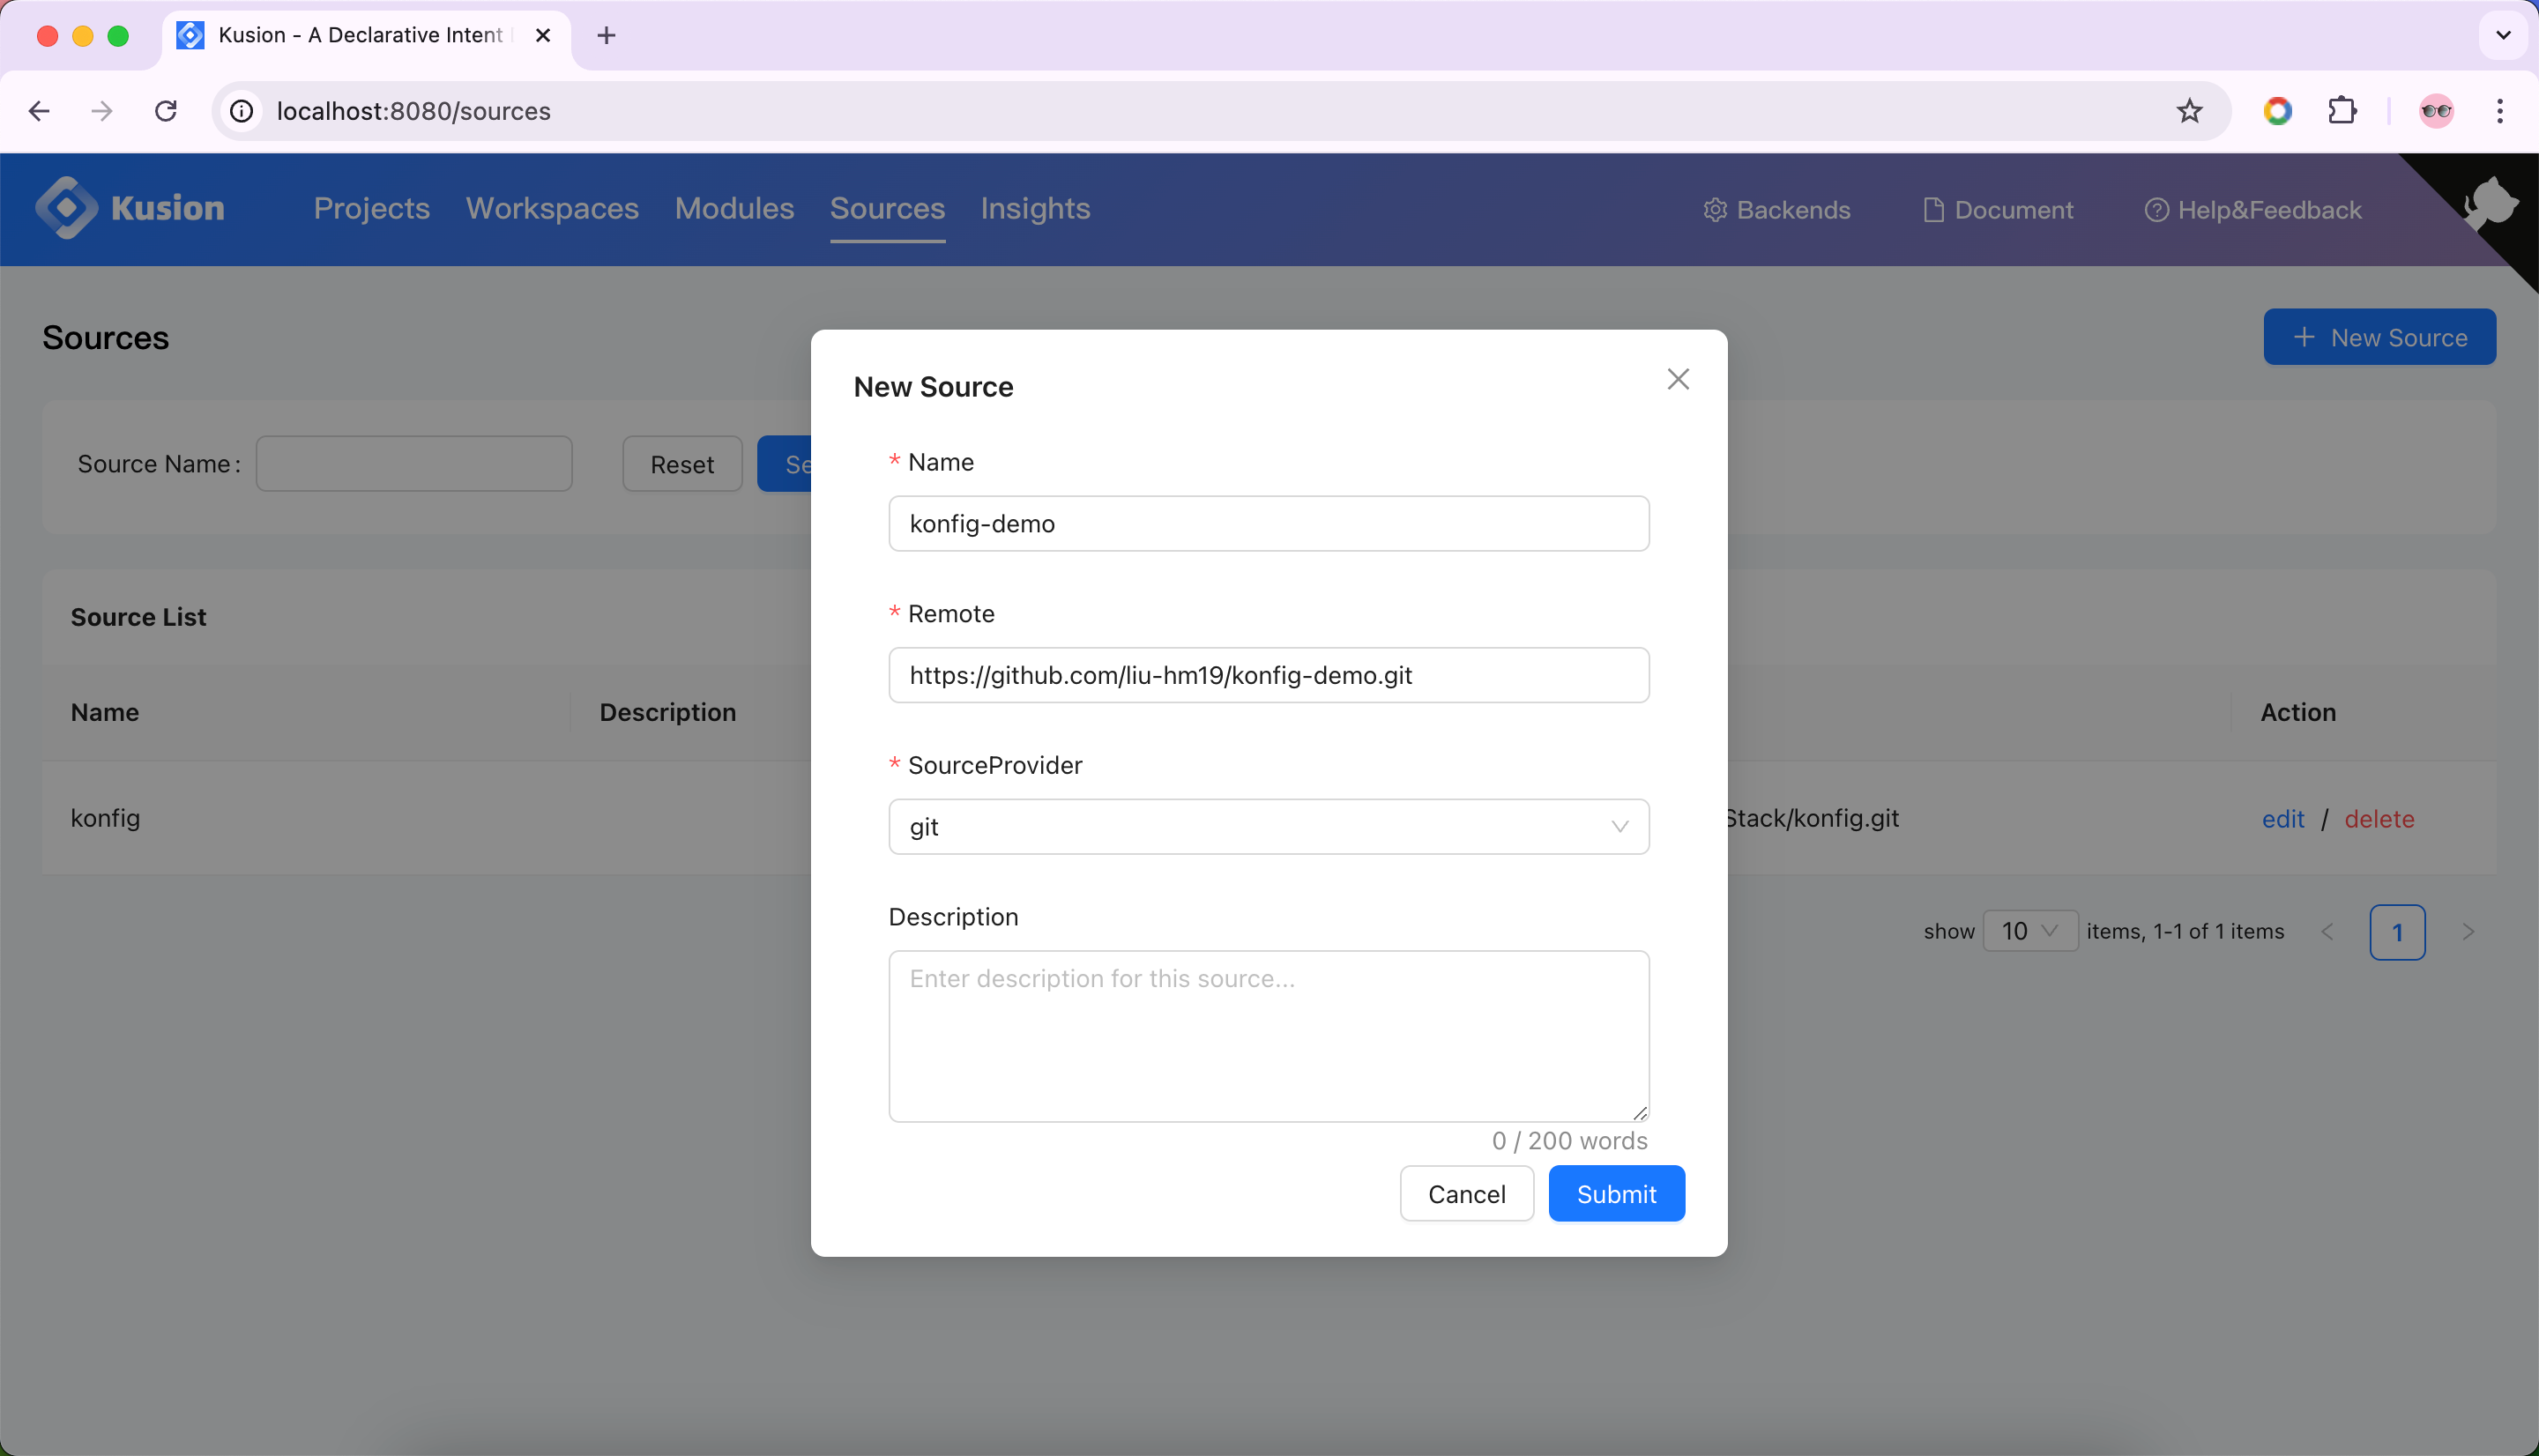
Then, we need to create a new Source with the created repository url.
Register Module And Update Workspace
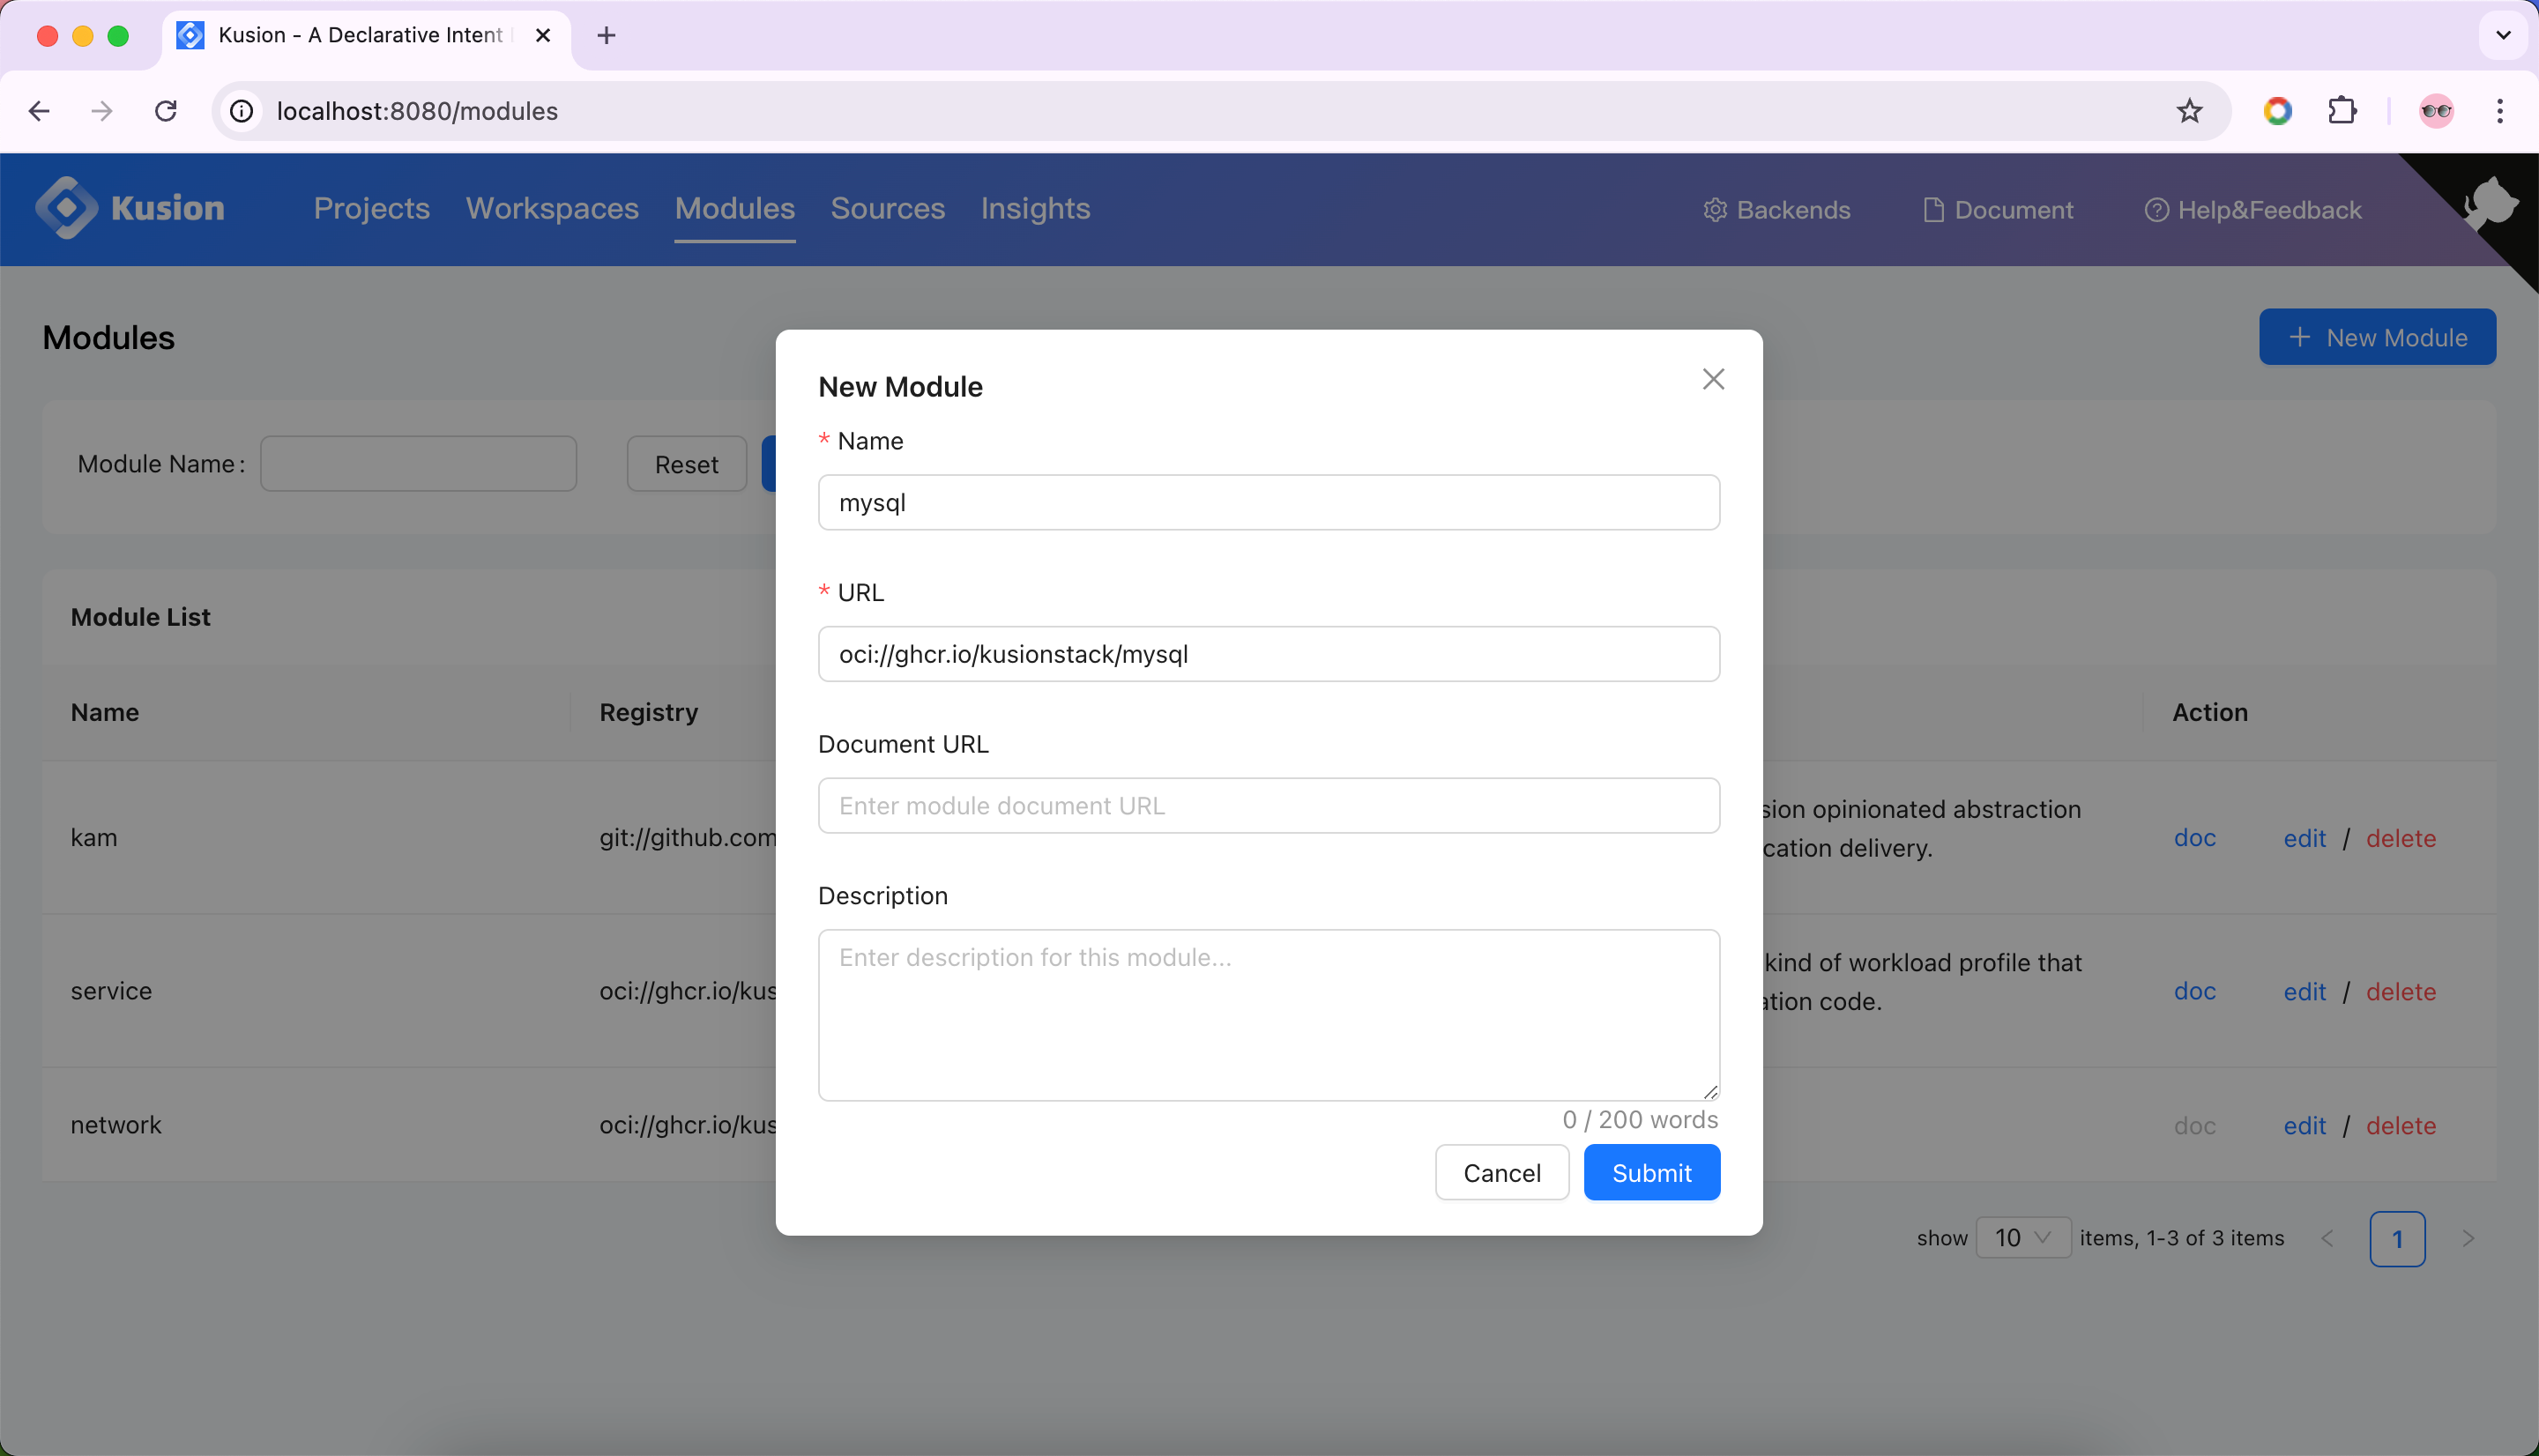
Next, we can register the mysql module provided by KusionStack community in Kusion.
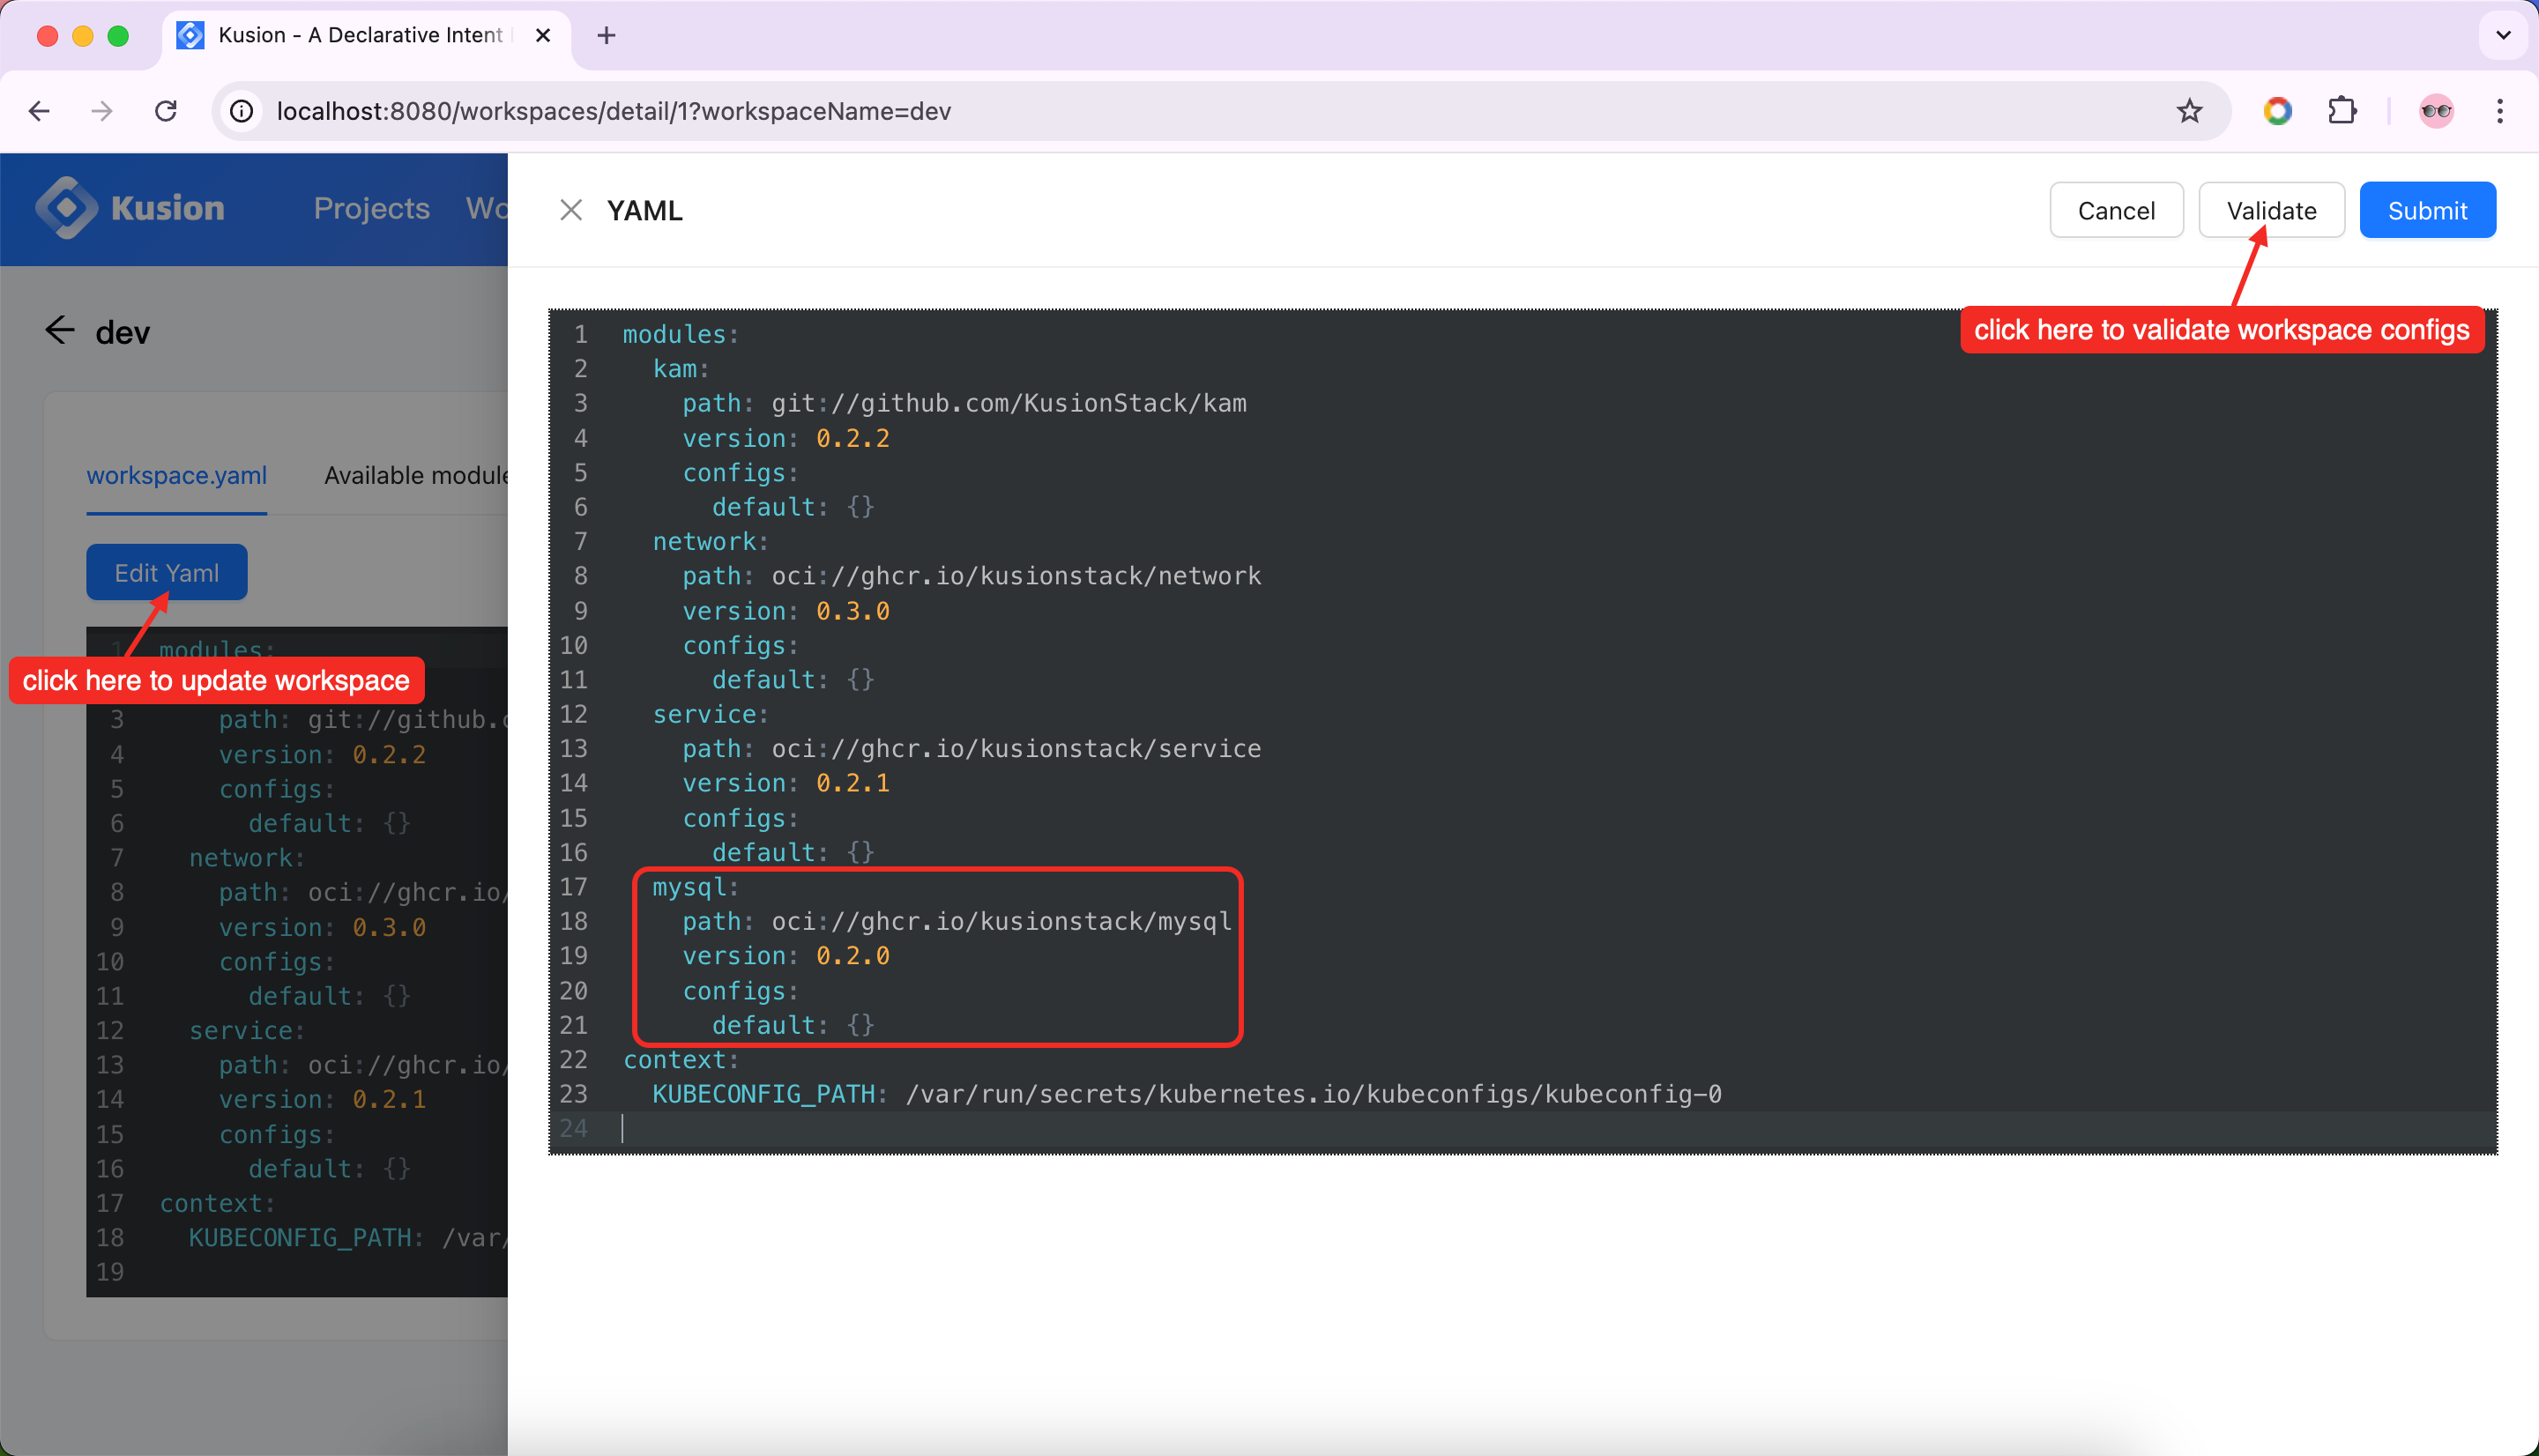
After the registration, we should add the mysql module to the dev workspace and re-generate the kcl.mod.
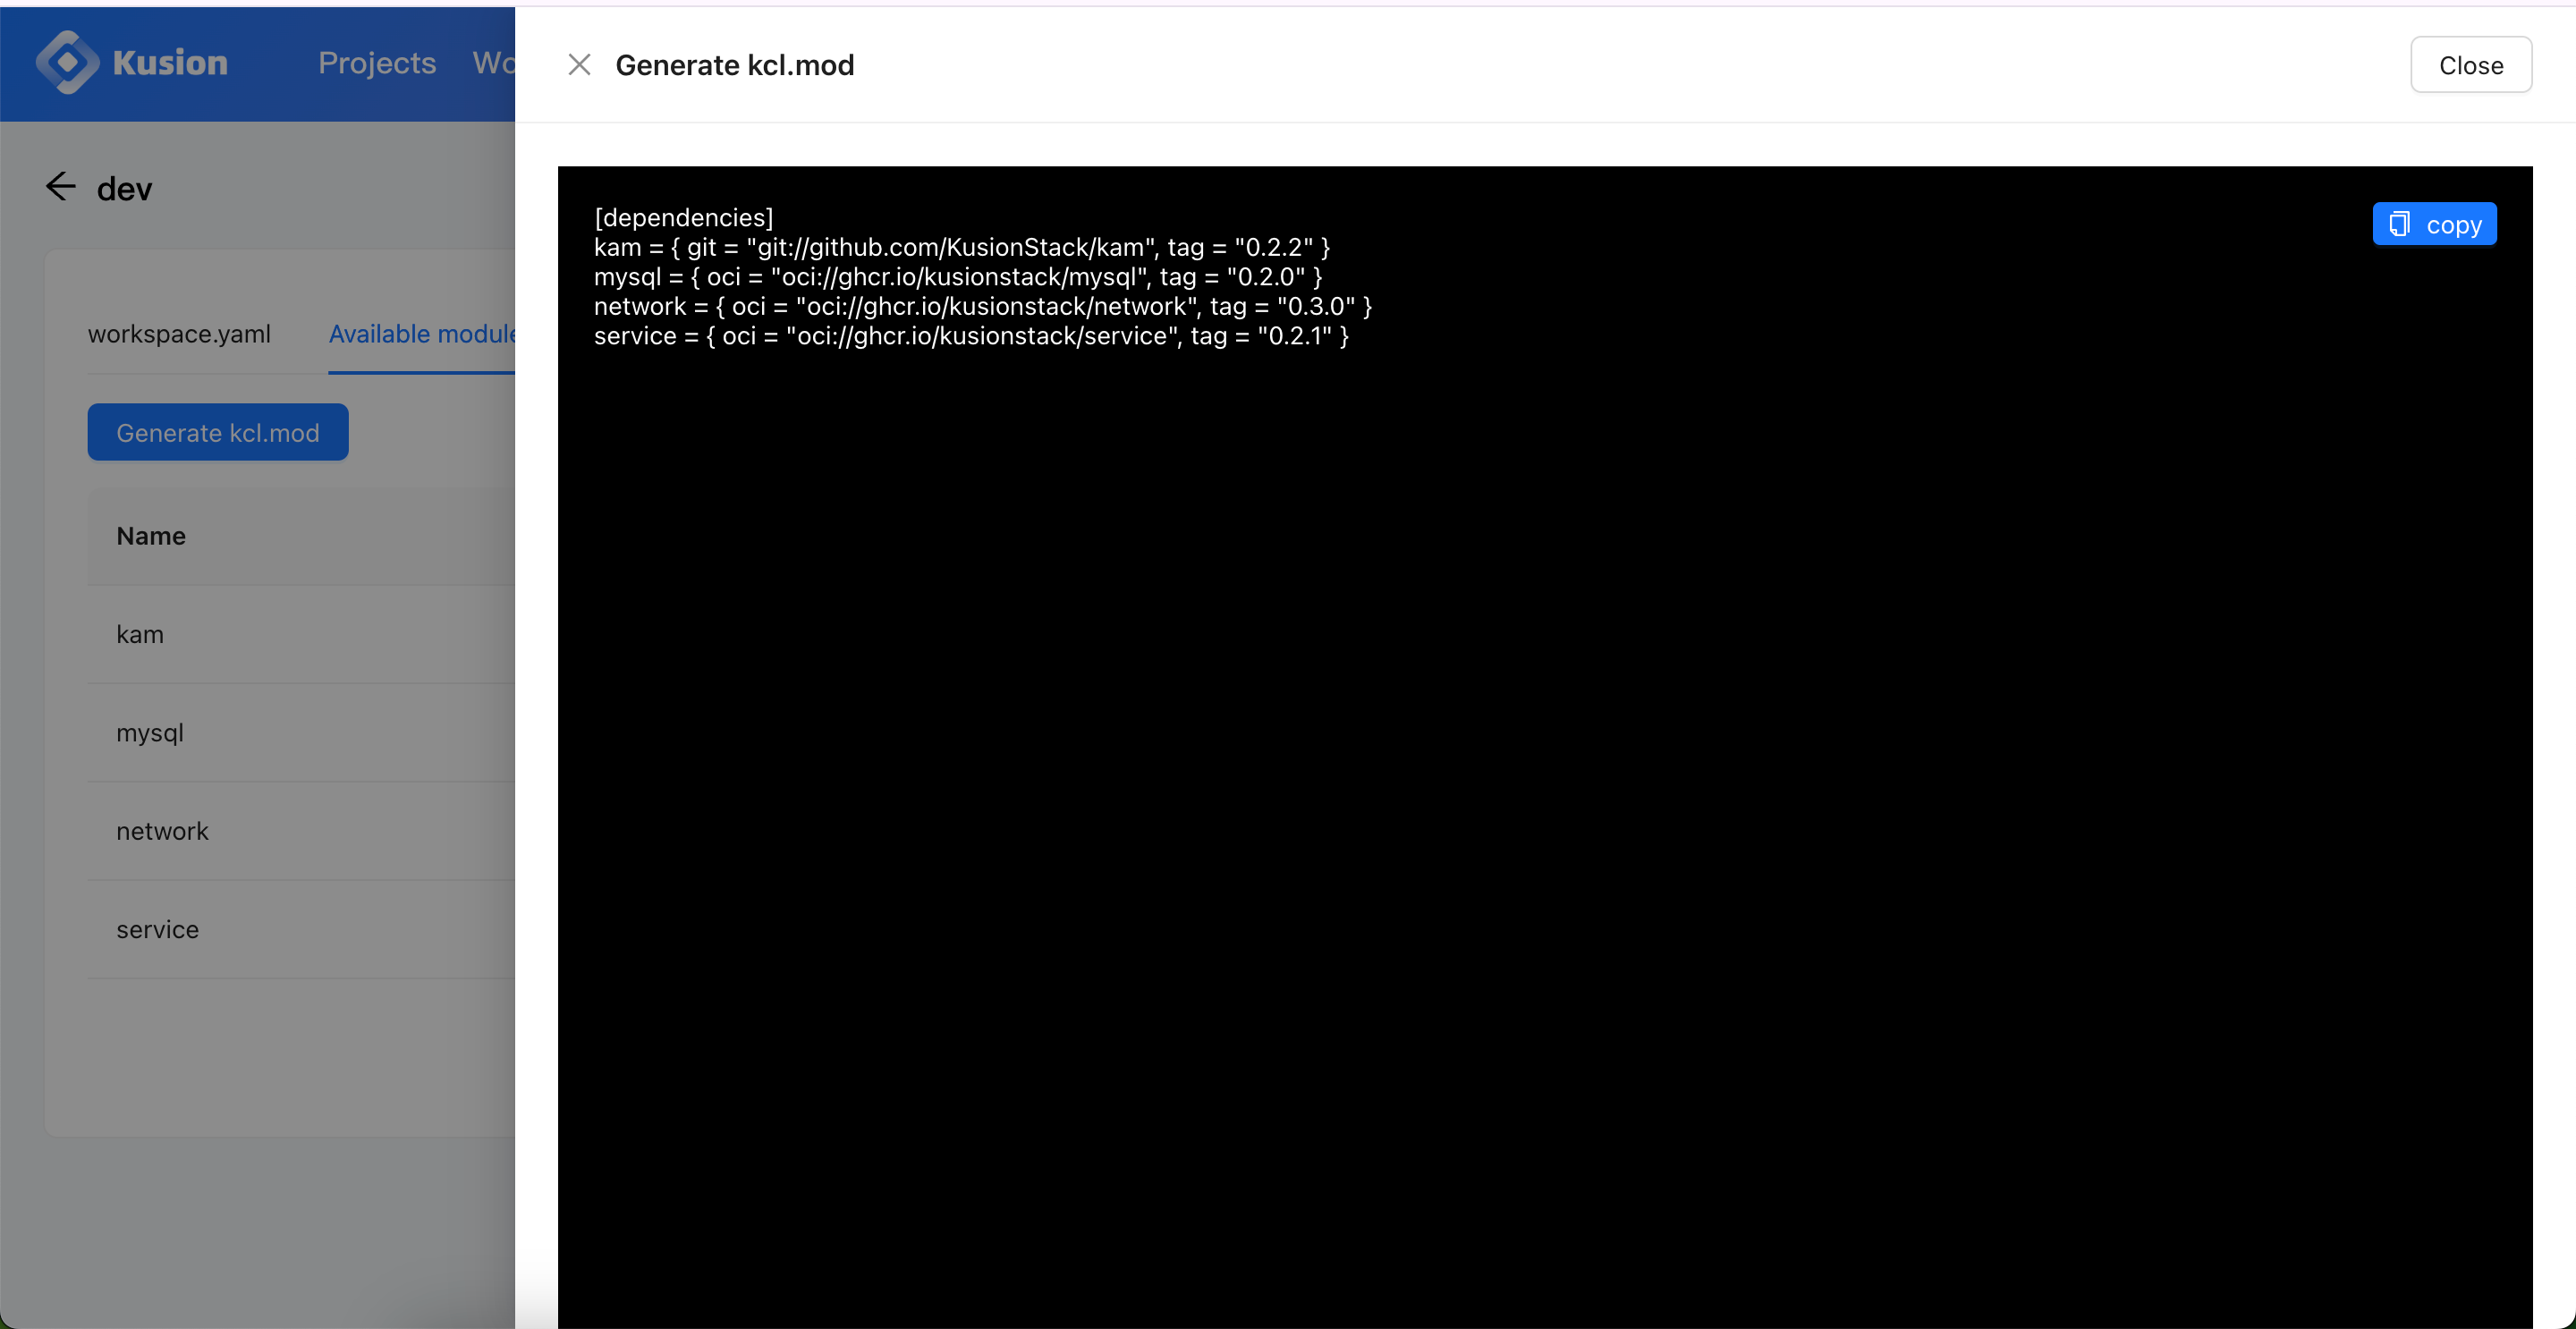
We can copy and paste to save the updated kcl.mod.
Create Project and Stack
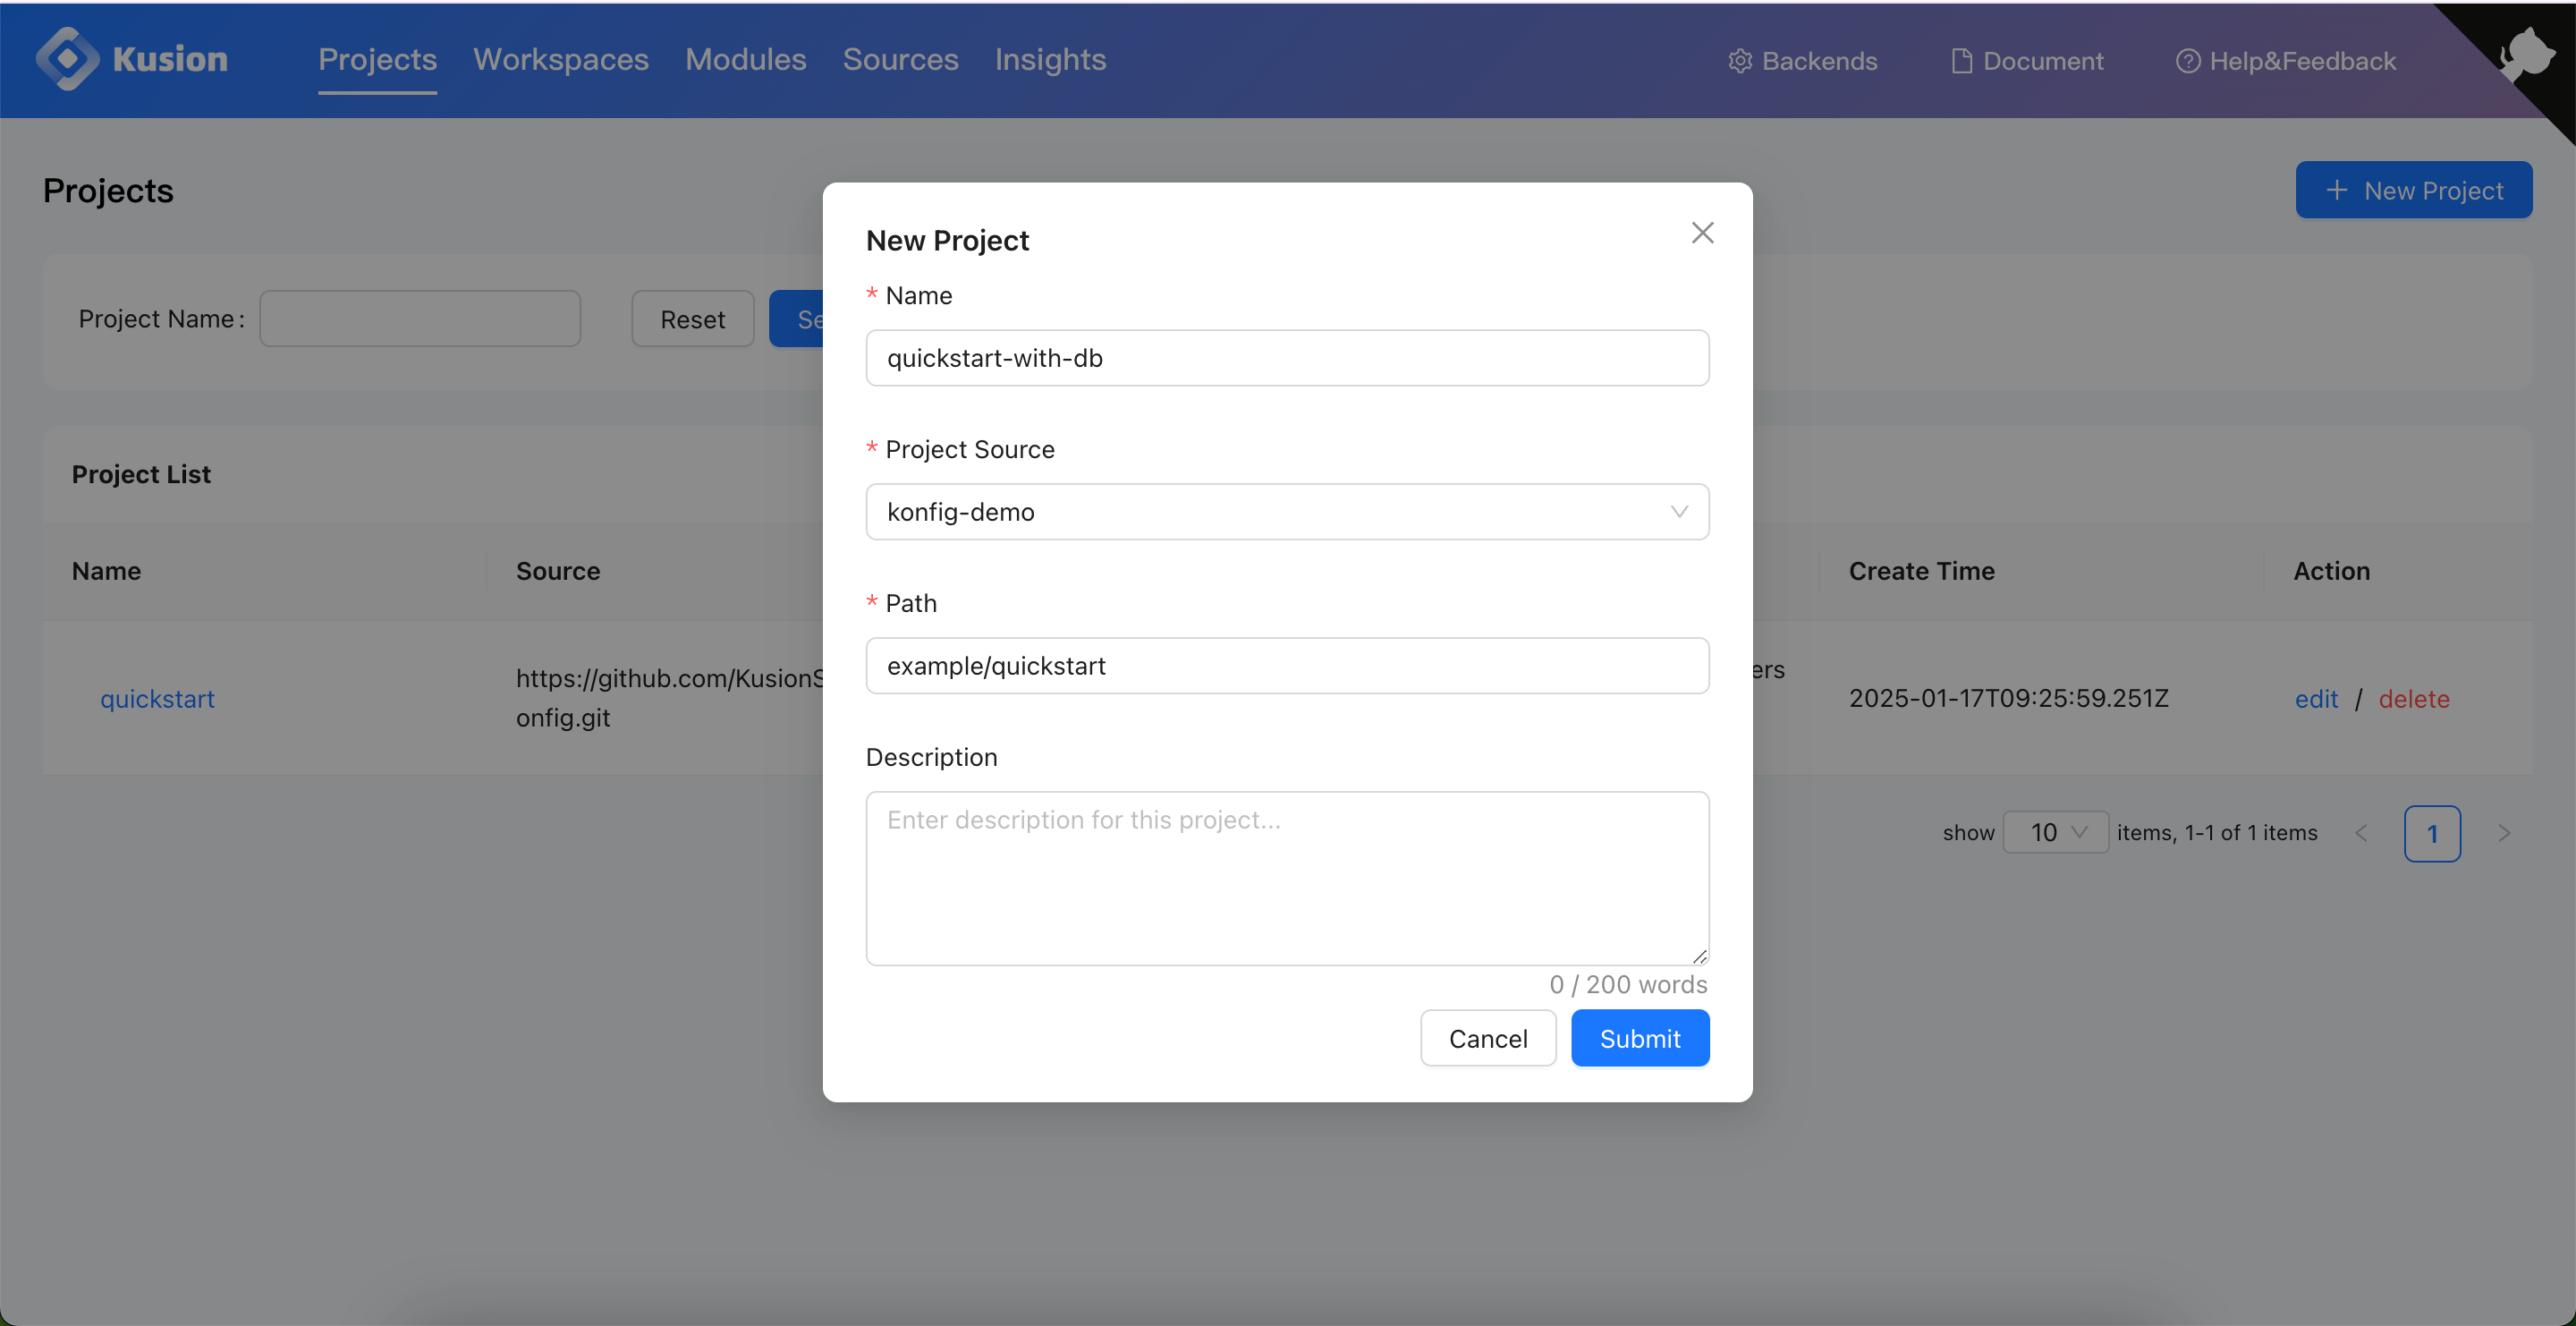
Next, we can create a new Project with our own config code repo.
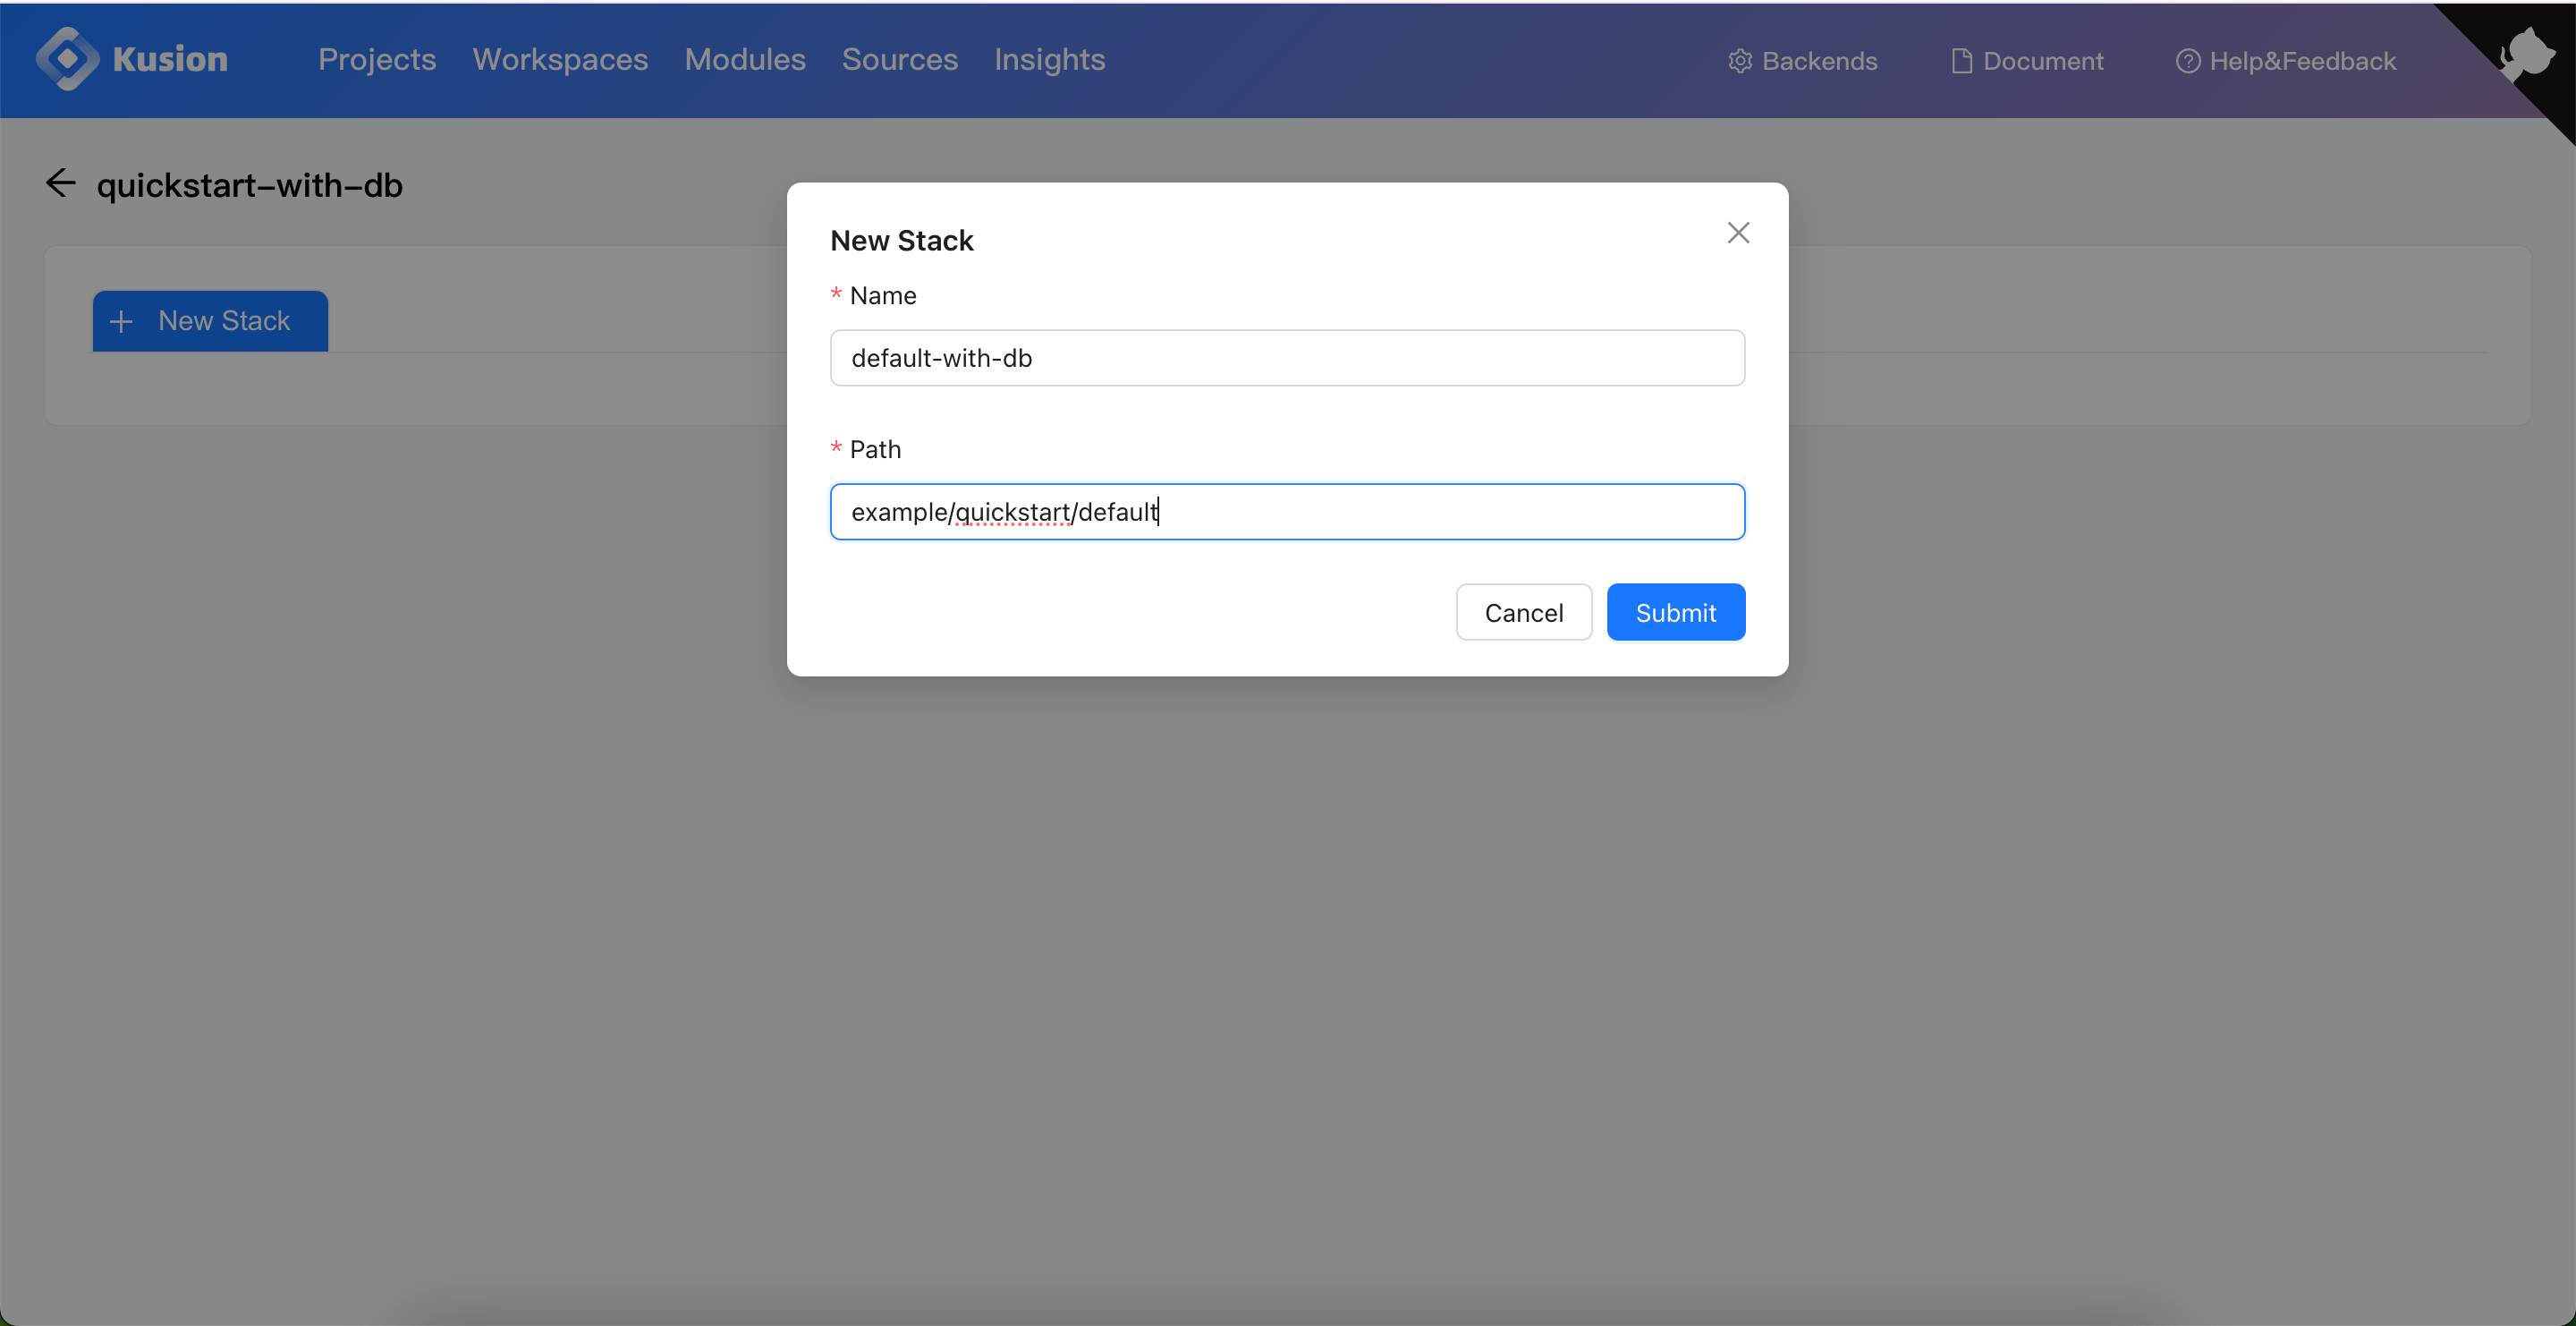
And similarly, create a new Stack.
Add MySQL Accessory
As you can see, the demo application page in this doc indicates that the MySQL database is not ready yet. Hence, we will now add a MySQL database as an accessory for the workload.
We should first update the module dependencies in the default/kcl.mod with the ones we previously stored, so that we can use the MySQL module in the configuration codes.
[dependencies]
kam = { git = "git://github.com/KusionStack/kam", tag = "0.2.2" }
mysql = { oci = "oci://ghcr.io/kusionstack/mysql", tag = "0.2.0" }
network = { oci = "oci://ghcr.io/kusionstack/network", tag = "0.3.0" }
service = { oci = "oci://ghcr.io/kusionstack/service", tag = "0.2.1" }
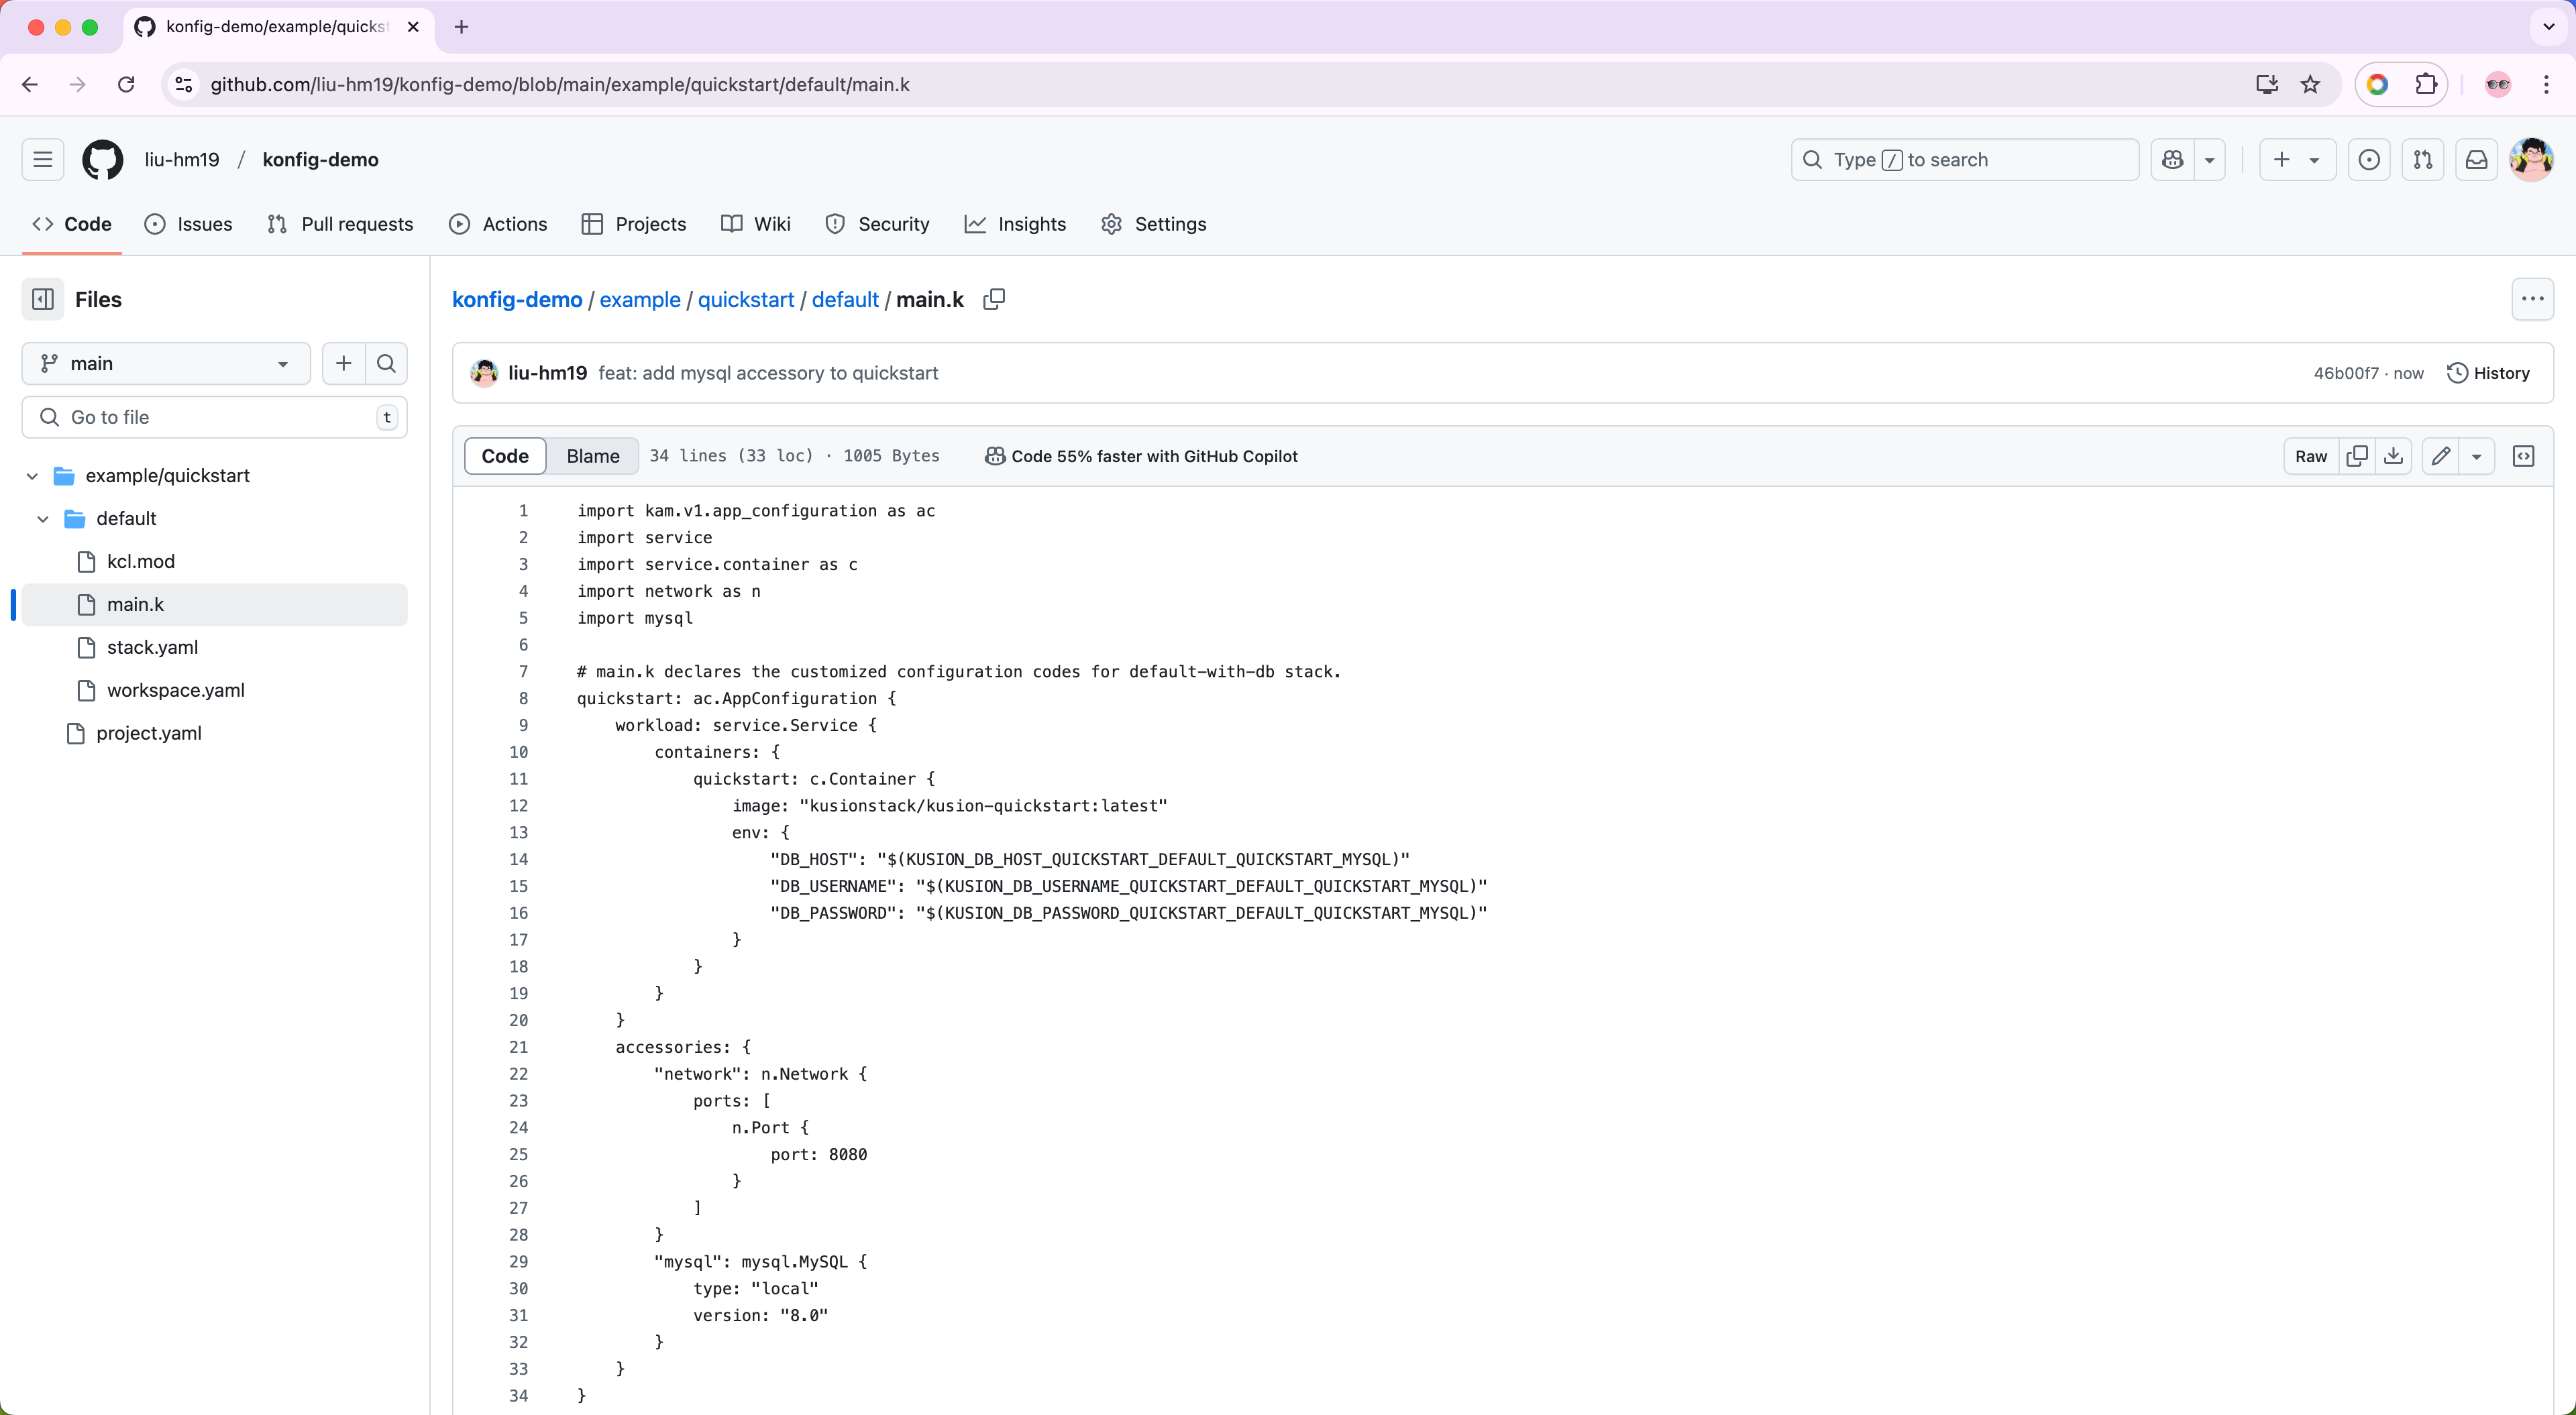
We can update the default/main.k with the following configuration codes:
import kam.v1.app_configuration as ac
import service
import service.container as c
import network as n
import mysql

# main.k declares the customized configuration codes for default-with-db stack.
quickstart: ac.AppConfiguration {
    workload: service.Service {
        containers: {
            quickstart: c.Container {
                image: "kusionstack/kusion-quickstart:latest"
                env: {
                    "DB_HOST": "$(KUSION_DB_HOST_QUICKSTARTWITHDBDEFAULTWITHDBQU)"
                    "DB_USERNAME": "$(KUSION_DB_USERNAME_QUICKSTARTWITHDBDEFAULTWITHDBQU)"
                    "DB_PASSWORD": "$(KUSION_DB_PASSWORD_QUICKSTARTWITHDBDEFAULTWITHDBQU)"
                }
            }
        }
    }
    accessories: {
        "network": n.Network {
            ports: [
                n.Port {
                    port: 8080
                }
            ]
        }
        "mysql": mysql.MySQL {
            type: "local"
            version: "8.0"
        }
    }
}
The configuration codes above declare a local mysql.MySQL with the engine version of 8.0 as an accessory for the application workload. The necessary Kubernetes resources for deploying and using the local MySQL database will be generated and users can get the host, username and password of the database through the MySQL Credentials And Connectivity of Kusion in application containers.
For more information about the naming convention of Kusion built-in MySQL module, you can refer to Module Naming Convention.
After that, we need to update the remote repository with the modified config code files.
Application Delivery
Now we can start to run the application delivery!
Preview Changes
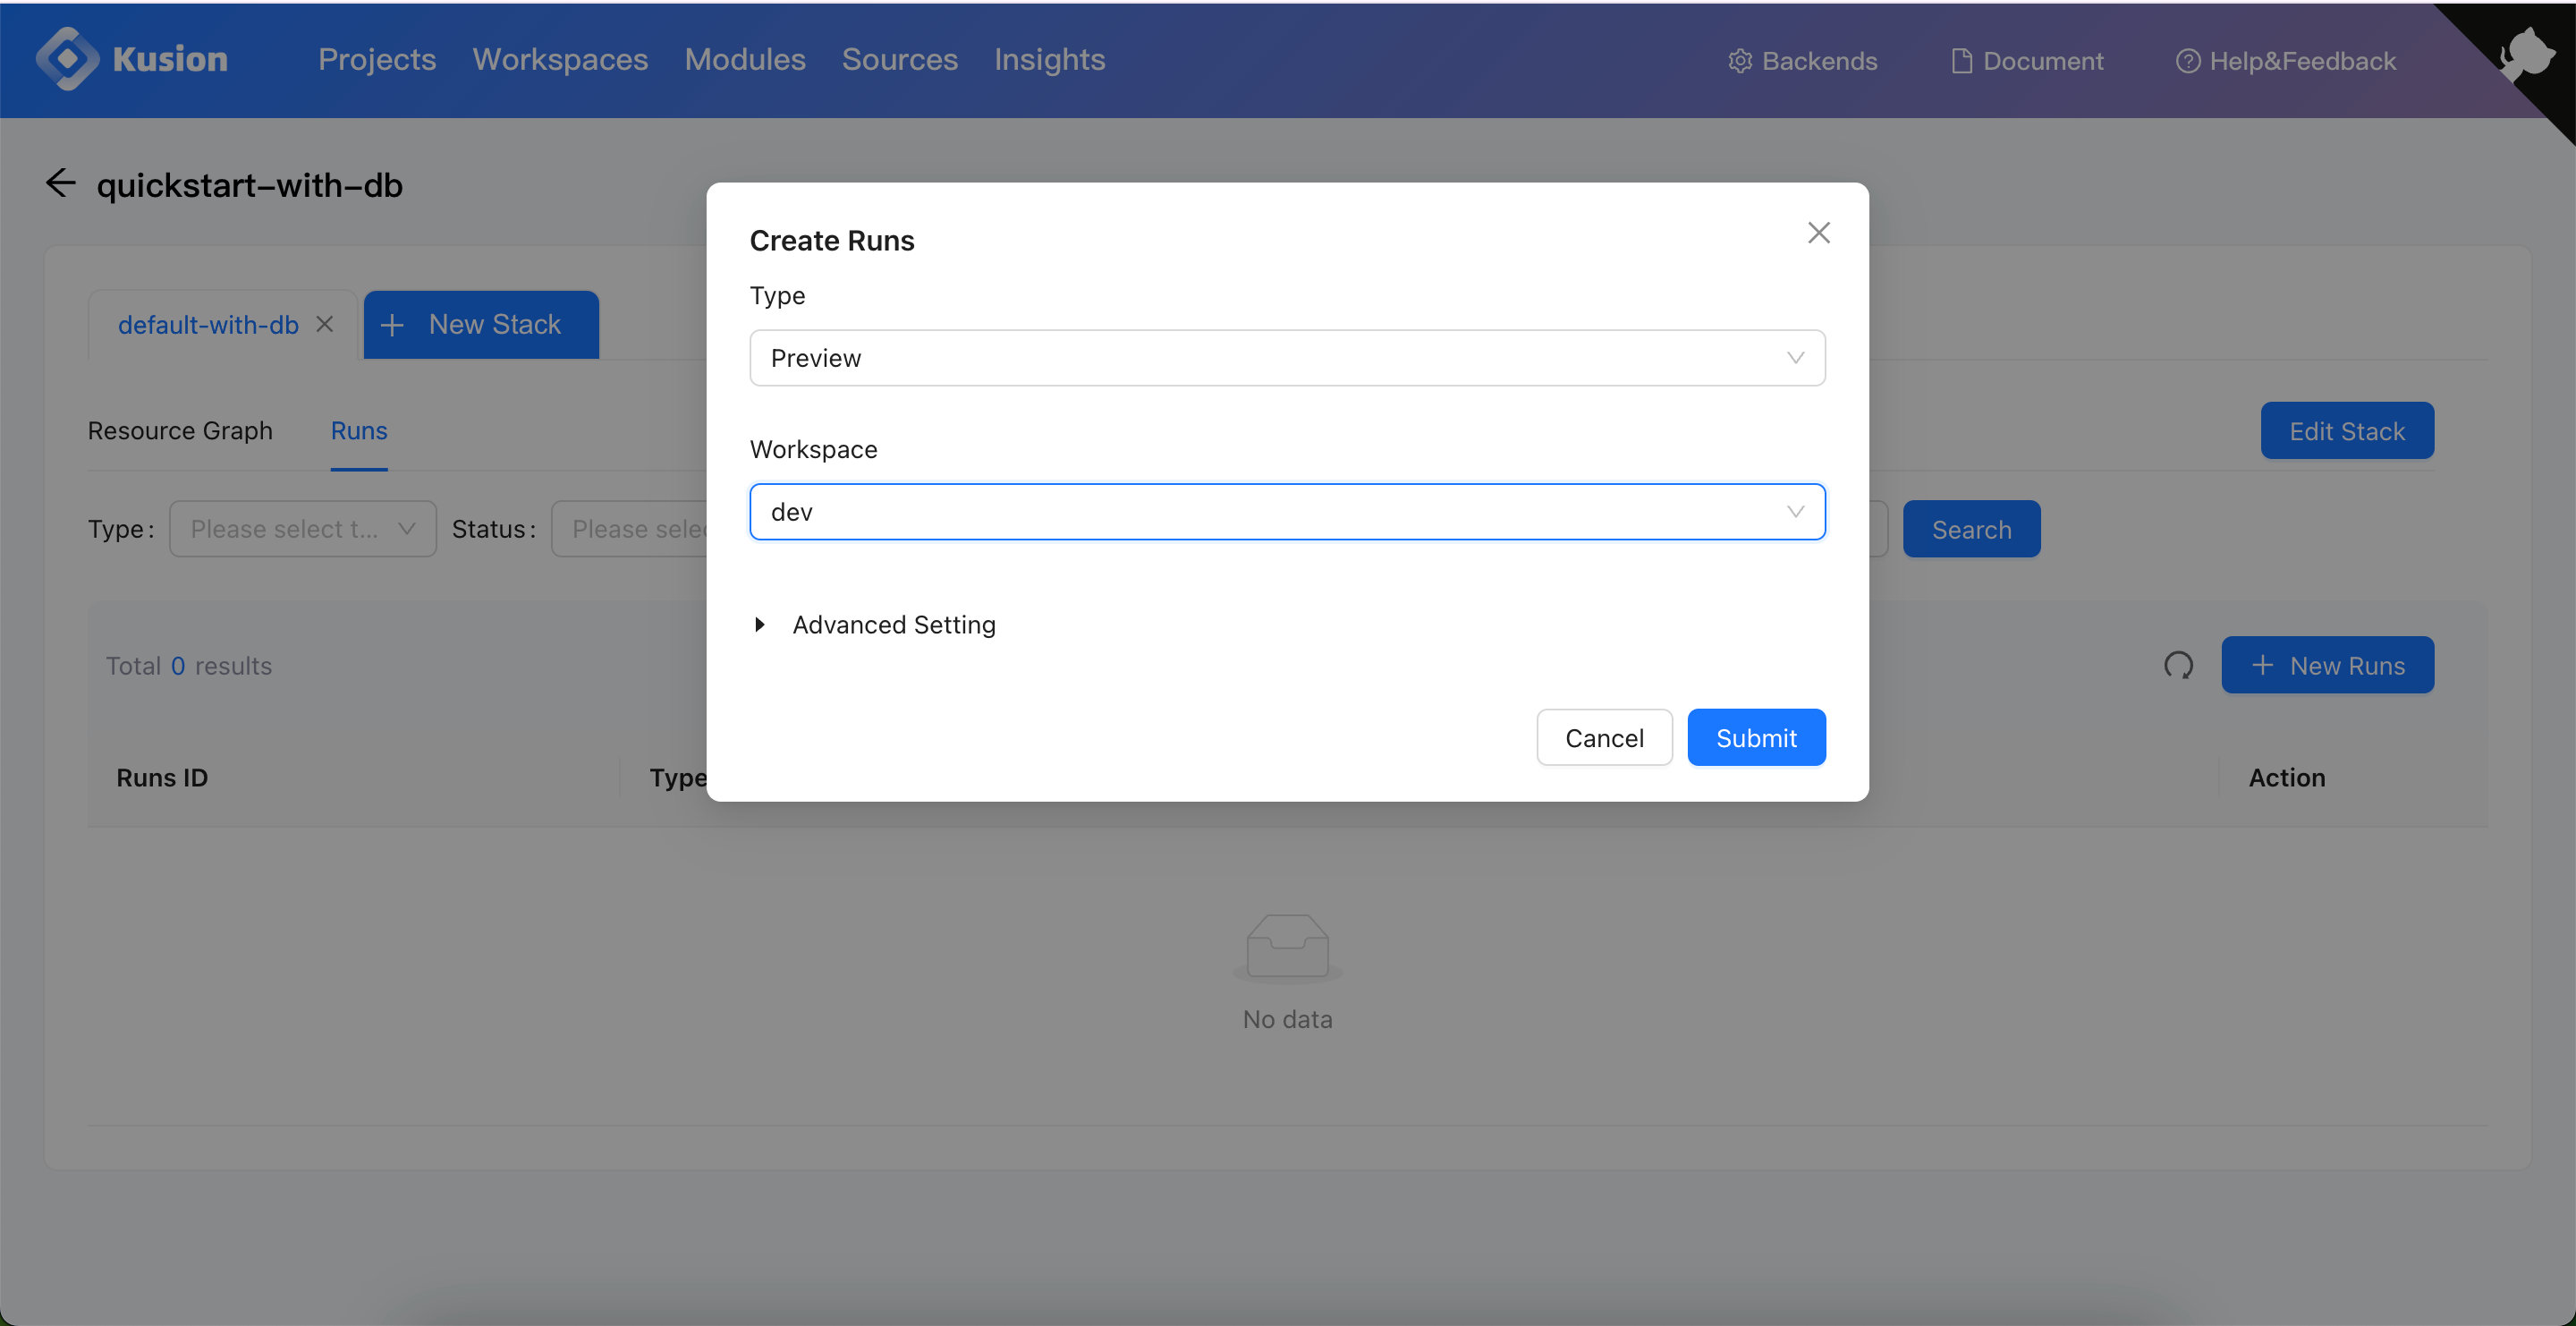
We can first preview the changes to the application resources that are going to be deployed to the dev workspace.
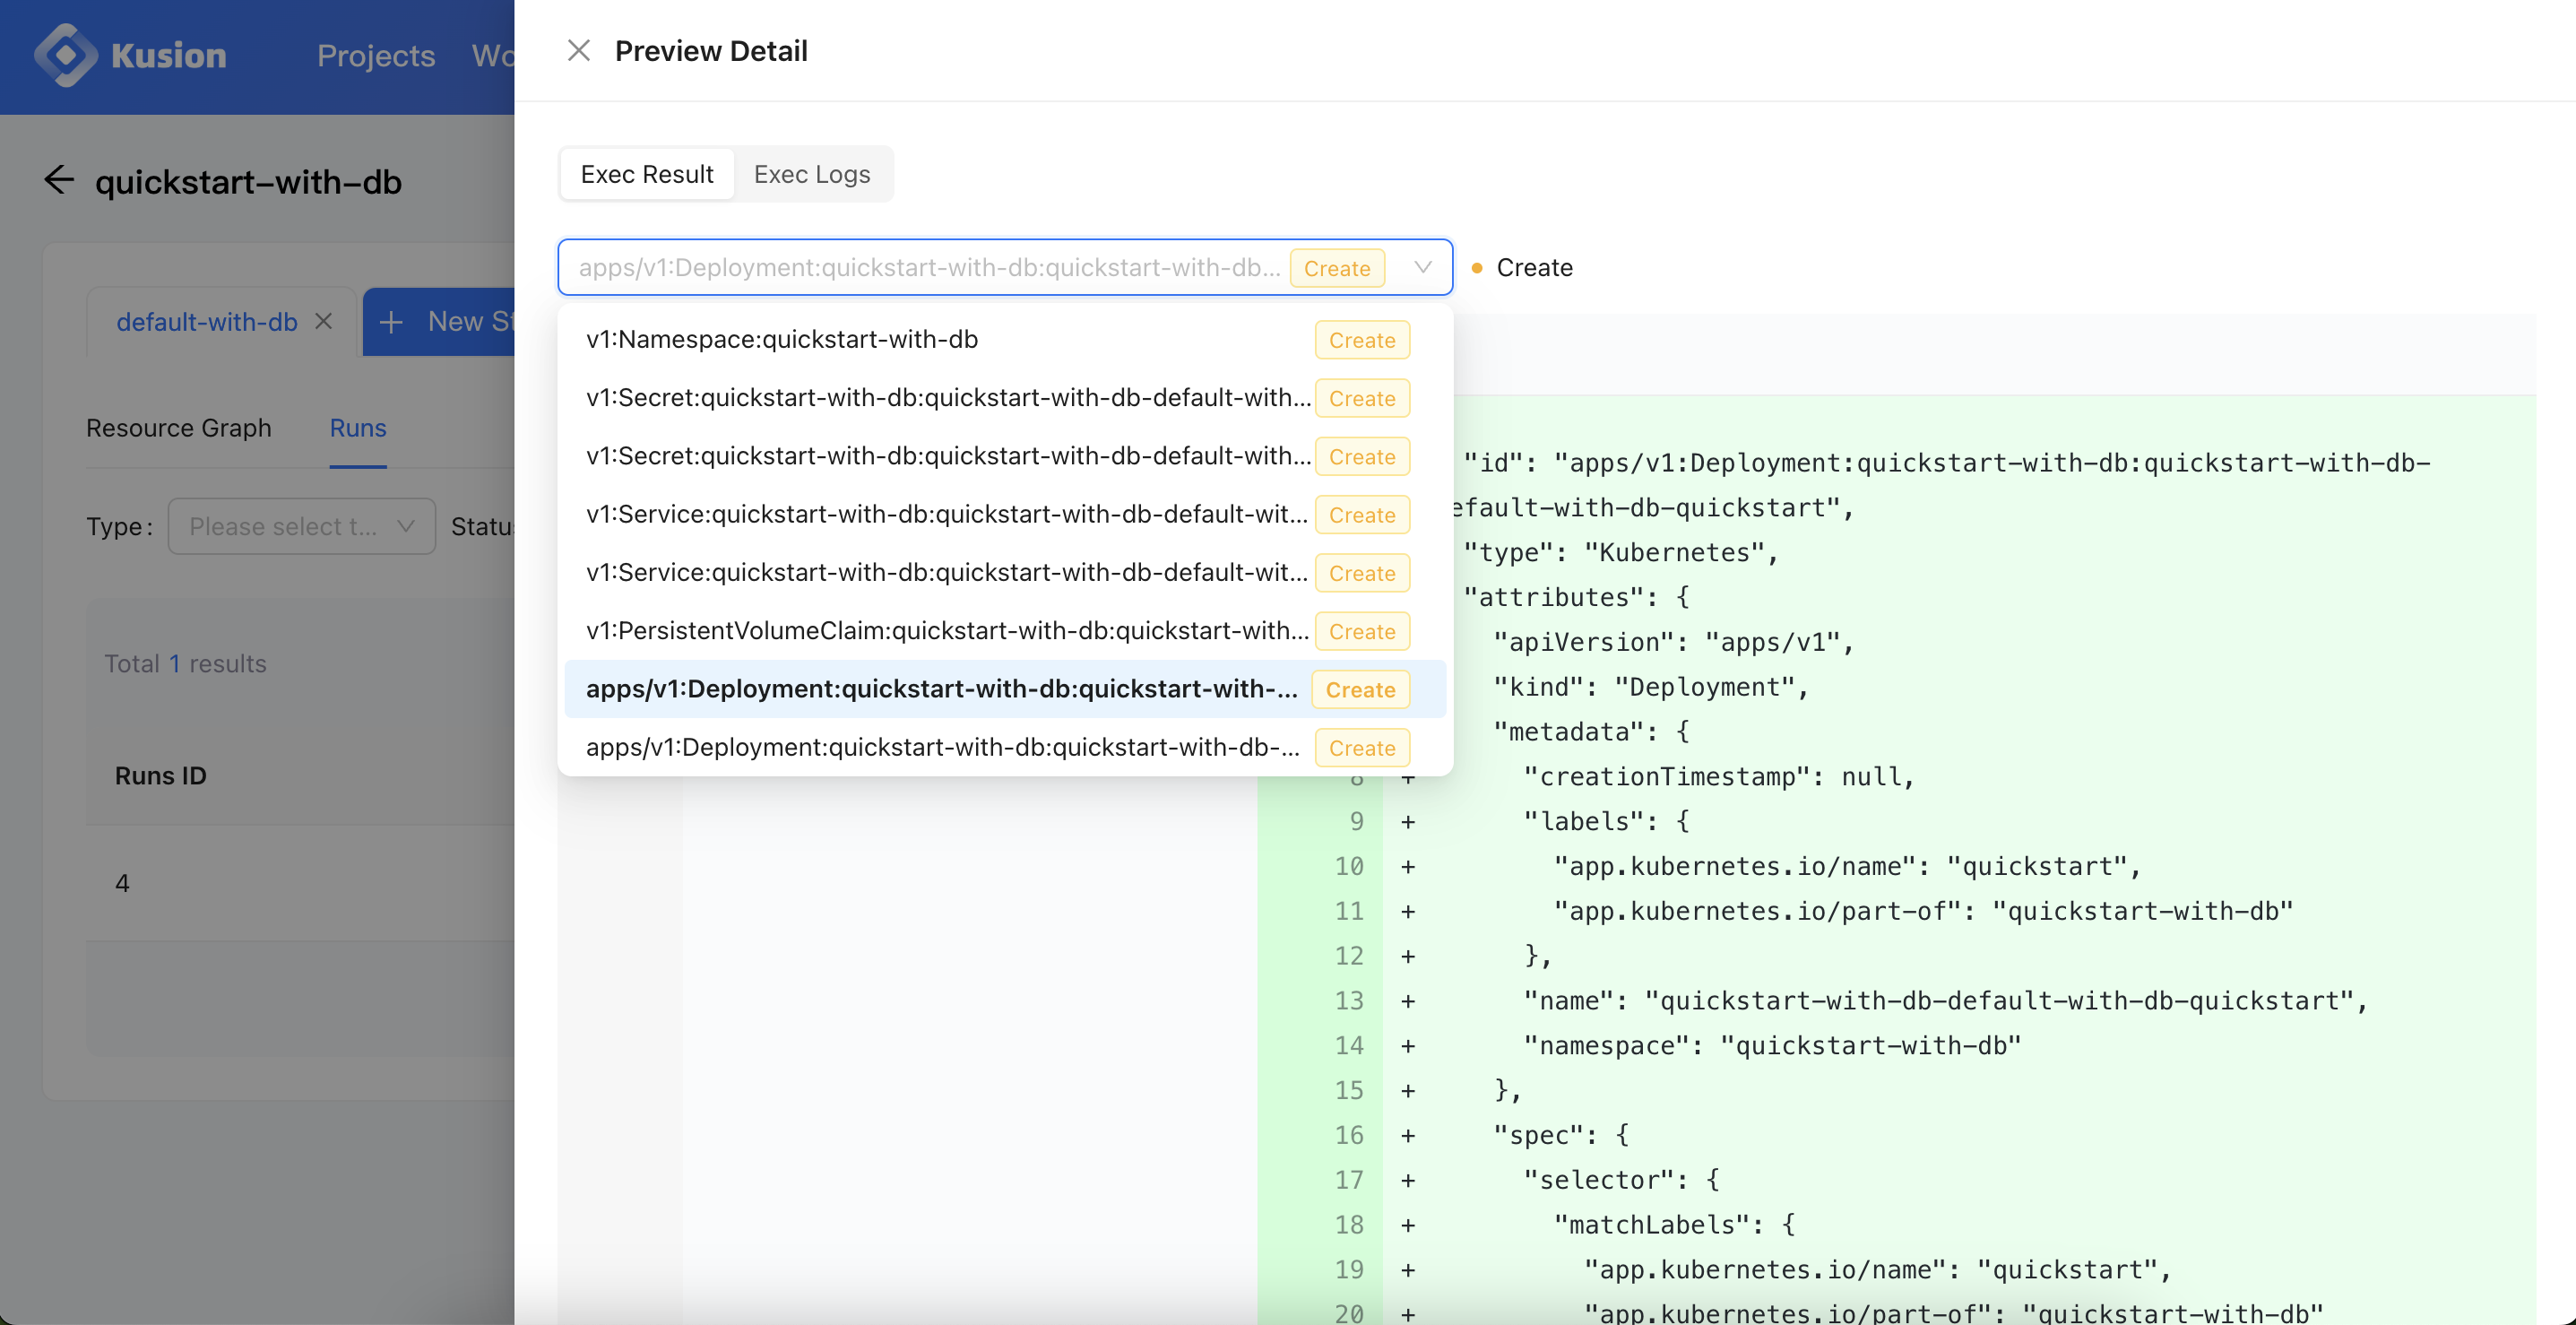
We can click the Detail button to view the Preview results, and we can find that compared to the results in this doc, the mysql accessory has brought us database related Kubernetes resources.
Apply Resources
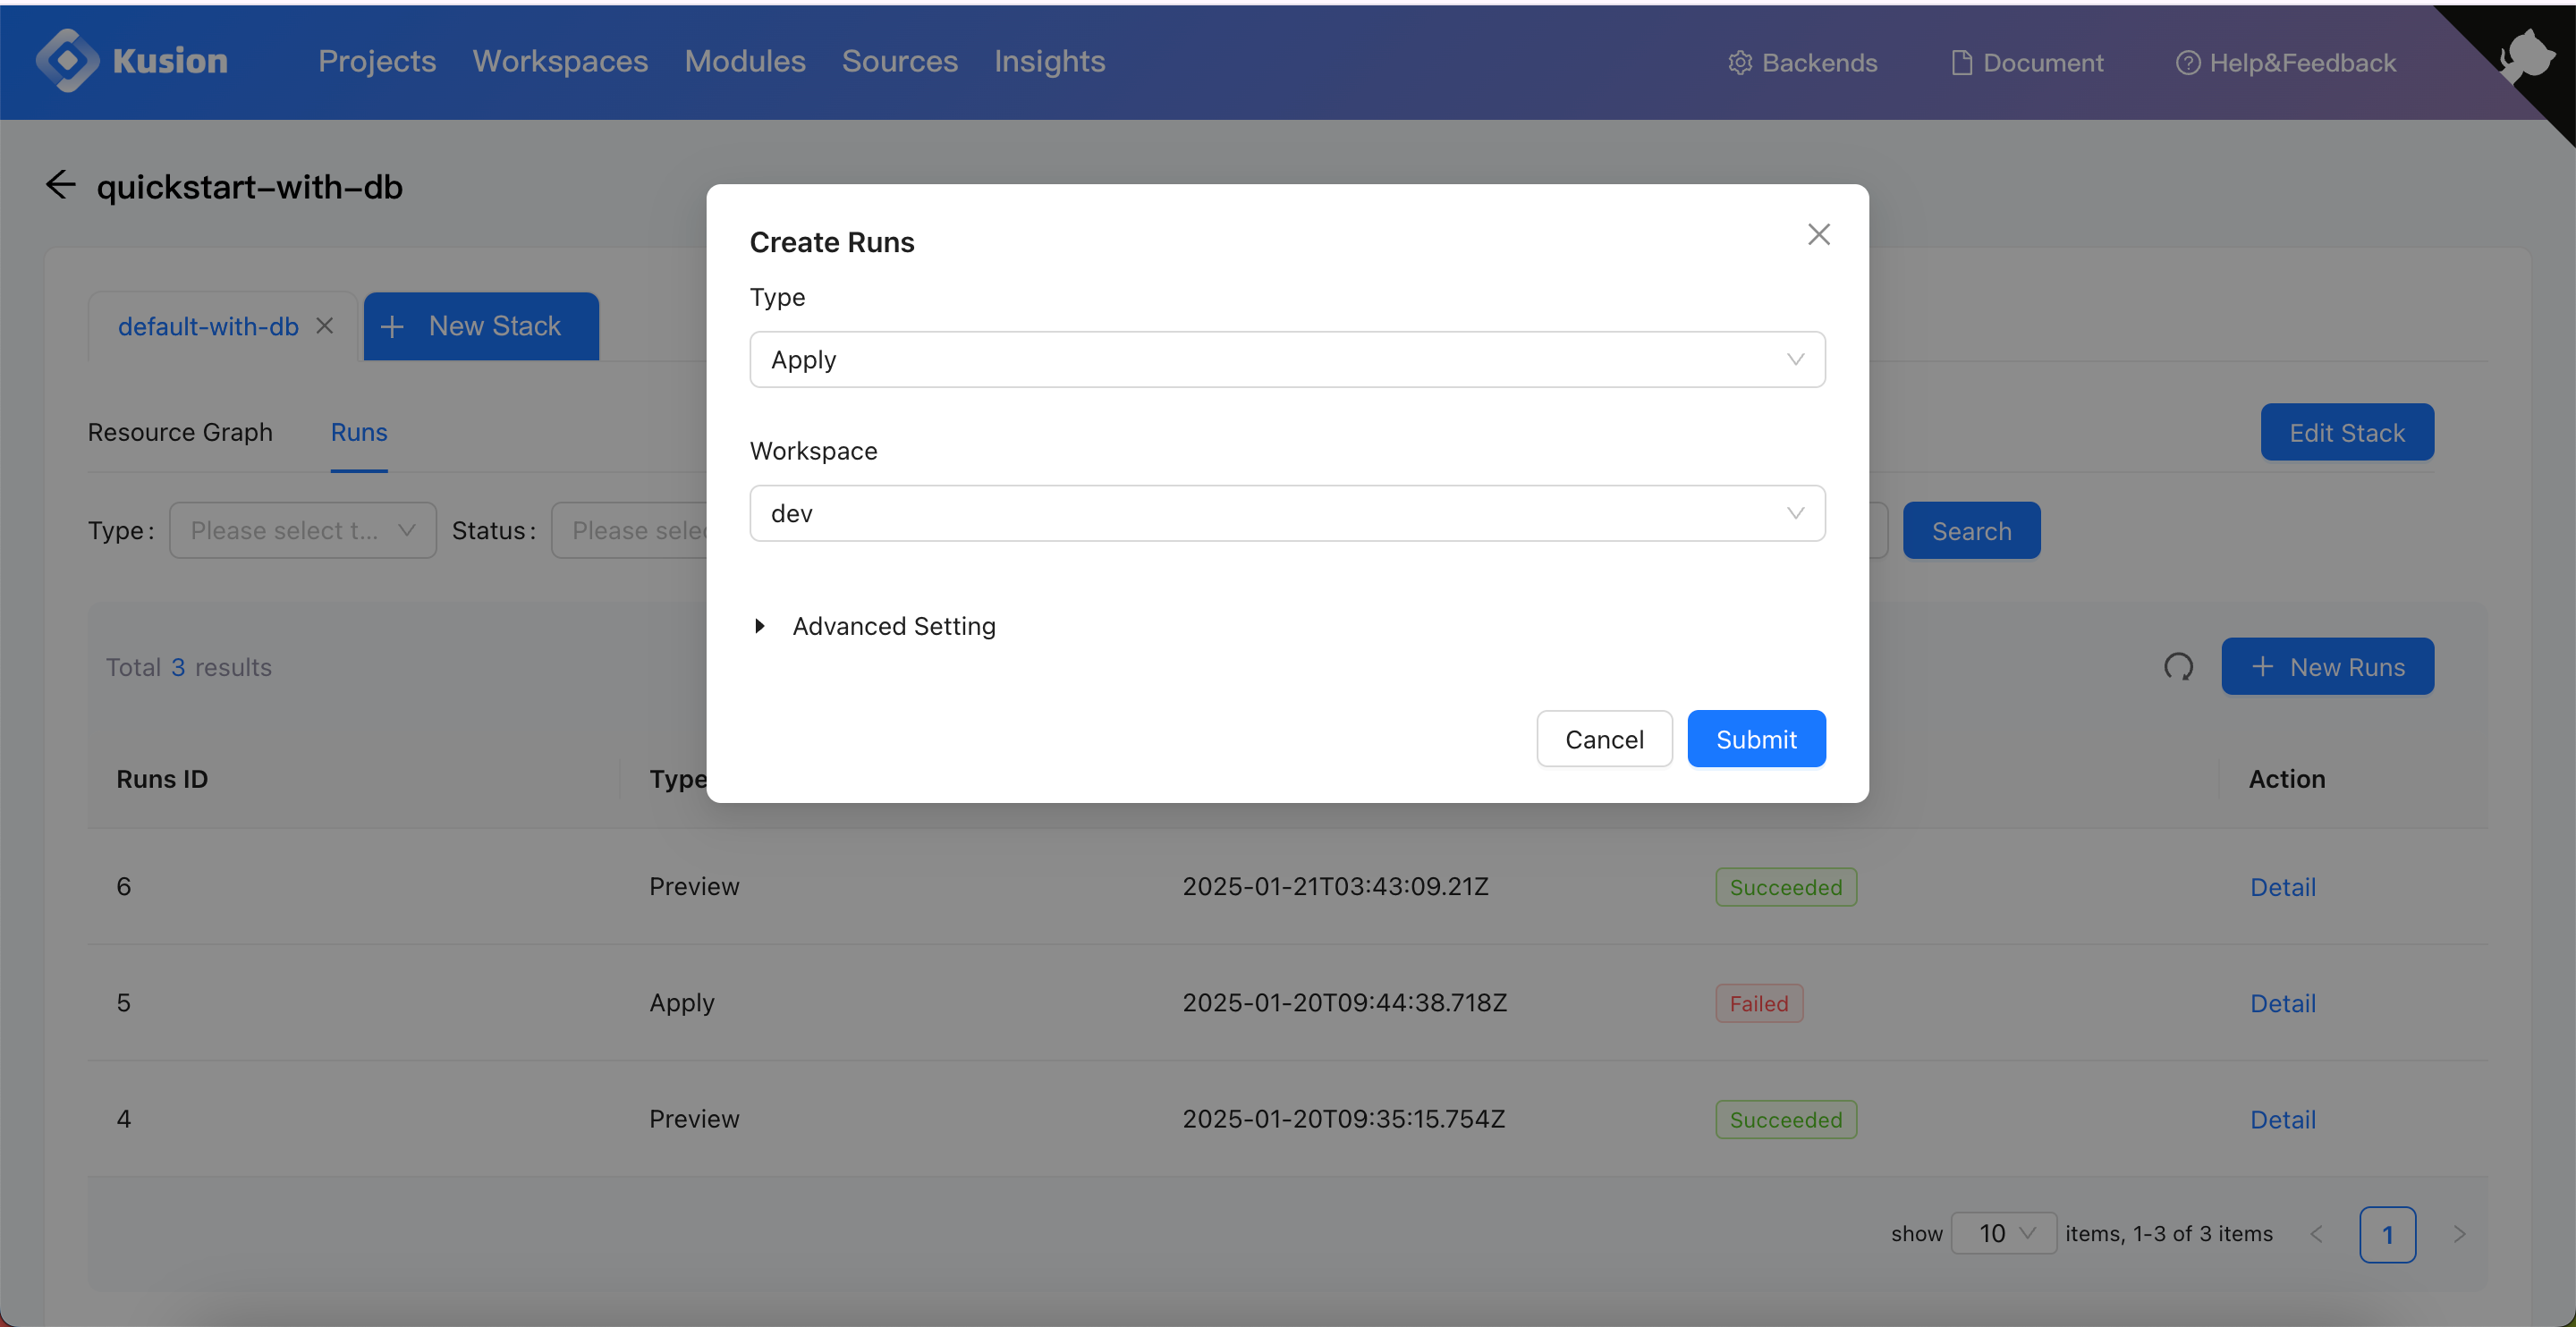
Then we can create a Run operation of the type of Apply to deploy the previewed application resources to the Kubernetes cluster corresponding to the dev workspace.
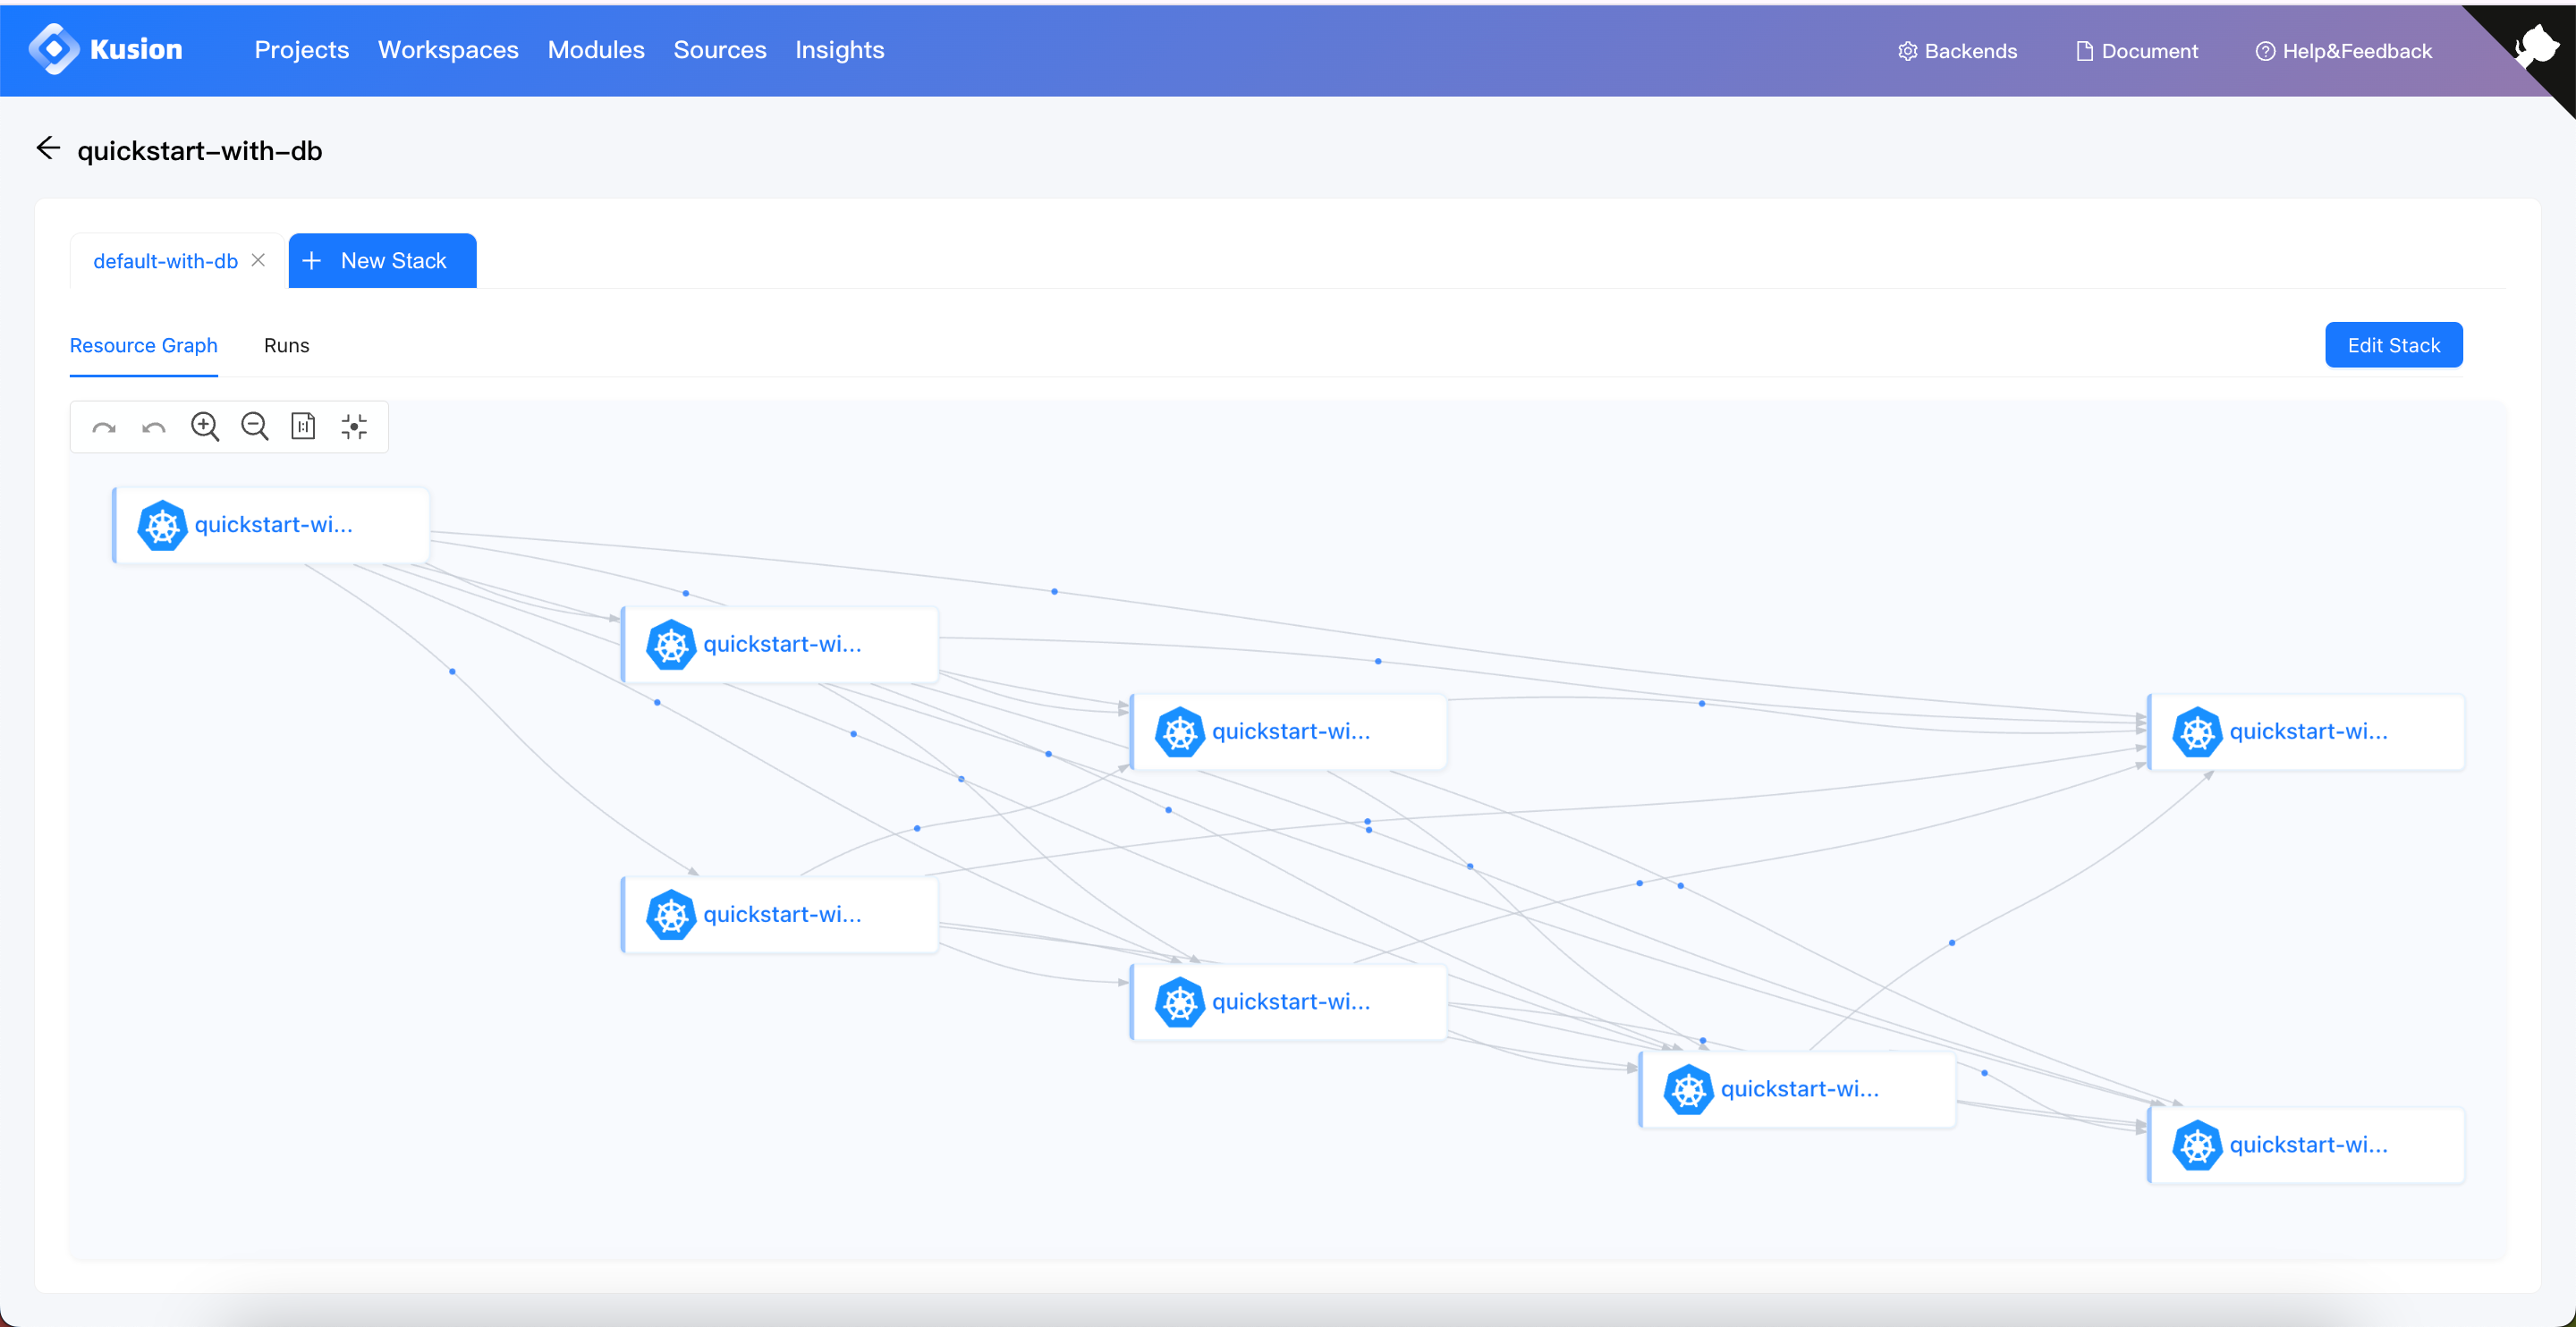
After successfully completing the Apply, we can check the application resource graph, which will display the topology of the application resources related to mysql database, including Kubernetes Deployment, Service, Secret, and PVC.
Next, we can expose the service of the application we just applied through port-forwarding Kubernetes Pod and verify it in the browser.
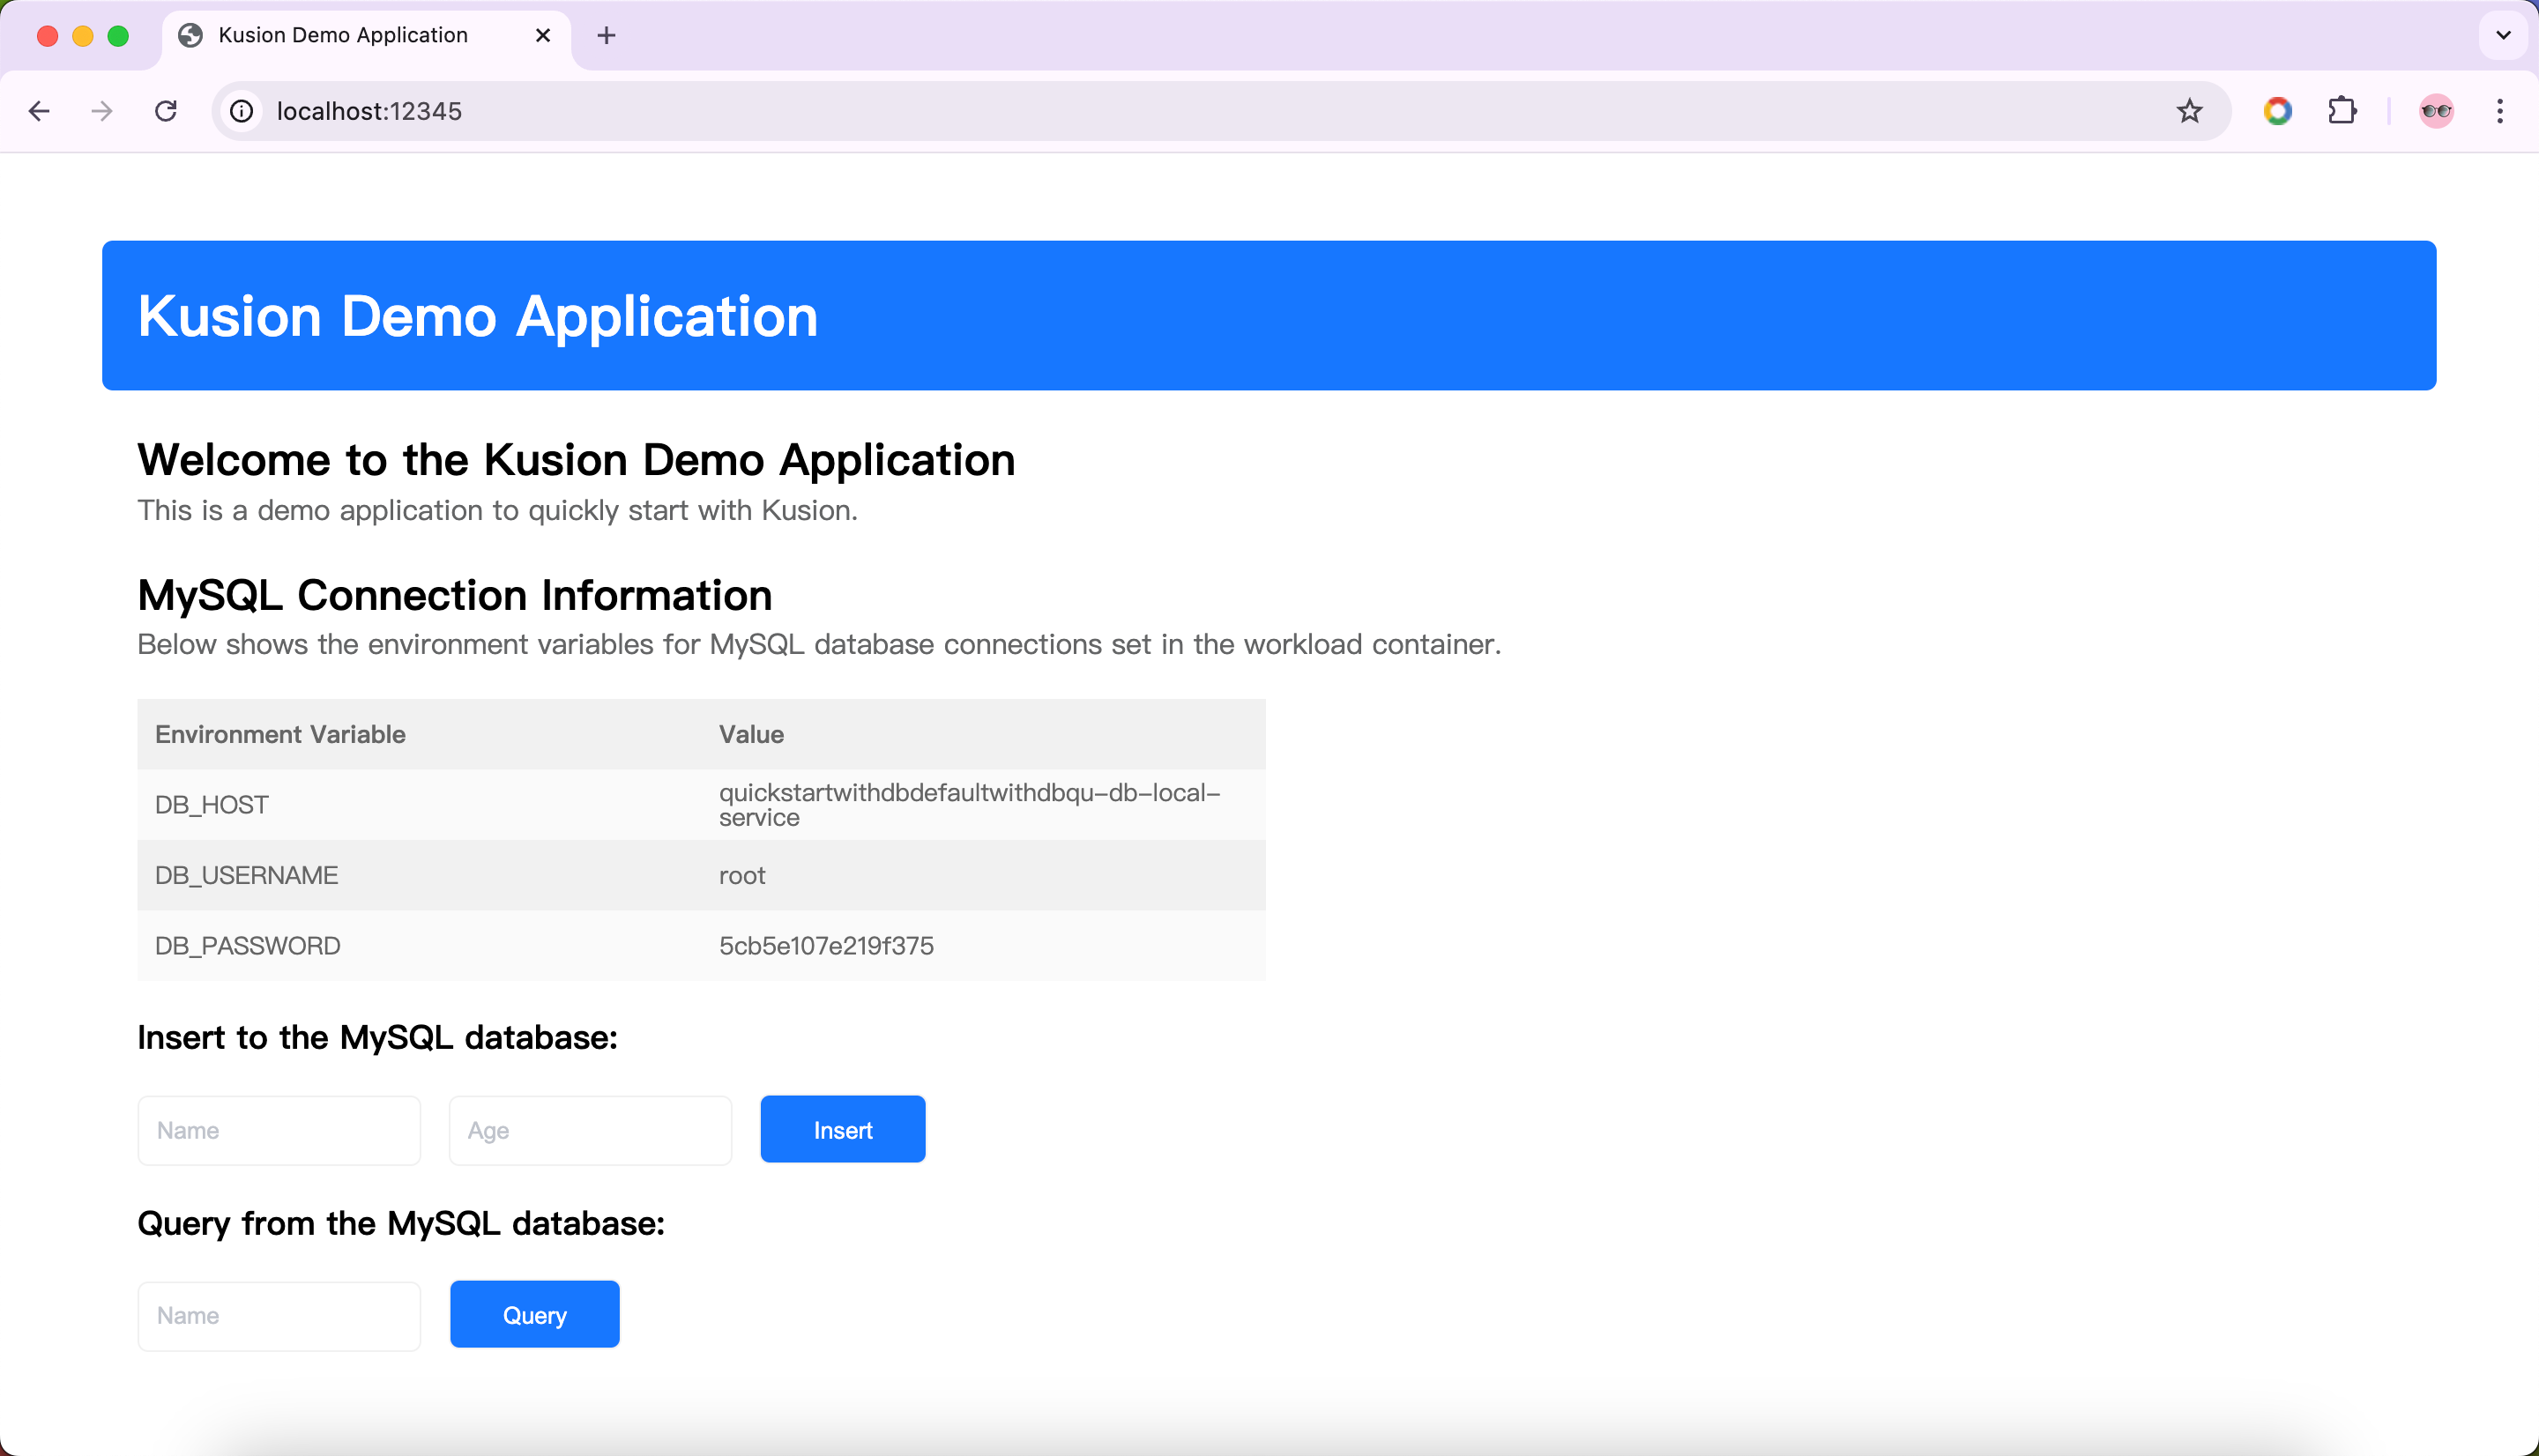
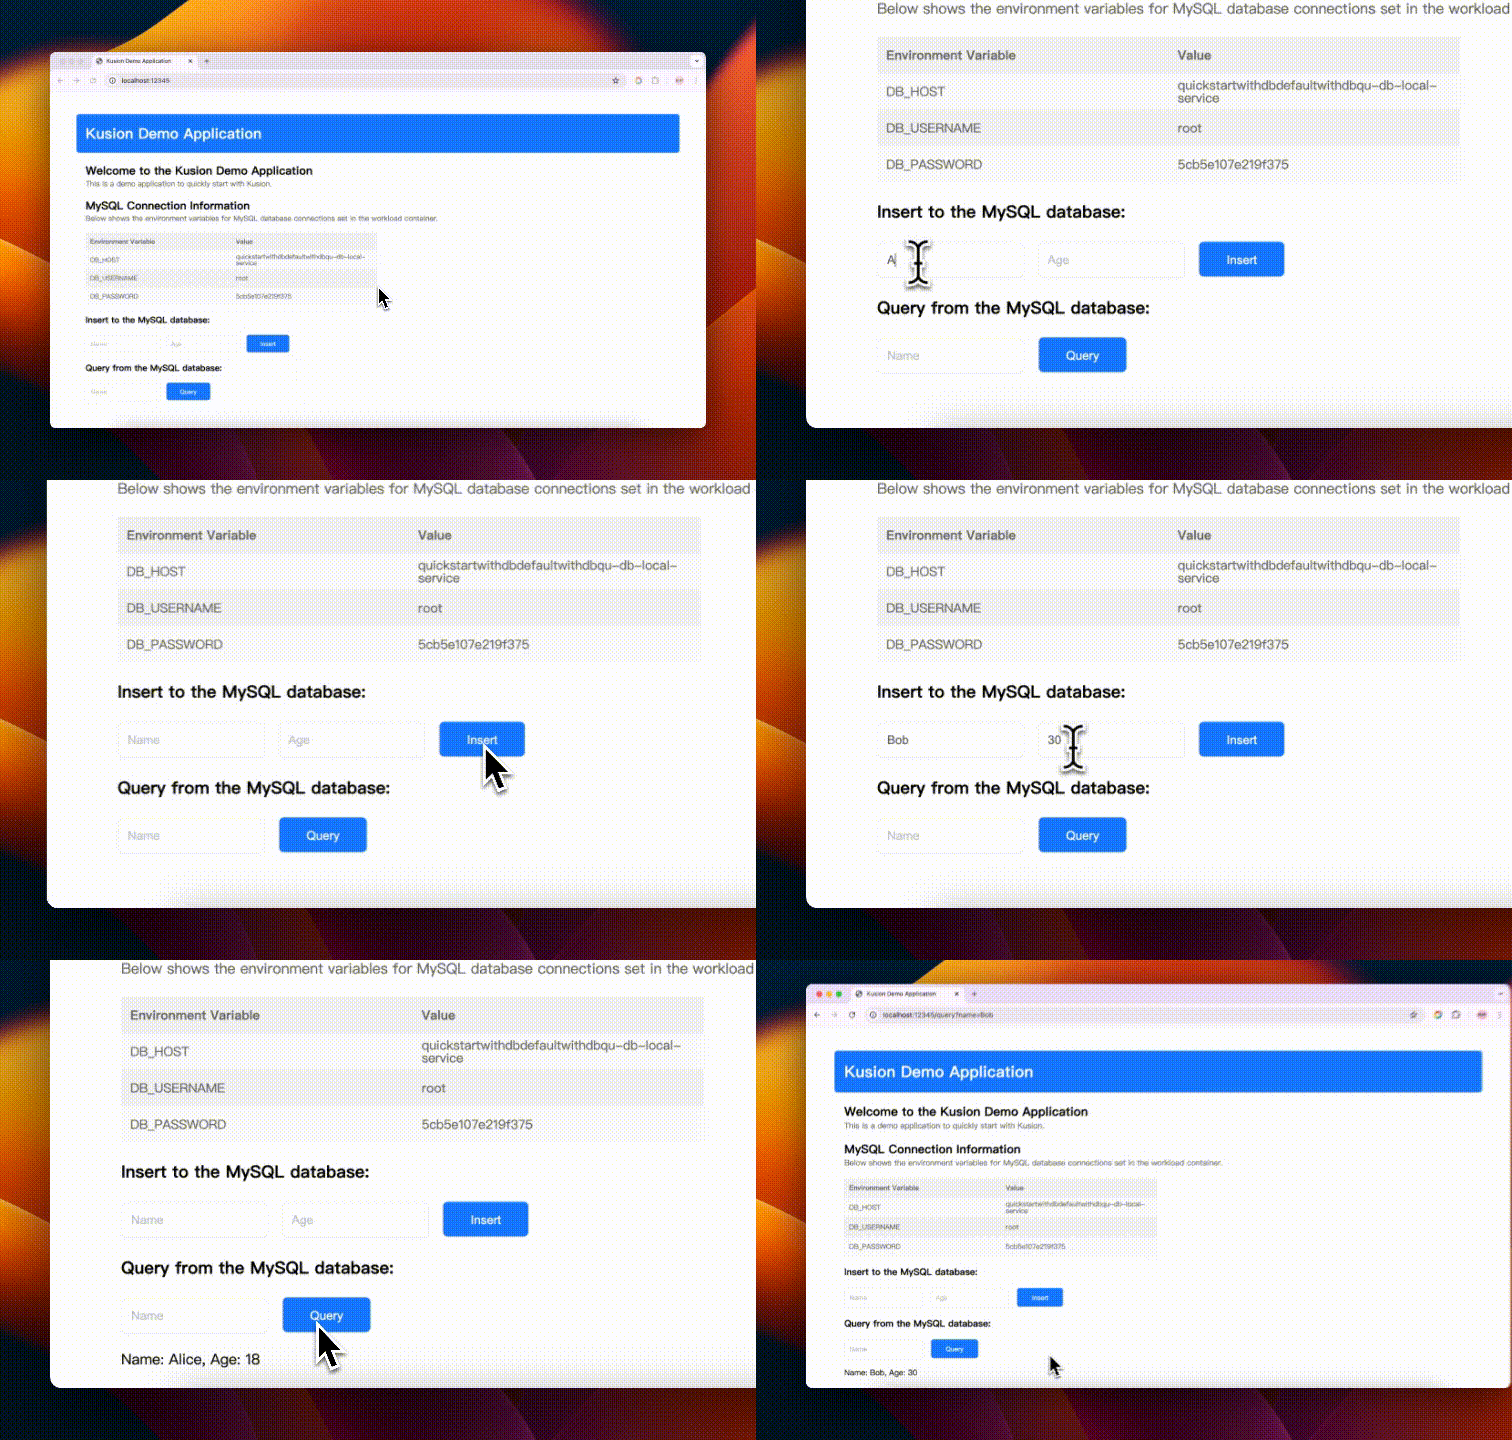
We can find that the application has successfully connected to the MySQL database, and the connection information is also printed on the page. Now please feel free to enjoy the demo application!
Delete Application
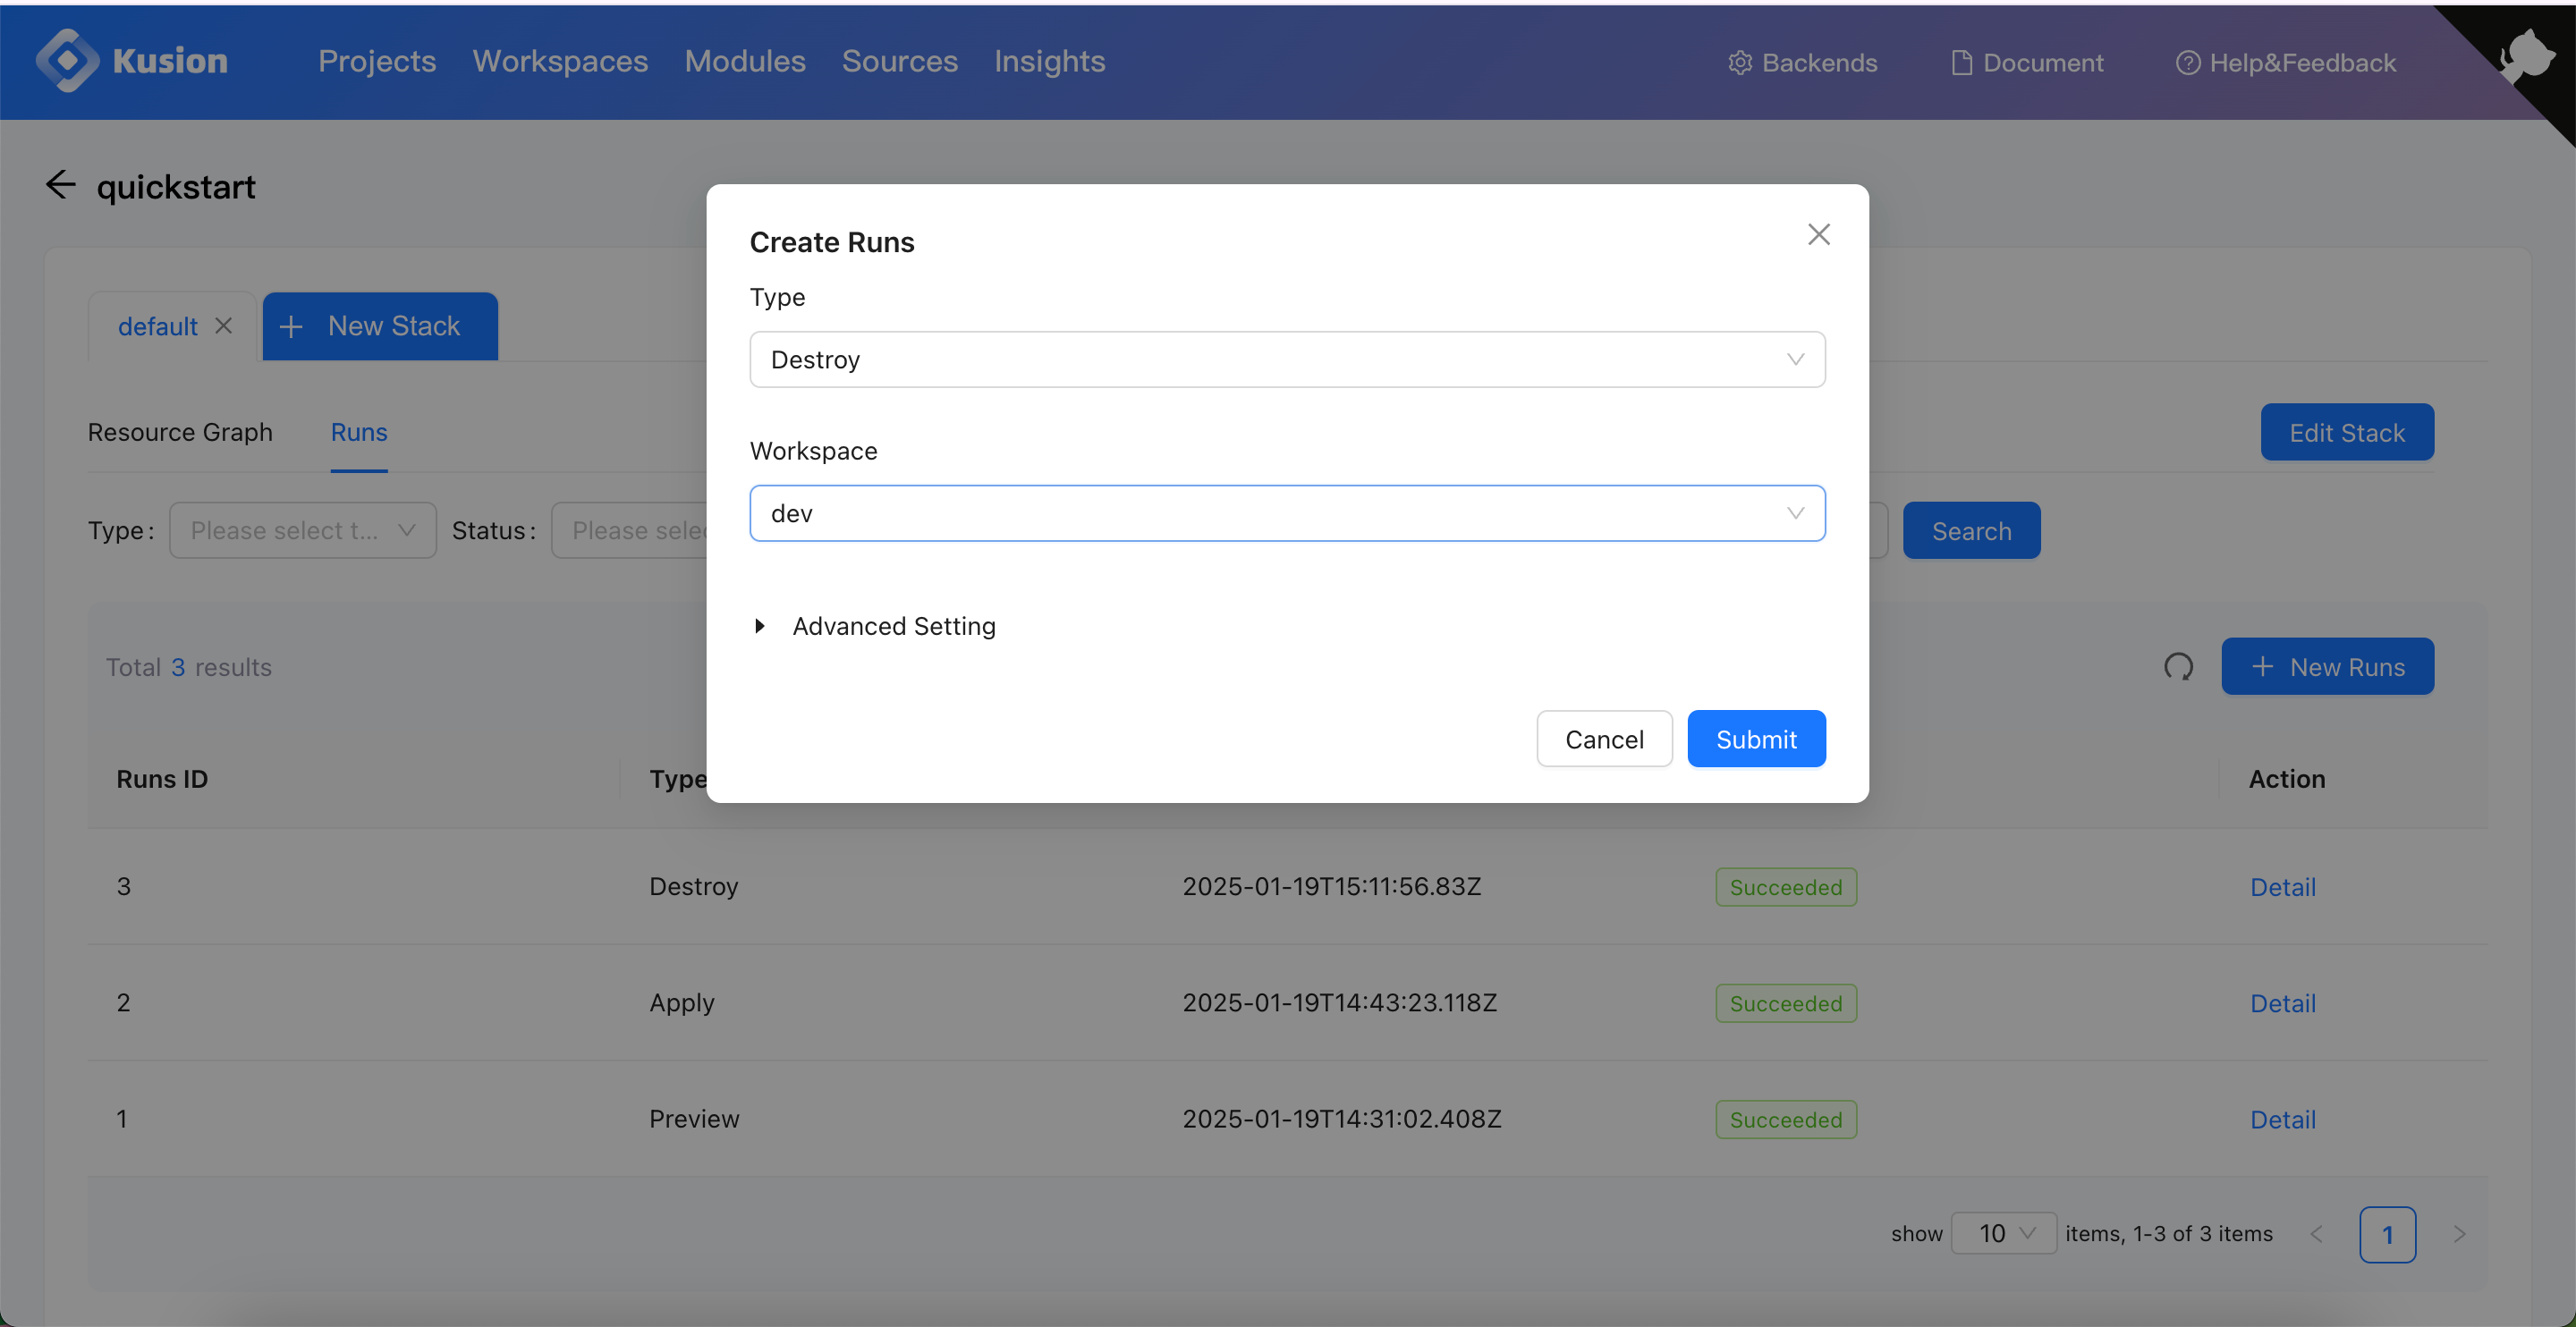
We can delete the quickstart demo workload and related accessory resources with the Destroy run:
