Deliver the WordPress Application with Cloud RDS
This tutorial will demonstrate how to deploy a WordPress application with Kusion, which relies on both Kubernetes and IaaS resources provided by cloud vendors. We can learn how to declare the Relational Database Service (RDS) to provide a cloud-based database solution with Kusion for our application from this article.
Prerequisites
- Install Kusion.
- Install kubectl CLI and run a Kubernetes or k3s or k3d or MiniKube cluster.
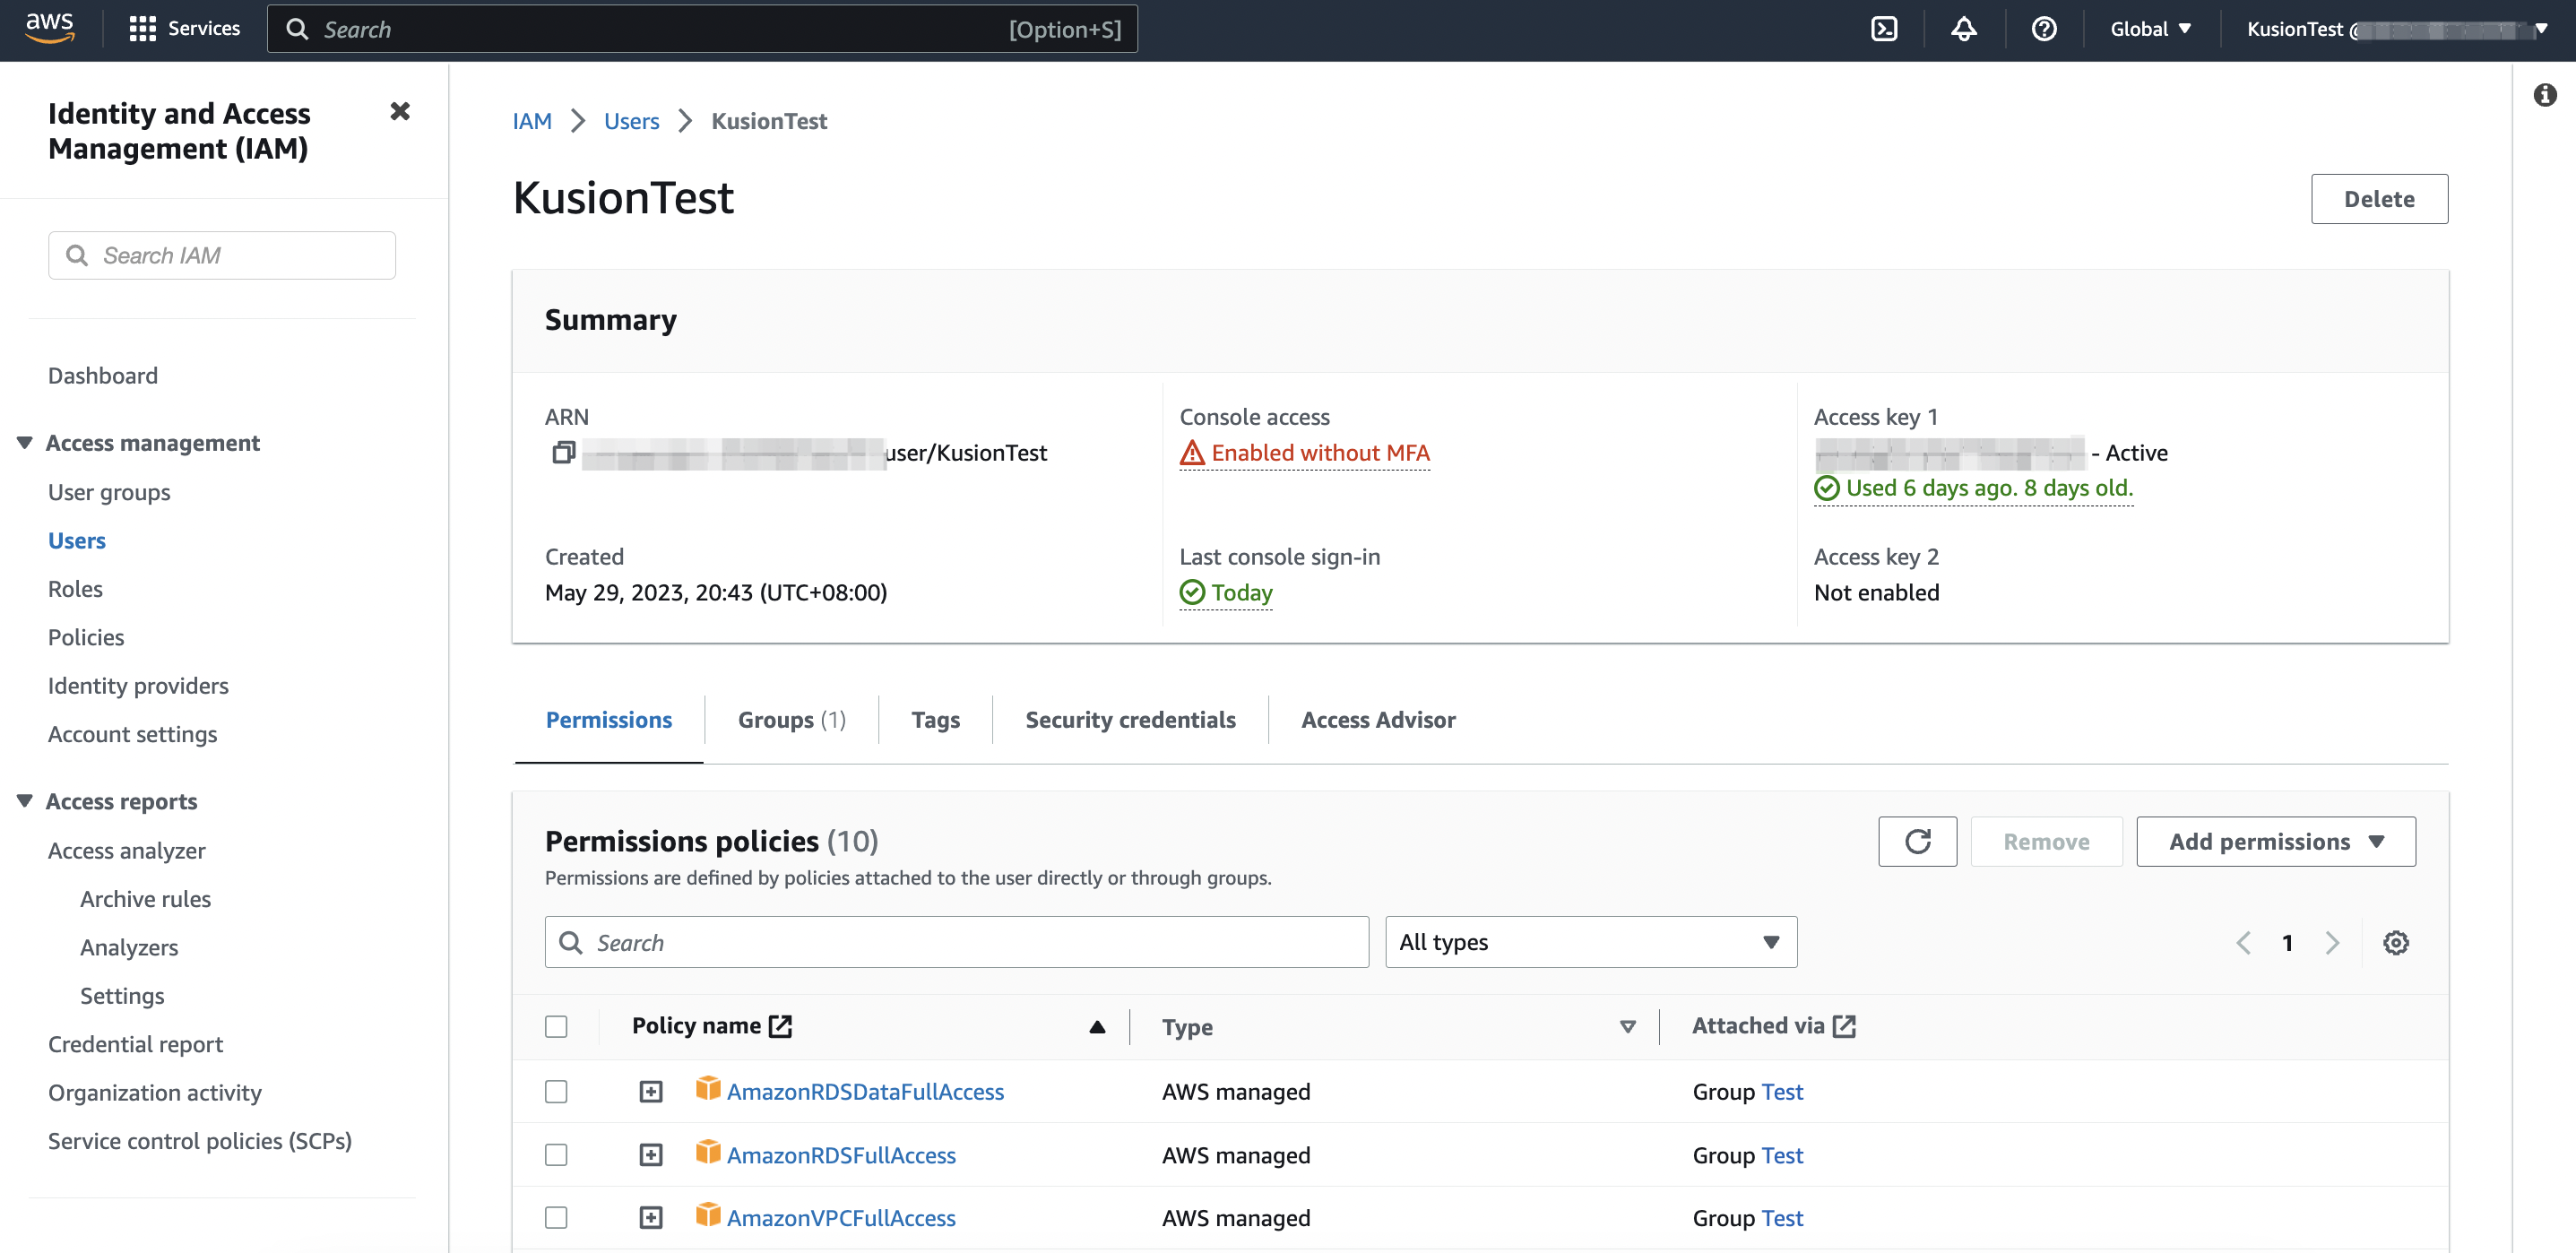
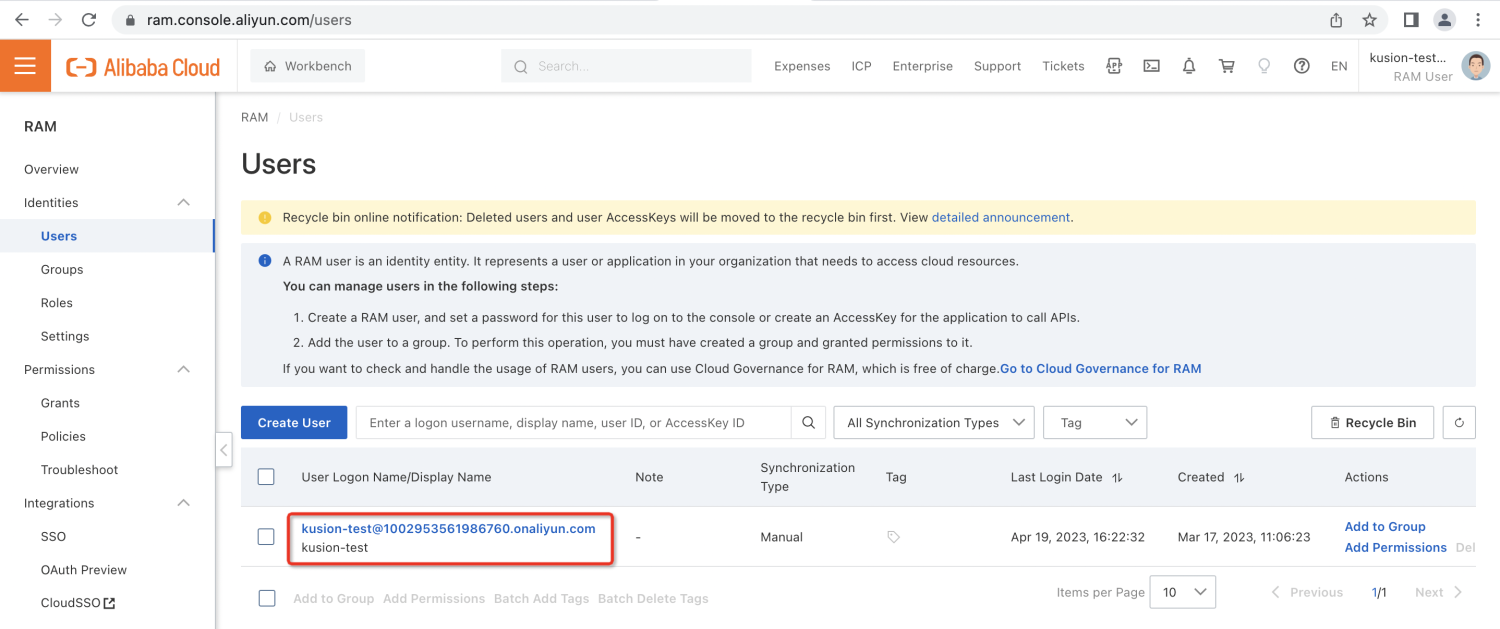
- Prepare a cloud service account and create a user with at least VPCFullAccess and RDSFullAccess related permissions to use the Relational Database Service (RDS). This kind of user can be created and managed in the Identity and Access Management (IAM) console of the cloud vendor.
- The environment that executes
kusionneeds to have connectivity to terraform registry to download the terraform providers.
Additionally, we also need to configure the obtained AccessKey and SecretKey as well as the cloud resource region as environment variables for specific cloud provider:
- AWS
- Alicloud
export AWS_ACCESS_KEY_ID="AKIAQZDxxxx" # replace it with your AccessKey
export AWS_SECRET_ACCESS_KEY="oE/xxxx" # replace it with your SecretKey
export AWS_REGION=us-east-1            # replace it with your region
export ALICLOUD_ACCESS_KEY="LTAI5txxx" # replace it with your AccessKey
export ALICLOUD_SECRET_KEY="nxuowIxxx" # replace it with your SecretKey
export ALICLOUD_REGION=cn-hangzhou     # replace it with your region
Init Workspace
To deploy the WordPress application with cloud rds, we first need to initiate a Workspace for the targeted stack (here we are using dev). Please copy the following example YAML file to your local workspace.yaml.
- AWS
- Alicloud
workspace.yaml
# MySQL configurations for AWS RDS
modules:
  mysql:
    path: oci://ghcr.io/kusionstack/mysql
    version: 0.2.0
    configs:
        default:
            cloud: aws
            size: 20
            instanceType: db.t3.micro
            privateRouting: false
            databaseName: "wordpress-mysql"
workspace.yaml
# MySQL configurations for Alicloud RDS
modules:
  mysql:
    path: oci://ghcr.io/kusionstack/mysql
    version: 0.2.0
    configs:
        default:
            cloud: alicloud
            size: 20
            instanceType: mysql.n2.serverless.1c
            category: serverless_basic
            privateRouting: false
            subnetID: [your-subnet-id]
            databaseName: "wordpress-mysql"
If you would like to try creating the Alicloud RDS instance, you should replace the [your-subnet-id] of modules.kusionstack/mysql@0.1.0.default.subnetID field with the Alicloud vSwitchID to which the database will be provisioned in. After that, you can execute the following command line to initiate the configuration for dev workspace.
kusion workspace create dev -f workspace.yaml
Since Kusion by default use the default workspace, we can switch to the dev workspace with the following cmd:
kusion workspace switch dev
If you have already created and used the configuration of dev workspace, you can append the MySQL module configs to your workspace YAML file and use the following command line to update the workspace configuration.
kusion workspace update dev -f workspace.yaml
We can use the following command lines to show the current workspace configurations for dev workspace.
kusion workspace show
The workspace.yaml is a sample configuration file for workspace management, including MySQL module configs. Workspace configurations are usually declared by Platform Engineers and will take effect through the corresponding stack.
More details about the configuration of Workspace can be found in Concepts of Workspace.
Create Project And Stack
We can create a new project named wordpress-rds-cloud with the kusion project create command.
# Create a new directory and navigate into it.
mkdir wordpress-rds-cloud && cd wordpress-rds-cloud

# Create a new project with the name of the current directory.
kusion project create
After creating the new project, we can create a new stack named dev with the kusion stack create command.
# Create a new stack with the specified name under current project directory.
kusion stack create dev
The created project and stack structure looks like below:
tree
.
├── dev
│   ├── kcl.mod
│   ├── main.k
│   └── stack.yaml
└── project.yaml

2 directories, 4 files
Update And Review Configuration Codes
The configuration codes in the created stack are basically empty, thus we should replace the dev/kcl.mod and dev/main.k with the below codes:
# dev/kcl.mod
[dependencies]
kam = { git = "https://github.com/KusionStack/kam.git", tag = "0.2.0" }
service = { oci = "oci://ghcr.io/kusionstack/service", tag = "0.1.0" }
network = { oci = "oci://ghcr.io/kusionstack/network", tag = "0.2.0" }
mysql = { oci = "oci://ghcr.io/kusionstack/mysql", tag = "0.2.0" }
# dev/main.k
import kam.v1.app_configuration as ac
import service
import service.container as c
import network as n
import mysql

# main.k declares customized configurations for dev stacks.
wordpress: ac.AppConfiguration {
    workload: service.Service {
        containers: {
            wordpress: c.Container {
                image: "wordpress:6.3"
                env: {
                    "WORDPRESS_DB_HOST": "$(KUSION_DB_HOST_WORDPRESS_MYSQL)"
                    "WORDPRESS_DB_USER": "$(KUSION_DB_USERNAME_WORDPRESS_MYSQL)"
                    "WORDPRESS_DB_PASSWORD": "$(KUSION_DB_PASSWORD_WORDPRESS_MYSQL)"
                    "WORDPRESS_DB_NAME": "mysql"
                }
                resources: {
                    "cpu": "500m"
                    "memory": "512Mi"
                }
            }
        }
        replicas: 1
    }
    accessories: {
        "network": n.Network {
            ports: [
              n.Port {
                  port: 80
              }
            ]
        }
        "mysql": mysql.MySQL {
            type: "cloud"
            version: "8.0"
        }
    }
}
Application Delivery
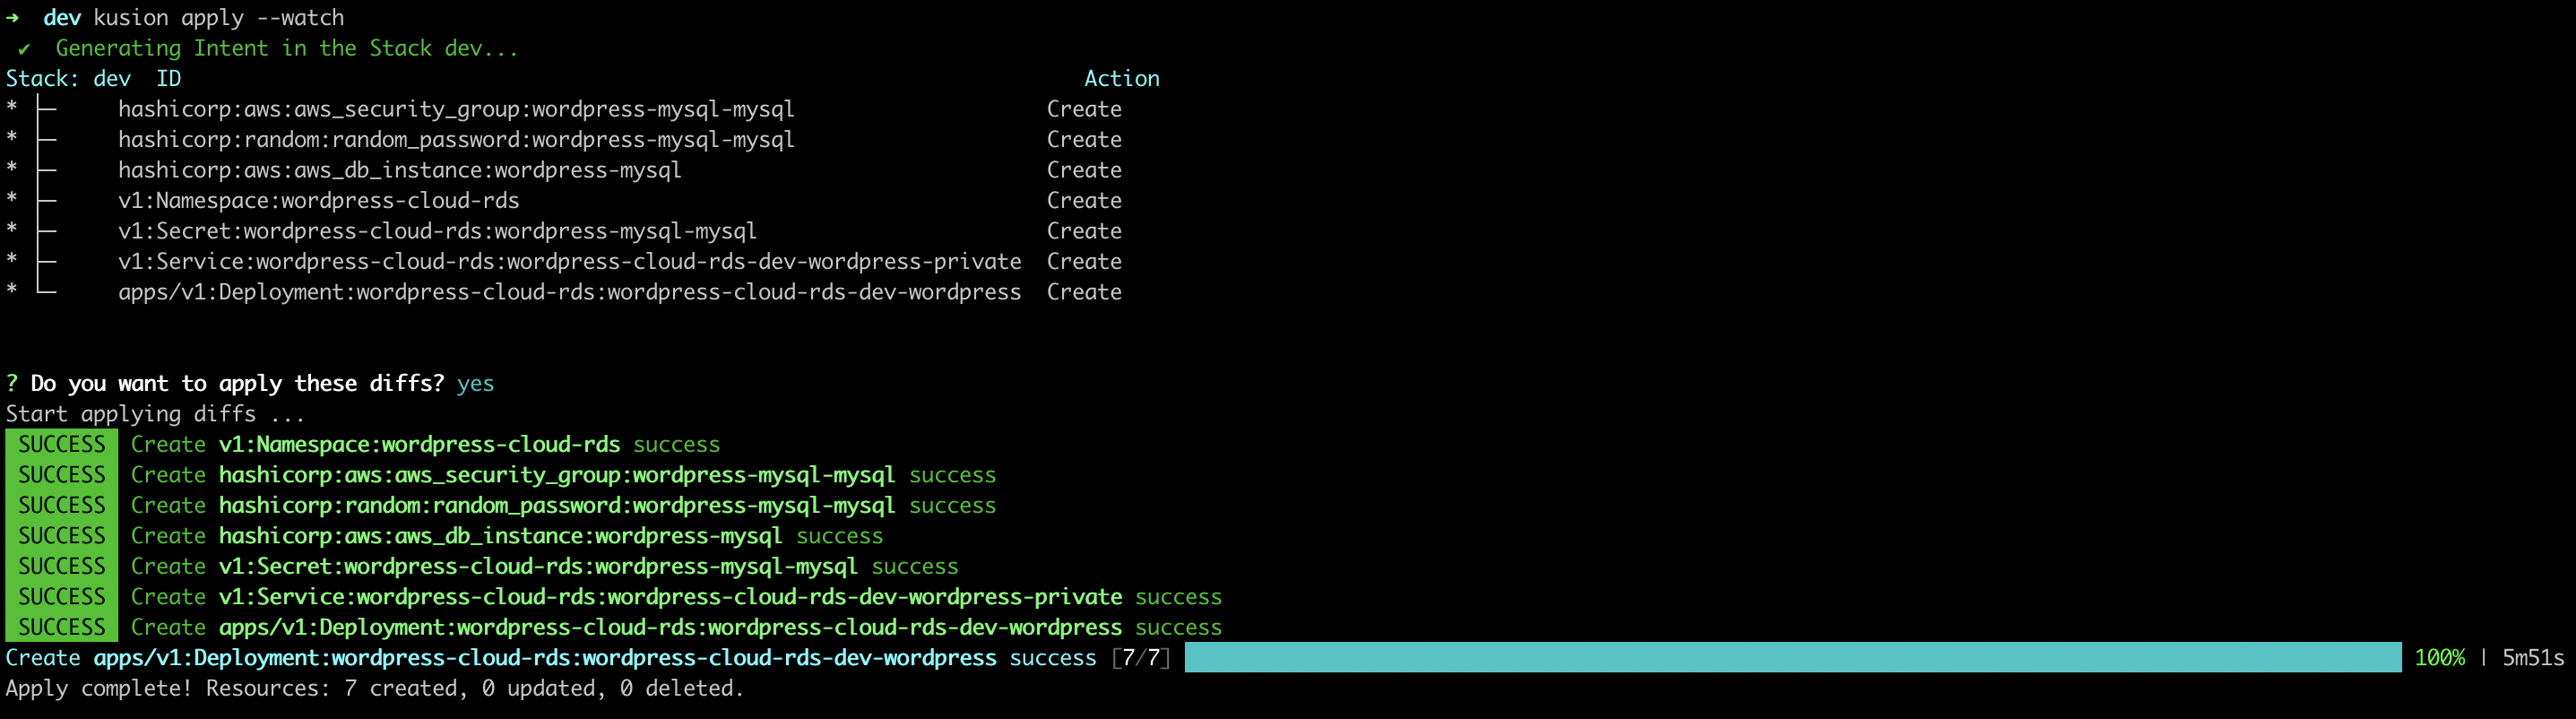
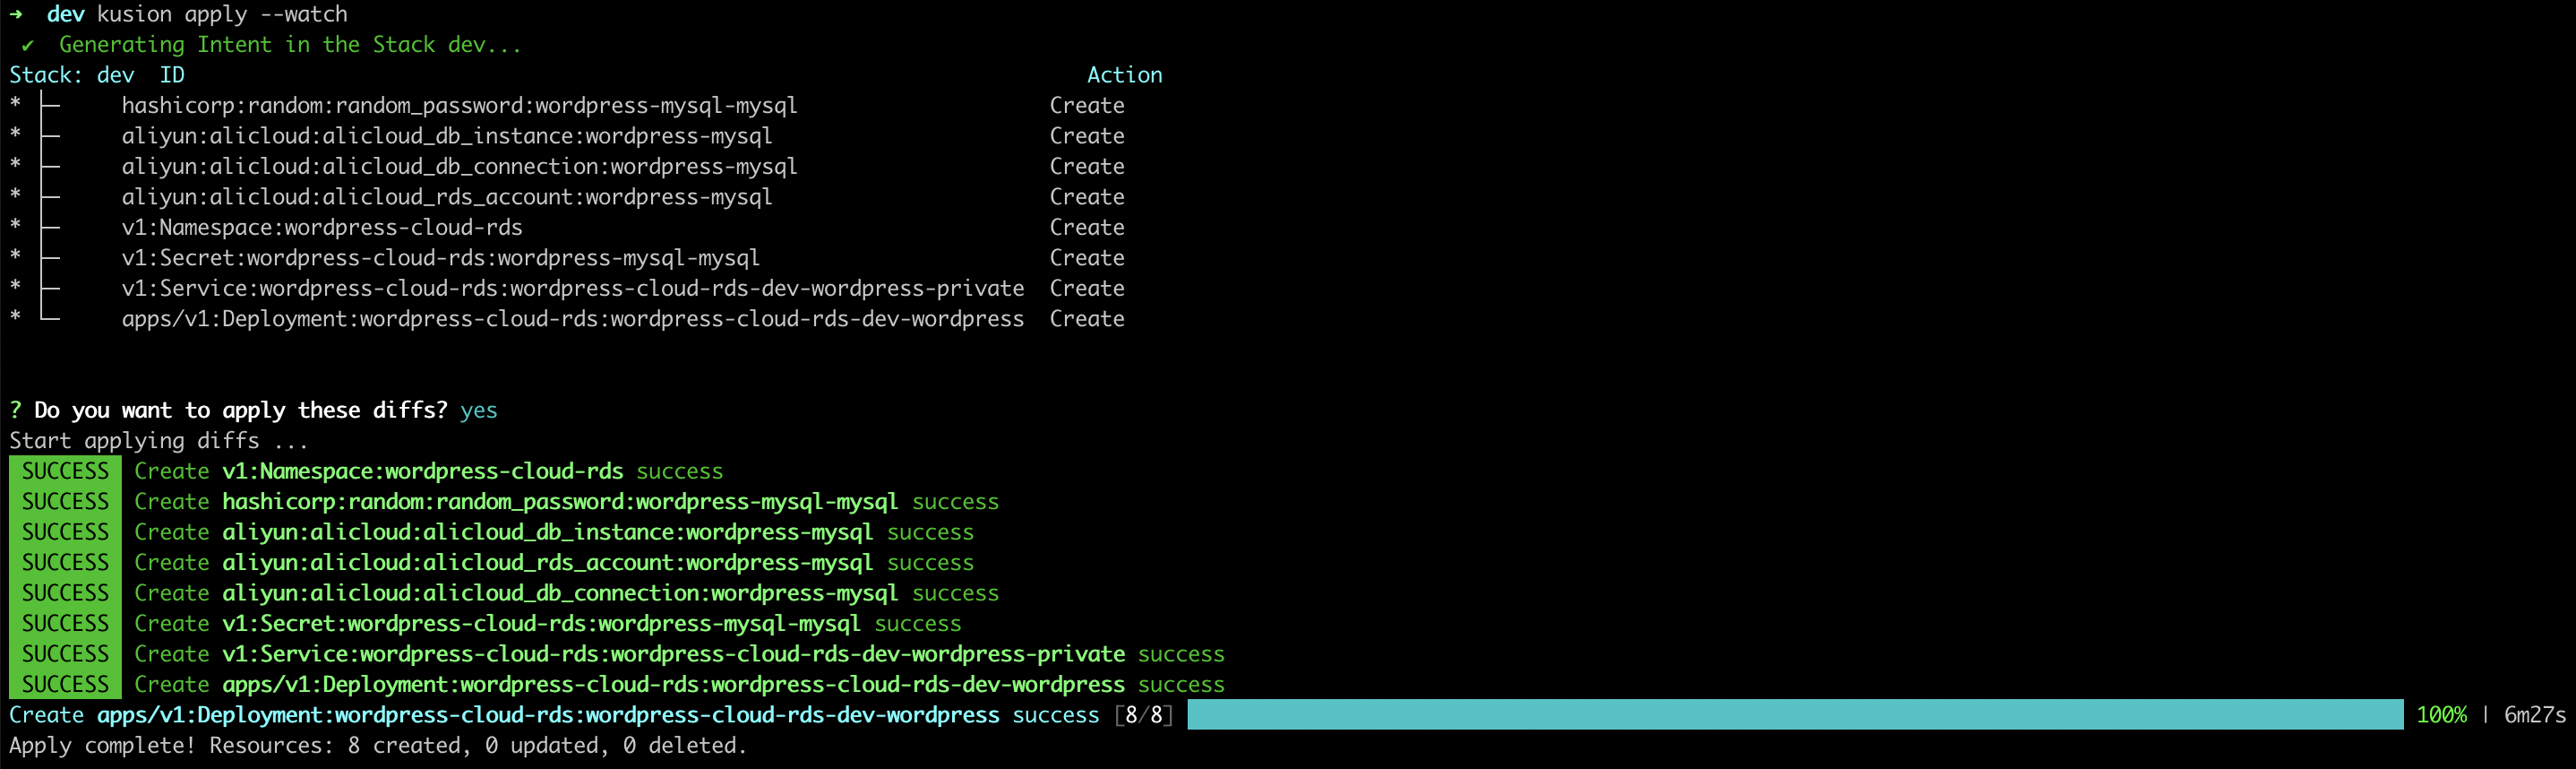
You can complete the delivery of the WordPress application in the folder of wordpress-cloud-rds/dev using the following command line. Kusion will enable the watching of the application resource creation and automatic port-forwarding of the specified port (80) from local to the Kubernetes Service.
cd dev && kusion apply --watch
During the first apply, the models and modules as well as the Terraform CLI (if not exists) that the application depends on will be downloaded, so it may take some time (usually within two minutes). You can take a break and have a cup of coffee.
- AWS
- Alicloud
After all the resources reconciled, we can port-forward our local port (e.g. 12345) to the WordPress frontend service port (80) in the cluster:
kubectl port-forward -n wordpress-cloud-rds svc/wordpress-cloud-rds-dev-wordpress-private 12345:80

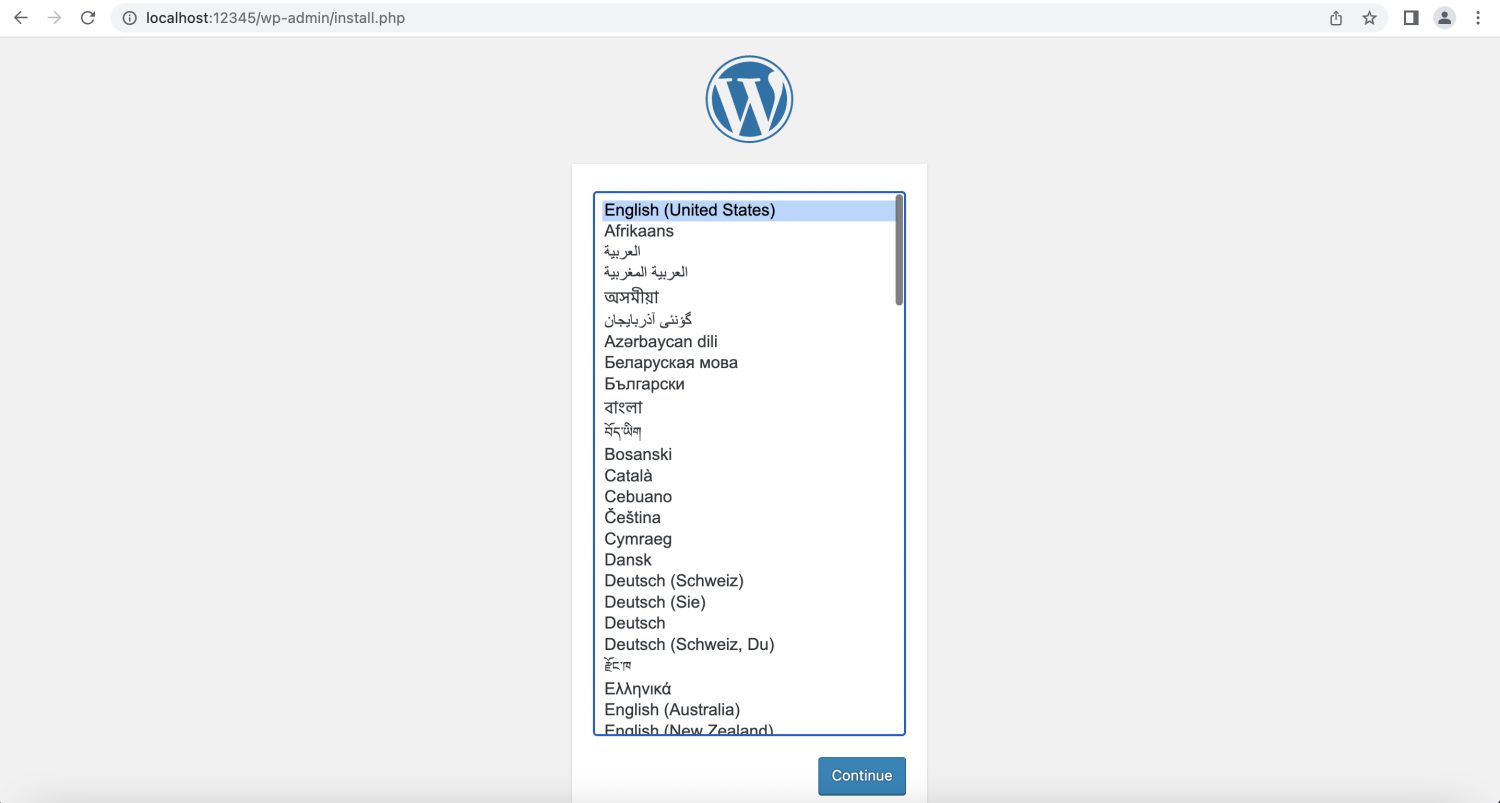
Verify WordPress Application
Next, we will verify the WordPress site service we just delivered, along with the creation of the RDS instance it depends on. We can start using the WordPress site by accessing the link of local-forwarded port (http://localhost:12345) we just configured in the browser.
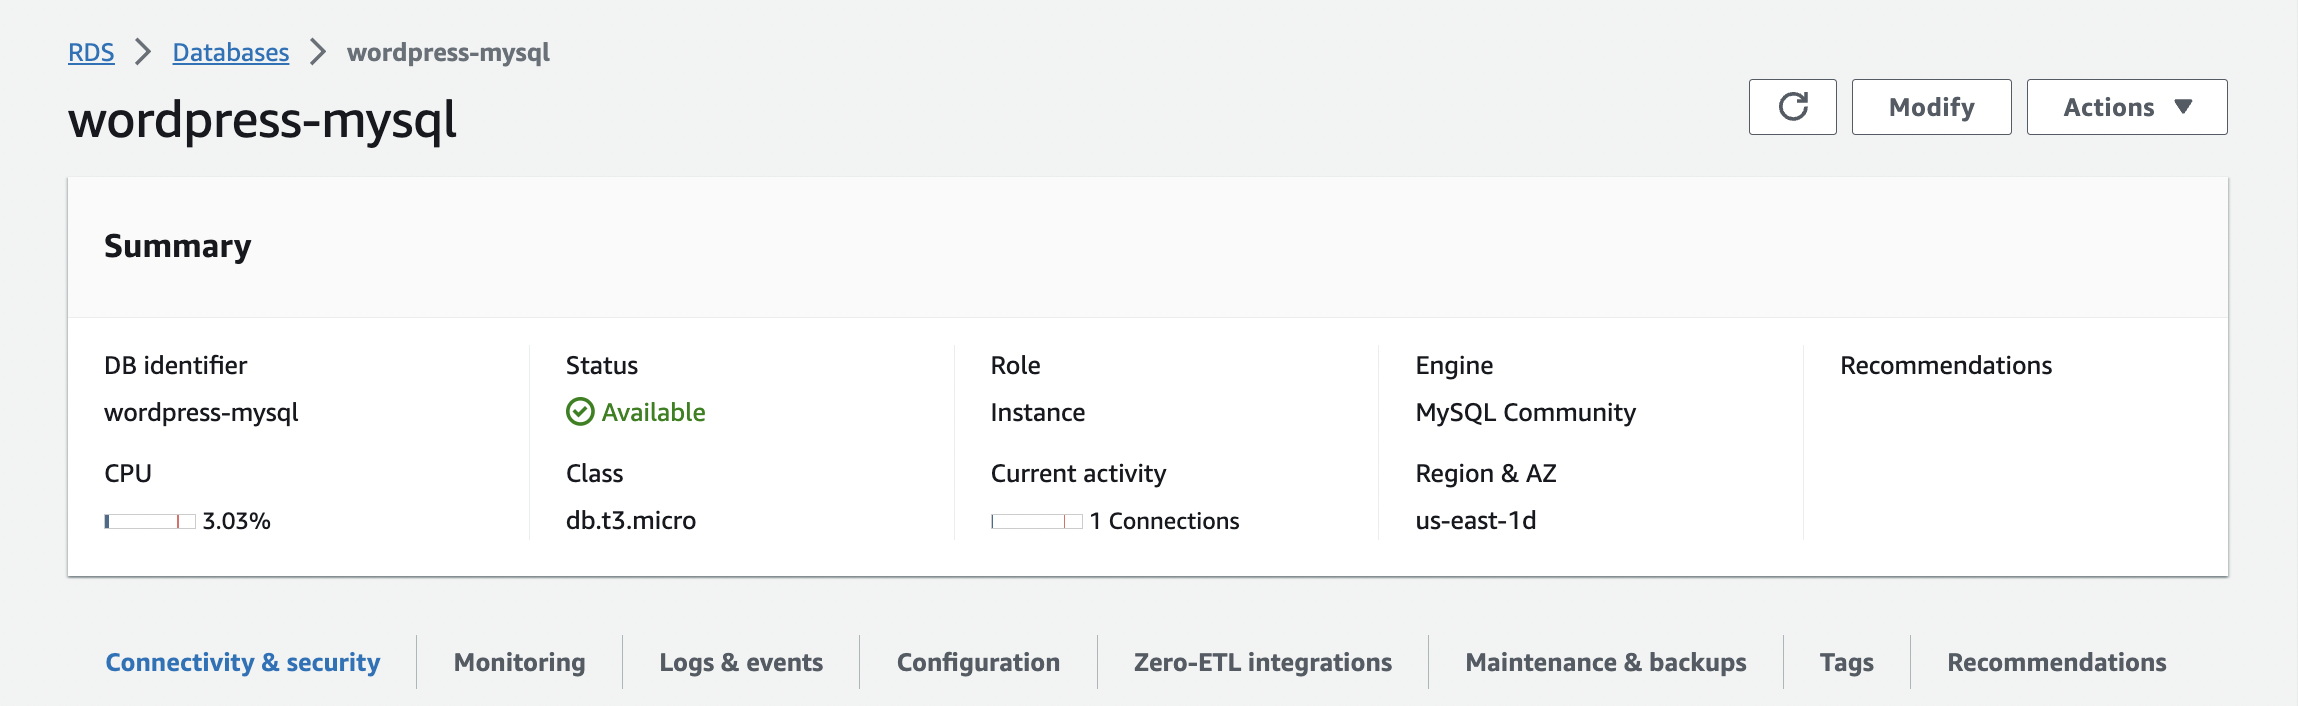
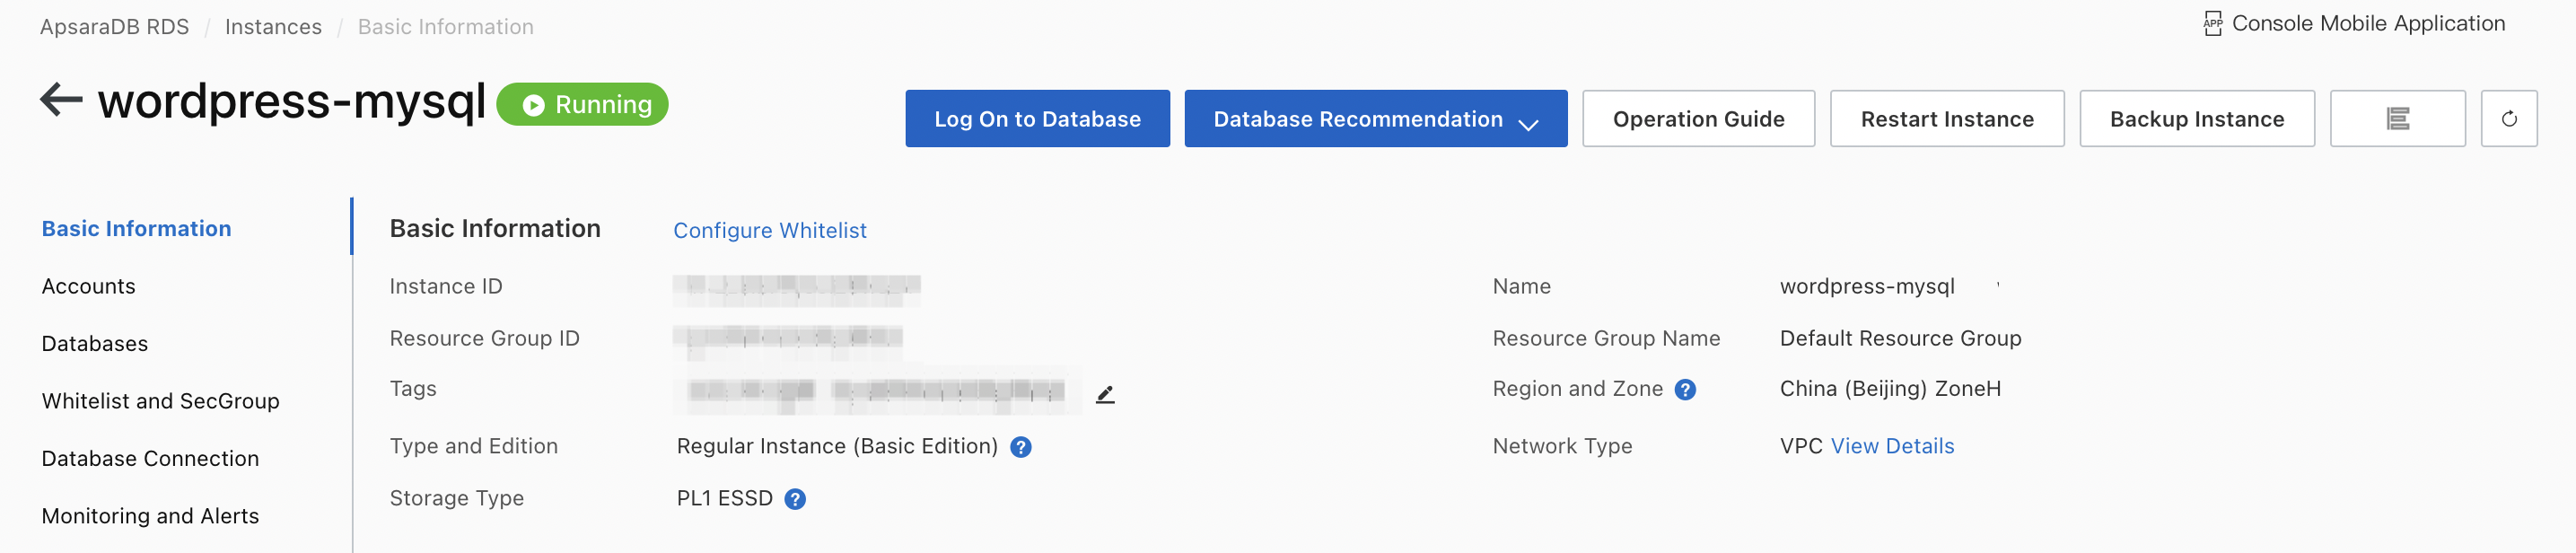
In addition, we can also log in to the cloud service console page to view the RDS instance we just created.
- AWS
- Alicloud
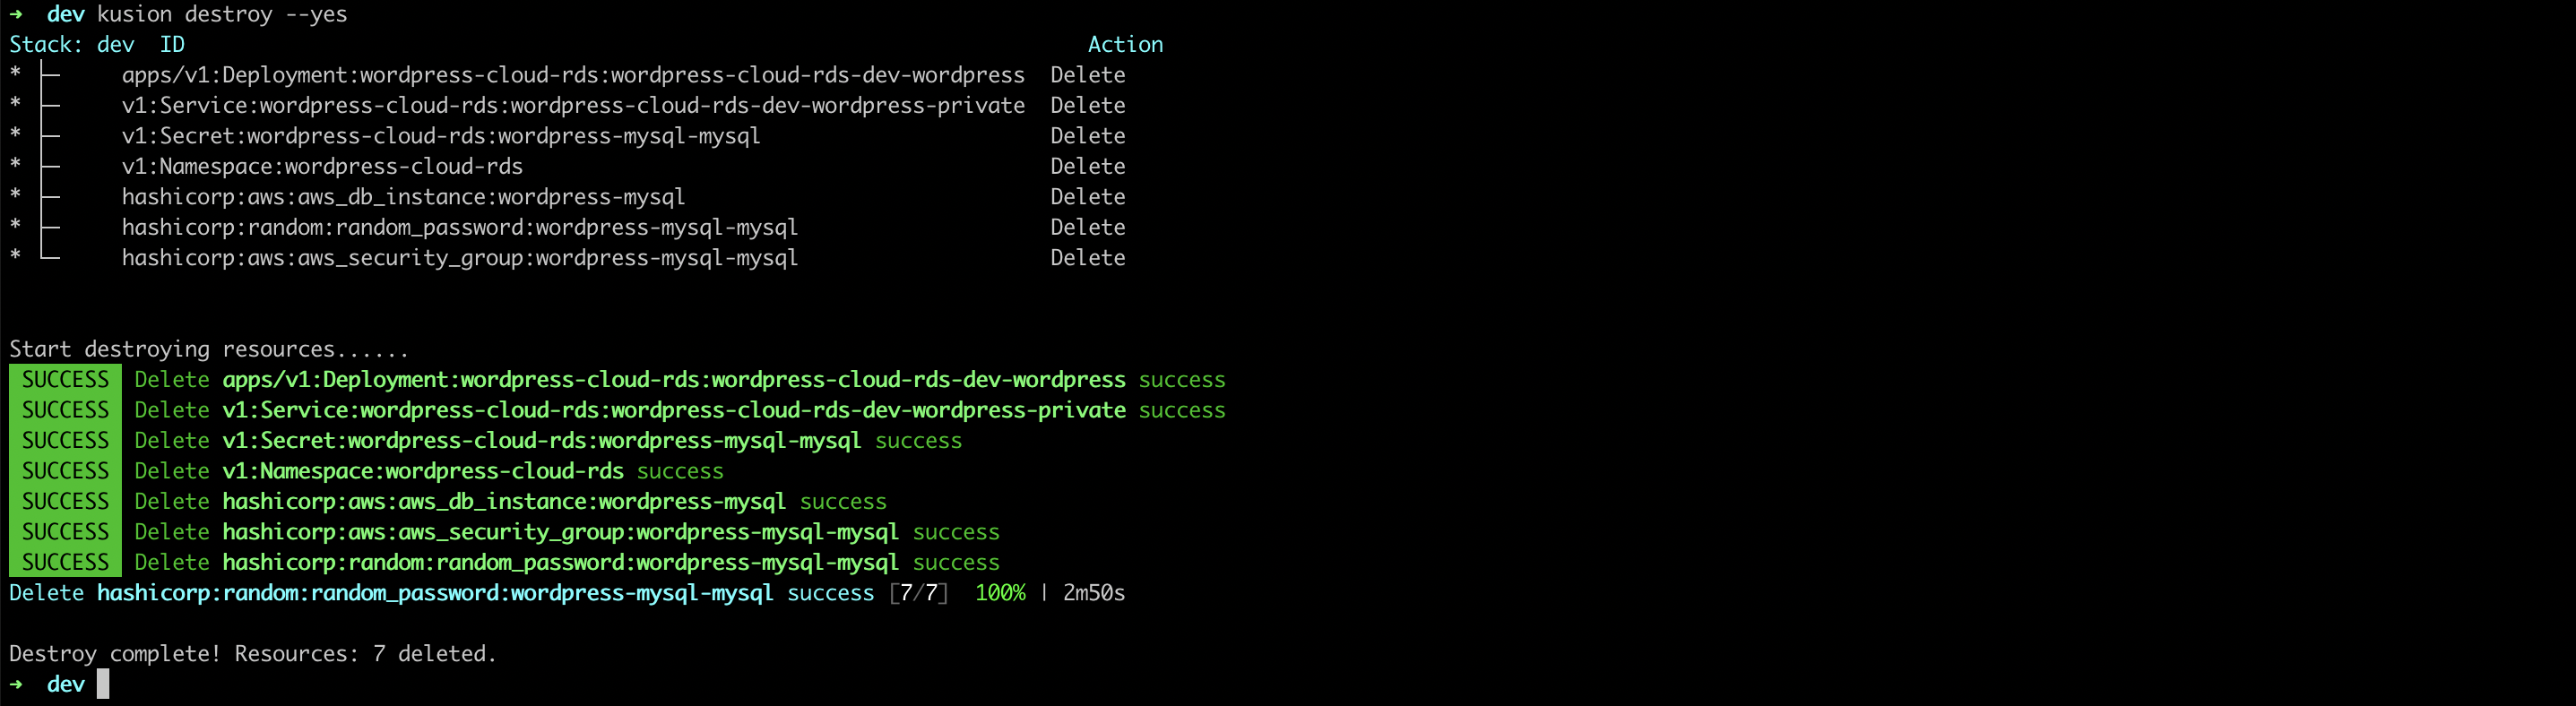
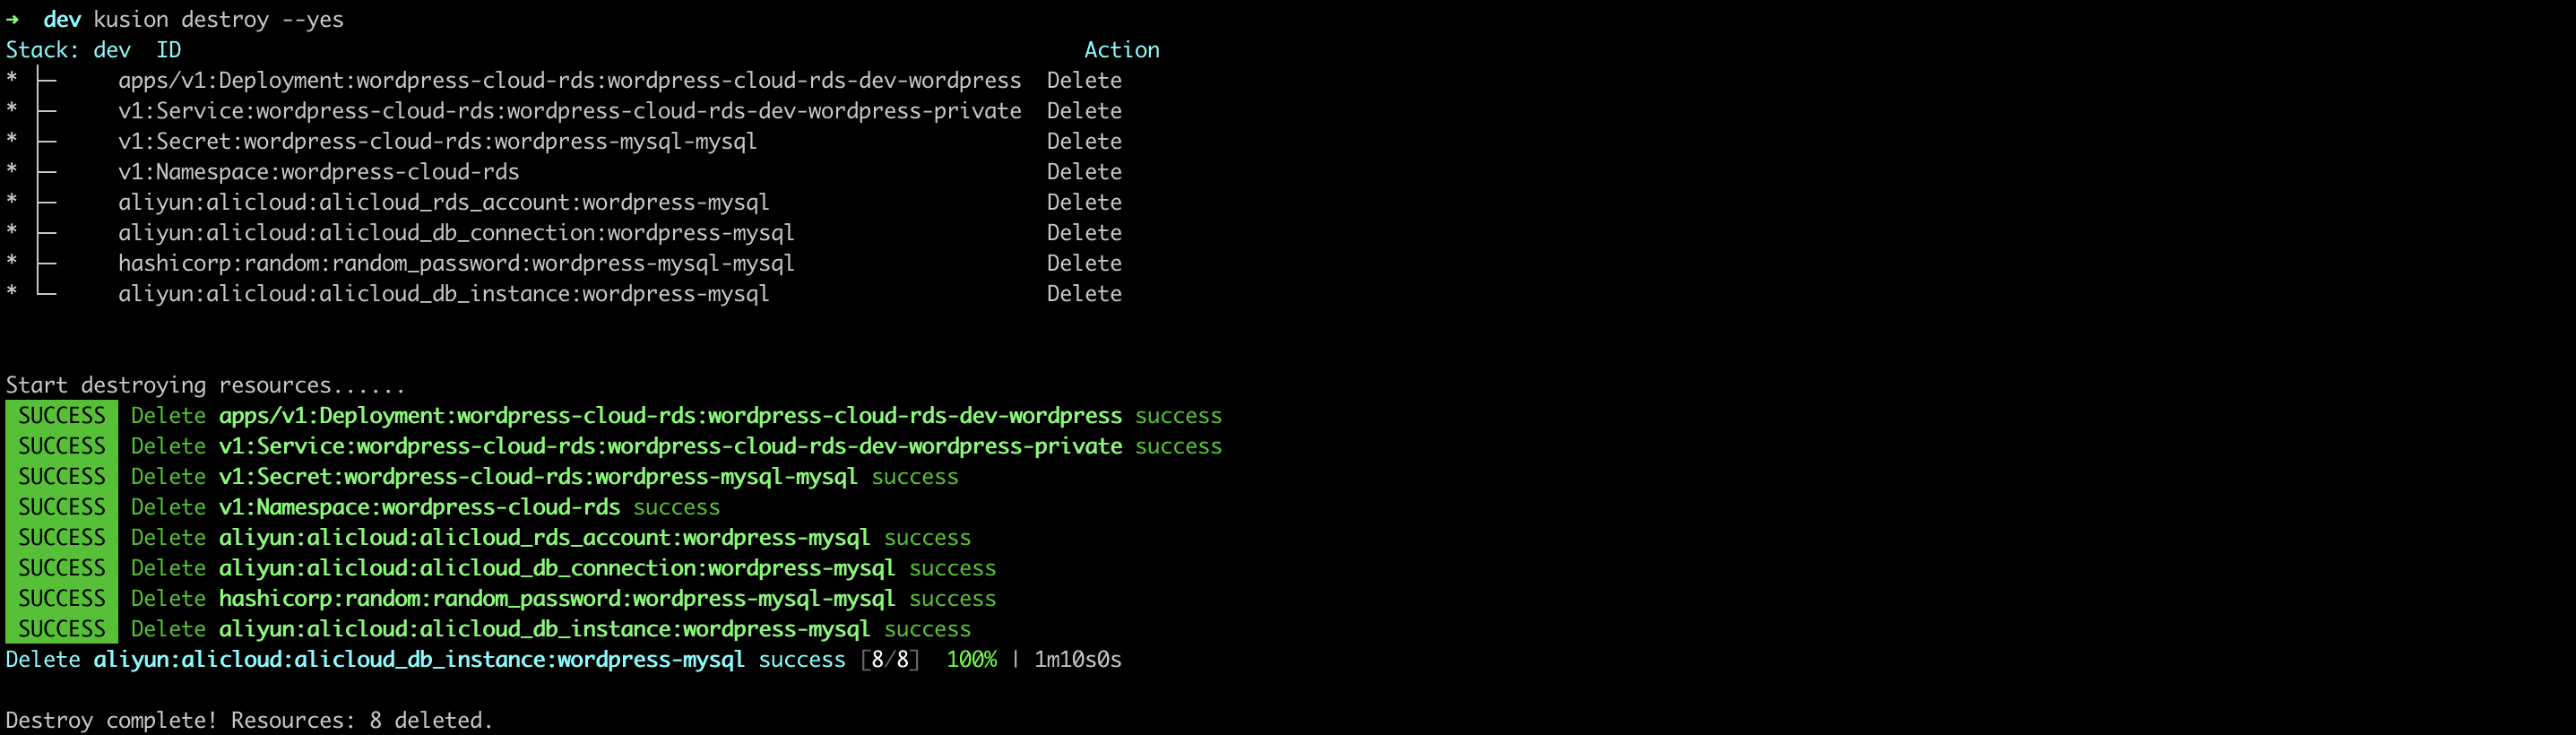
Delete WordPress Application
You can delete the WordPress application and related RDS resources using the following command line.
kusion destroy --yes
- AWS
- Alicloud